
Welcome to CivilGEO Knowledge Base
Welcome to CivilGEO Knowledge Base
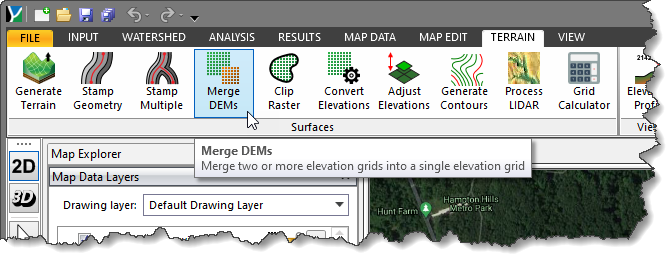
The Merge DEMs command is used to merge multiple elevation grids (sometimes called rasters, DEMs or Digital Elevation Models) into a single elevation grid. The user can prioritize and define preference for use of different elevation grids so that higher resolution (smaller cell size) elevation grids, for example, are used where possible and lower resolution (larger cell size) elevation grids are used to fill-in areas where high resolution elevation data is lacking. In addition, this command allows the user to specify the coordinate reference system (CRS) and grid resolution of the final merged elevation grid.
This command should not be used to merge elevation grids that have different elevation units (i.e., intermixing feet and meter elevations). The Convert Elevations command should be used to create compatible elevation raster grids and to ensure consistency in elevation units before use of the Merge DEMs command.
Follow the steps below to display the Merge DEMs command:
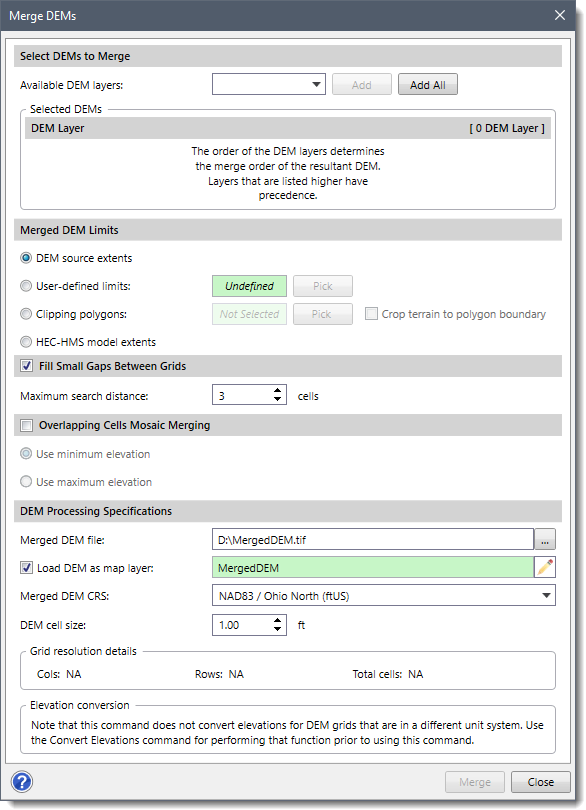
The following sections describe the Merge DEMs command and how to interact with the above dialog box.
This section controls the selection of elevation grids to be used for merging into a single elevation grid.
From the Available DEM layers dropdown combo box, select the elevation grids, one at a time, that need to be merged and click the [Add] button. The selected elevation grid will be added to the table listing the elevation grids to be merged.
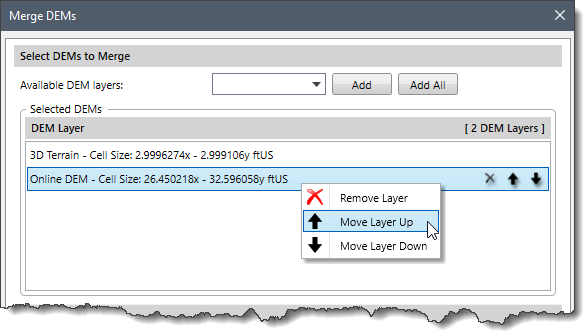
To change the merge order of the listed elevation grids, select the appropriate row and right-click to display a context menu. Then, select the Move Layer Up or Move Layer Down context menu command to change the merge order of the highlighted elevation grid. Layers that are higher in the listing have precedence over layers that appear lower in the list.
The elevation grid that is constructed using this command is a rectangular grid. The user can define the rectangular extents of the merged elevation grid using the criteria described below.
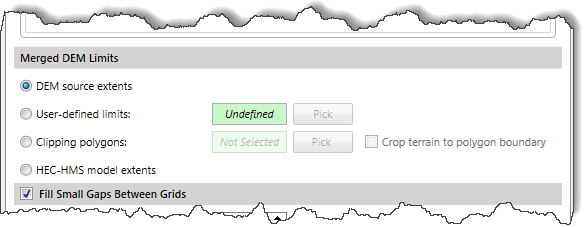
The following options are available to define the rectangular extents of the merged elevation grid:
This section allows the user to fill-in the small gaps between adjacent elevation grids by interpolating the elevations from the edge cells of each grid. By default, the Fill Small Gaps Between Grids checkbox is checked.

From the Maximum search distance entry field, the user can define the maximum search radius that will be used for gap filling. The spin control button can be used to define a threshold value between 1 to 50 cells. A gap that is farther away from any cell than this threshold value will remain unfilled.
This section allows the user to mosaic merge multiple terrain surface DEMs together. Select the Overlapping Cells Mosaic Merging checkbox to enable this section.
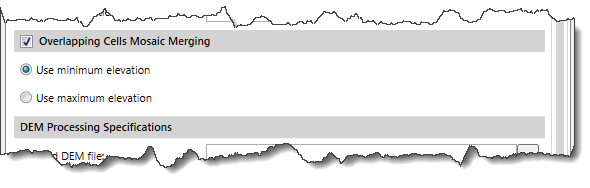
The user can select from two available options to define how the two surfaces should be merged when there is an overlapping space between terrain surfaces that are to be merged.
The following options are provided for the mosaic merge operation:
This section is used to define the specifications for the merged elevation grid.
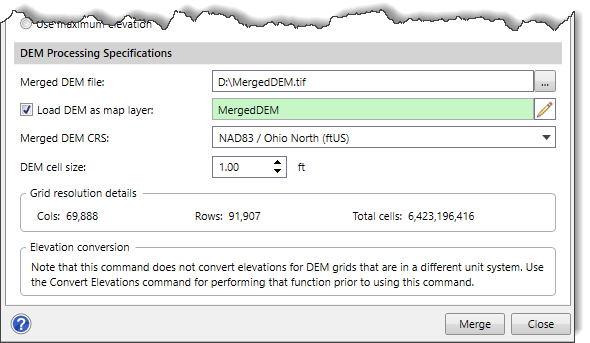
Click the […] button for the Merged DEM file entry to specify the file name and directory location for purposes of saving the merged elevation grid file.
By default, the Load DEM as map layer checkbox option is checked to load the merged elevation grid as a layer in the Map Data Layers panel. Click the pencil icon to rename the layer.
The user can select the CRS to be used for the merged elevation grid. If there is only one CRS in the project, the software automatically selects it.
From the DEM cell size entry, the user can manually define the elevation grid cell size. The finer the grid resolution (or smaller the cell size) defined, the greater the detail that can be represented in the merged elevation grid. However, there is no benefit to selecting a cell size smaller than the smallest cell size contained within the elevation grids to be merged. The software will automatically select the smallest cell size.
Based on the defined grid cell size and the extent of the merged DEM, the Grid resolution details panel displays the total number of cells and the number of columns and rows that the merged DEM file will contain.
The Merge DEMs command supports merging DEMs that have different coordinate reference systems (CRS). For example, the project might be in a State Plane CRS in US Survey Foot and the DEMs being merged might be in a geographic (lat-long) or metric CRS. The software will perform the necessary reprojections to align the selected DEMs so that they can be merged together.
After the options have been defined, click the [Merge] button and the software will merge the elevation grids into a new elevation grid file.
After merging the DEM layer, the software will then place and identify the merged DEM layer as a new group in the Map Data Layers panel.
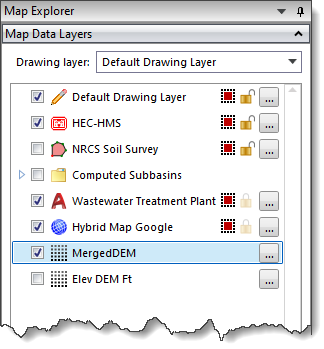
Clicking on the […] button adjacent to the Merged DEM layer will display the Elevation Grid Properties dialog box, allowing the user to define the color and style of the elevation grids.
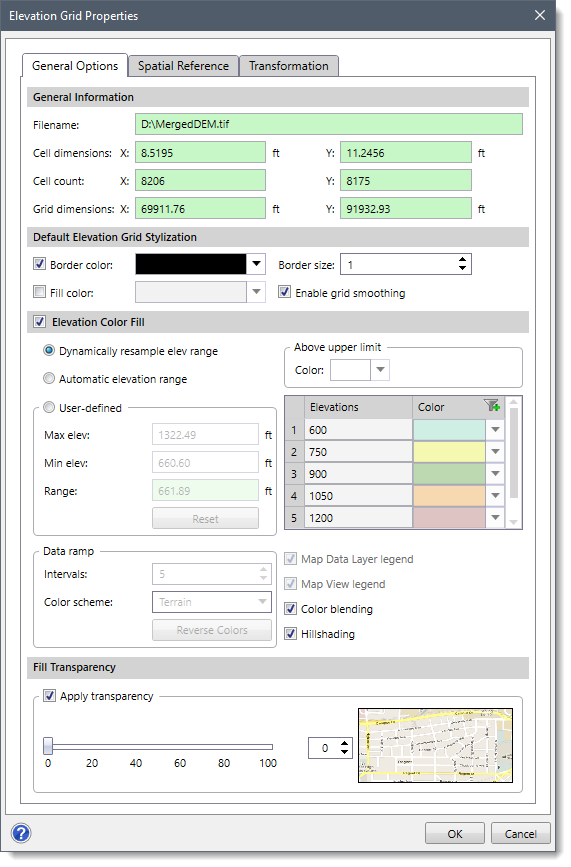
To learn more about the the Elevation Grid Properties dialog box, refer to this article in our knowledge base.


CivilGEO G2 Reviews
4.8/5.0 Rating, Over 230 Reviews

GeoHECRAS is recognized as the top Civil Engineering Design Software with an average of 4.8 out of 5.0 rating from over 230 real user reviews on G2.


We use cookies to give you the best online experience. By agreeing you accept the use of cookies in accordance with our cookie policy.
When you visit any web site, it may store or retrieve information on your browser, mostly in the form of cookies. Control your personal Cookie Services here.


