
Welcome to CivilGEO Knowledge Base
Welcome to CivilGEO Knowledge Base
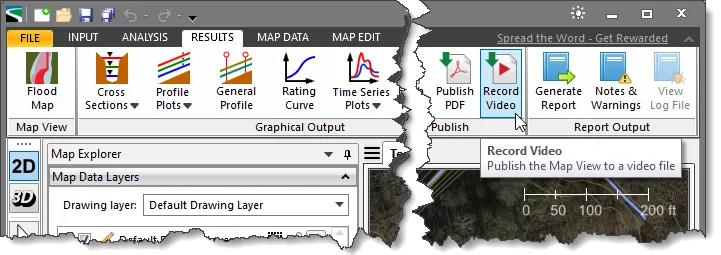
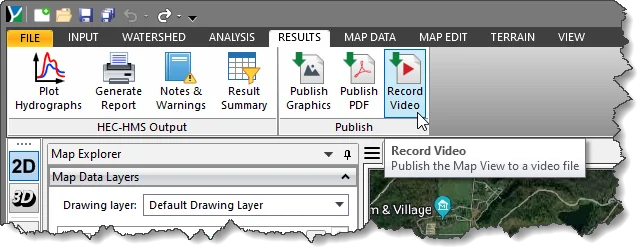
In CivilGEO software, the Record Video command allows the user to publish the Map View data to a video file. Saving the Map View data in a video file gives the user the ability to effortlessly use the data with other applications.
The user can also publish the Map View data into image and PDF files with the following commands:
Follow the steps below to use the Record Video command:
The following sections describe how to use the Record Video command and interact with the above dialog box.
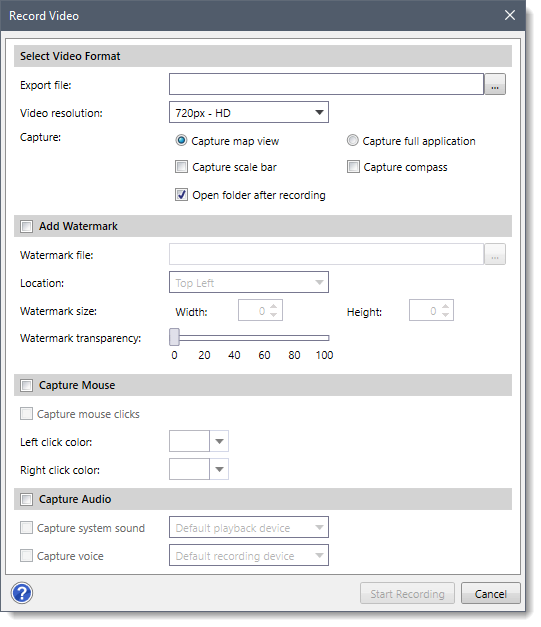
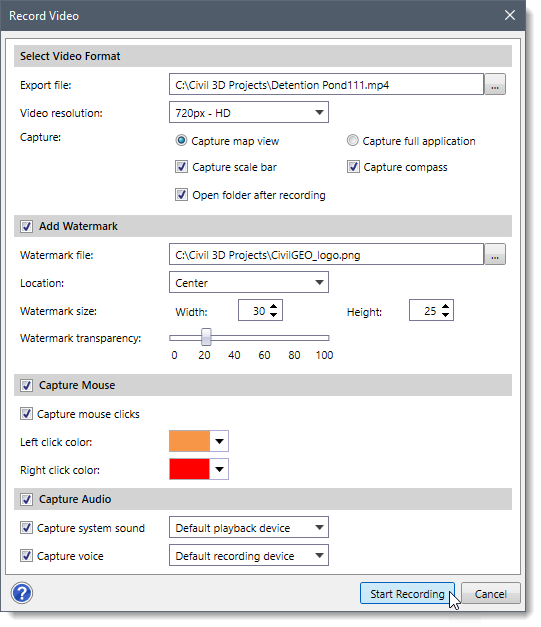
The Select Video Format section allows the user to define the resolution and directory location for the created video. The user can also use the capturing option to define which portion of the screen is recorded in the video.
Click the […] button beside the Export file entry to specify the directory and the file name for purposes of saving the created video. The software will display the Save As dialog box. From the displayed dialog box, browse to the location to save the file, enter the file name, and then click the [Save] button.
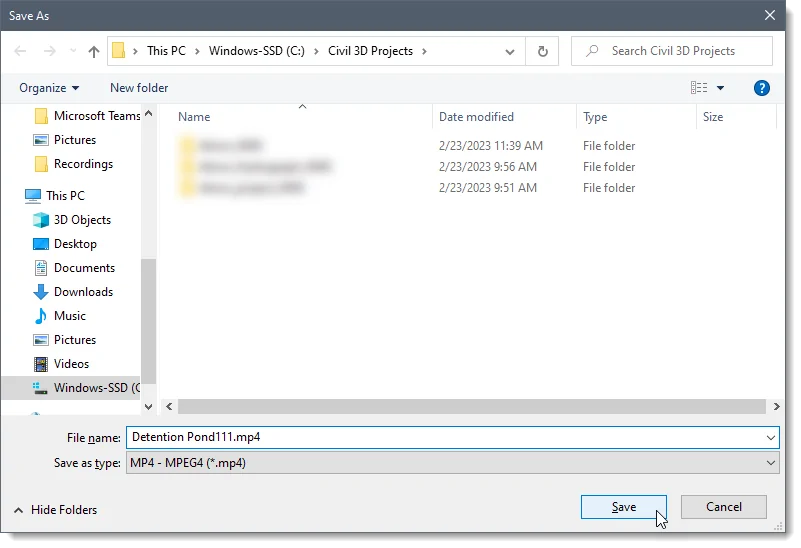
On clicking the [Save] button, the Record Video dialog box will be redisplayed, and the complete directory path and file name for saving the video file will be shown in the Export file entry.
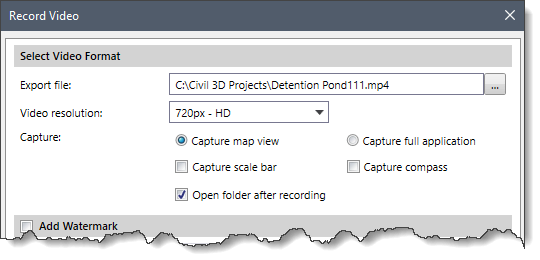
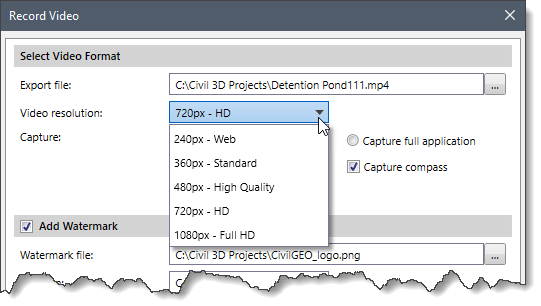
The Video resolution dropdown combo box allows the user to select the resolution for the video format to be published. The dropdown combo box contains the following options:
The Add Watermark section allows the user to add a watermark to the created video. The user can customize the position, size, and transparency of the watermark per the user’s preferences. By default, this section is disabled (i.e., grayed out). Check the Add Watermark checkbox to enable this section.
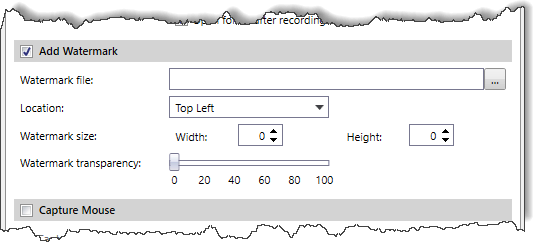
The Watermark file entry is used to select the image file to be used as a video watermark. Click the […] button to select the directory location of the image file that will be used as a video watermark. After selecting the image file, the complete directory path and file name will be shown in the Watermark file entry.
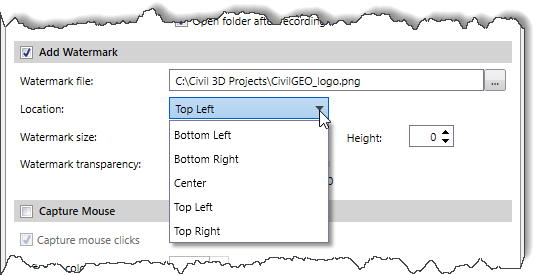
The Location dropdown combo box allows the user to select the position of the watermark in the created video. The dropdown combo box contains the following options:
The Watermark size option allows the user to control the size of the watermark to be displayed in the created video. The user can adjust the size of the watermark from the Width and Height spin control entry fields. By default, the software sets the width and height of the watermark image at 0. The user can increase or decrease the width and height to make the watermark image larger or smaller.
The Watermark transparency option allows the user to modify the opacity of the watermark in the created video using the horizontal slider. A transparency value of 40 to 50% works well.
The Capture Mouse section allows the user to record the mouse cursor in the created video. This can be helpful to see exactly what you are clicking on and selecting. By default, this section is disabled (i.e., grayed out). Check the Capture Mouse checkbox to enable this section.
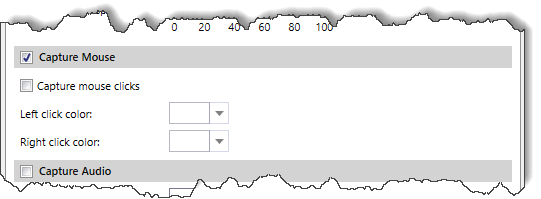
The Capture mouse click checkbox option causes the software to record the sound of mouse clicks in the created video. By default, this checkbox option is unchecked and the options that appear below it are disabled (i.e., grayed out). Check the checkbox to enable the Left click color and Right click color options as shown below.
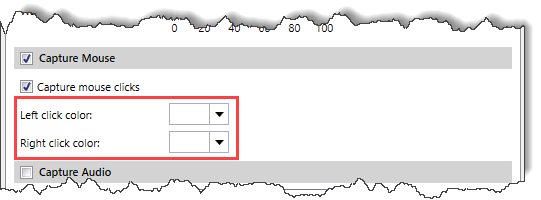
The Left click color option allows the user to change the color of the left mouse-click cursor. This can be helpful for purposes of making videos more visually appealing or emphasizing certain actions. The color selector next to this option is used to choose a new color for the left mouse-click cursor.
The Right click color option allows the user to change the color of the right-mouse click cursor. This can be helpful for purposes of making videos more visually appealing or emphasizing certain actions. The color selector next to this option is used to choose a new color for the right mouse-click cursor.
The Capture Audio section allows the user to record audio from a variety of sources, including a computer’s microphone, an external microphone, or a soundboard. By default, this section is disabled (i.e., grayed out). Check the Capture Audio checkbox to enable this section.
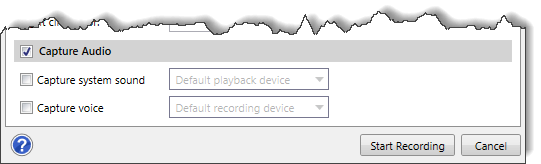
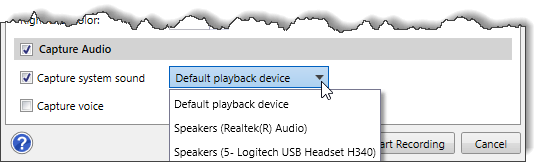
The Capture system sound dropdown option allows the user to select the audio source to record for the video. By default, this checkbox option is unchecked and the dropdown combo box next to this option is disabled (i.e., grayed out). Check the checkbox to enable the dropdown combo box.
The dropdown combo box contains the following options:
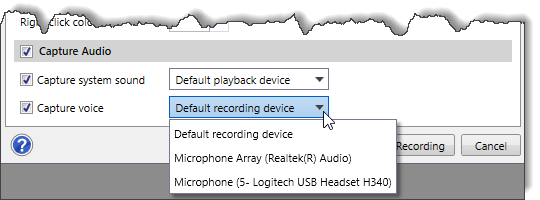
The Capture voice dropdown option allows the user to select the audio source for purposes of a voice recording. This can be helpful if the user wants to record his or her voice separately from the system sound or a different source, such as a microphone. By default, this checkbox option is unchecked and the dropdown combo box next to this option is disabled (i.e., grayed out). Check the checkbox to enable the dropdown combo box.
The dropdown combo box contains the following options:
When all the data have been defined, click the [Start Recording] button to start recording a new video.
The software will display the following window and start recording the Map View. Navigate on the Map View to record the desired model extent.
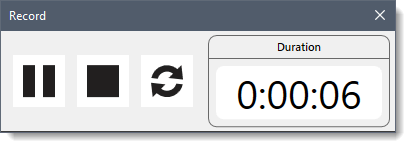
When the recording has been finished, press the Stop button to stop the recording. The software will then save the Map View data into the video file at the specified location.
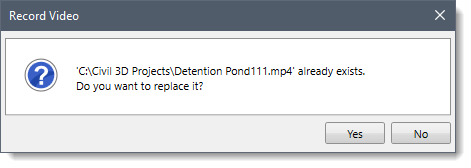
Note that if the file name specified in the Export file entry of the Select Video Format section already exists at the directory location, the following confirmational dialog box will be displayed.


CivilGEO G2 Reviews
4.8/5.0 Rating, Over 230 Reviews

GeoHECRAS is recognized as the top Civil Engineering Design Software with an average of 4.8 out of 5.0 rating from over 230 real user reviews on G2.


We use cookies to give you the best online experience. By agreeing you accept the use of cookies in accordance with our cookie policy.
When you visit any web site, it may store or retrieve information on your browser, mostly in the form of cookies. Control your personal Cookie Services here.


