Output data from the HEC-HMS model are stored in files with a *.dss extension. DSS stands for HEC Data Storage System which is specifically designed to store data for applications in water resources. The HEC-DSS system can store almost any type of data, but it is most efficient at storing large blocks of data (e.g., time-series data). GeoHECRAS can read data from a DSS file, whereas GeoHECHMS is capable of writing data in a DSS file format. Thus, a DSS file can be used to transfer data between both software, allowing the user to export flow data from a HEC-HMS model and use it in HEC-RAS modeling. As a result, HEC-DSS makes it easier to use observed data and communicate information between software. Click here to download the HEC-DSS software.
The following sections of the article describe how to export the flow data from a HEC-HMS model and use it for HEC-RAS modeling.
Locating a DSS File in File Explorer
Flow data from a HEC-HMS model is automatically stored in a DSS file associated with the project’s scenario once the HEC-HMS analysis is complete.
Follow the steps given below to locate the DSS file:
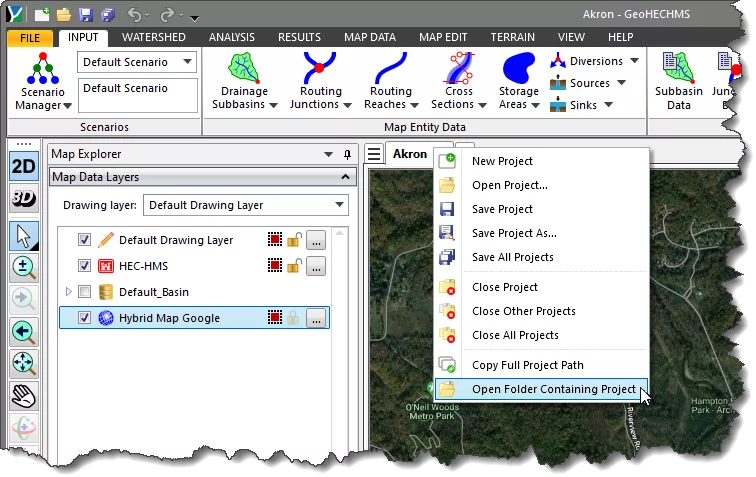
- After running the analysis, right-click on the current project tab and select Open Folder Containing Project from the displayed context menu, as shown below.
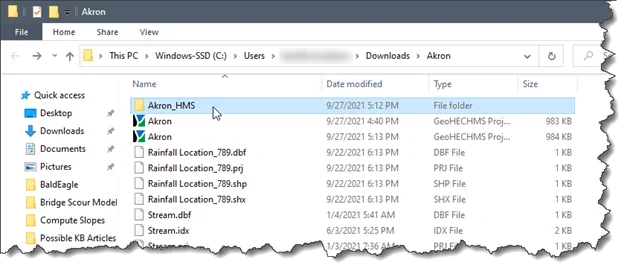
- The file explorer will be displayed. Double-click on the project folder to open. The project folder will be named as Project Name_HMS.
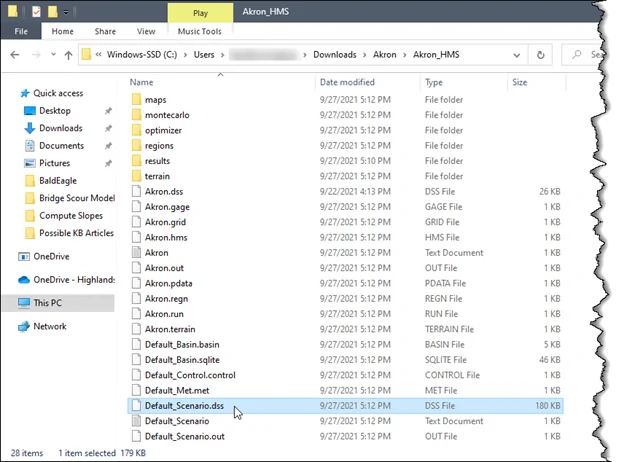
- Now, locate the DSS file associated with the project’s scenario. The content of this file can be viewed using the HEC-DSS software, as explained in the next section of the article.
Viewing a DSS File in HEC-DSS
Follow the steps given below to open the *.dss file using HEC-DSS software:
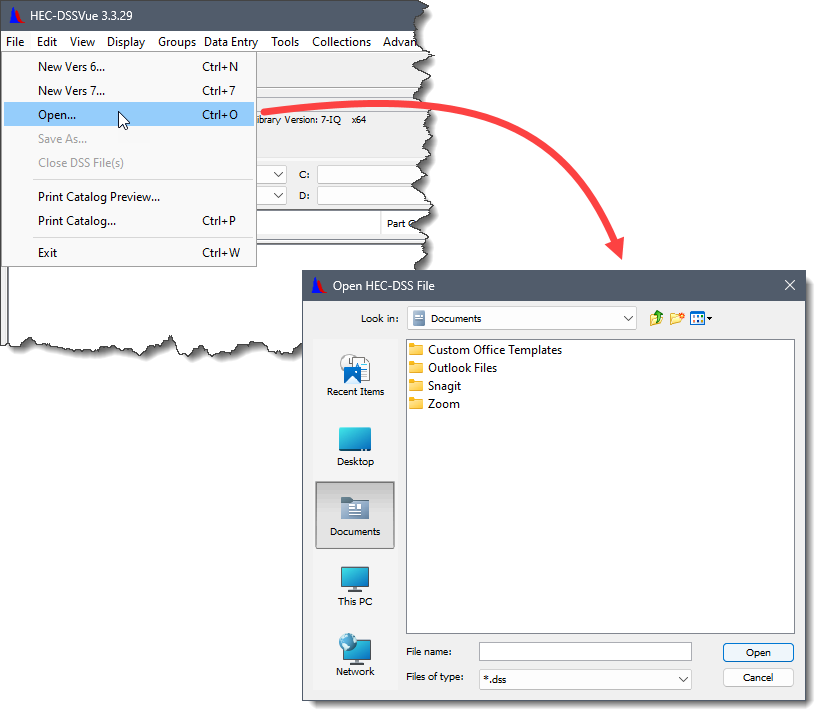
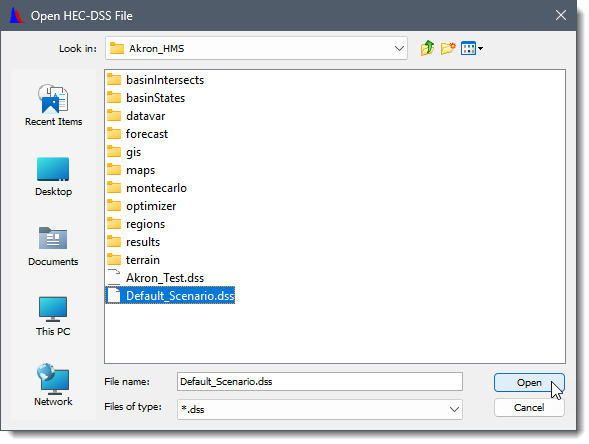
- Run the HEC-DSS application. From the File menu, select the Open command. The Open HEC-DSS File dialog box will be displayed.
- Browse to the folder containing the DSS file associated with the project’s scenario.
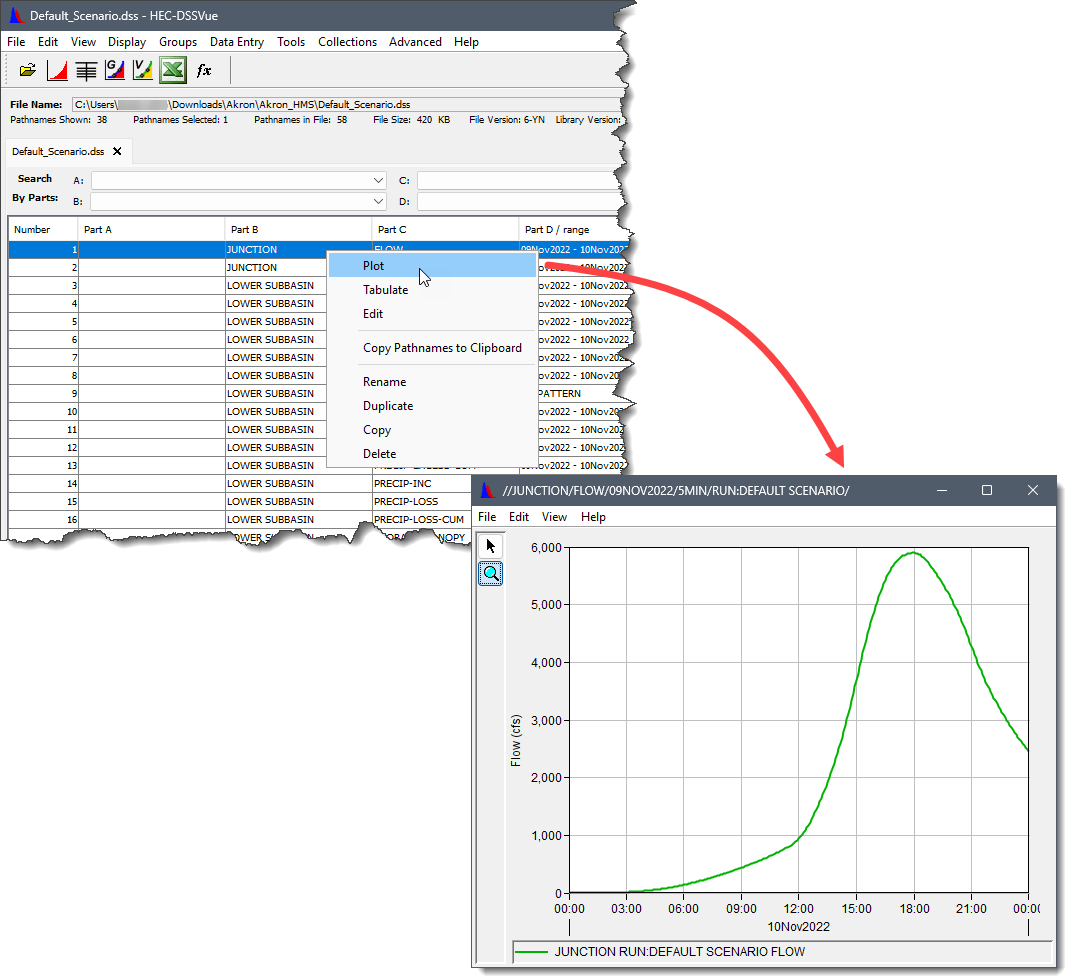
- After selecting the DSS file, the flow output of the HEC-HMS model will be displayed in tabular form, as shown below.

- To see the plot for a particular pathname, select the desired row, right-click, and select Plot from the displayed context menu. The plot window will be displayed in a new window.
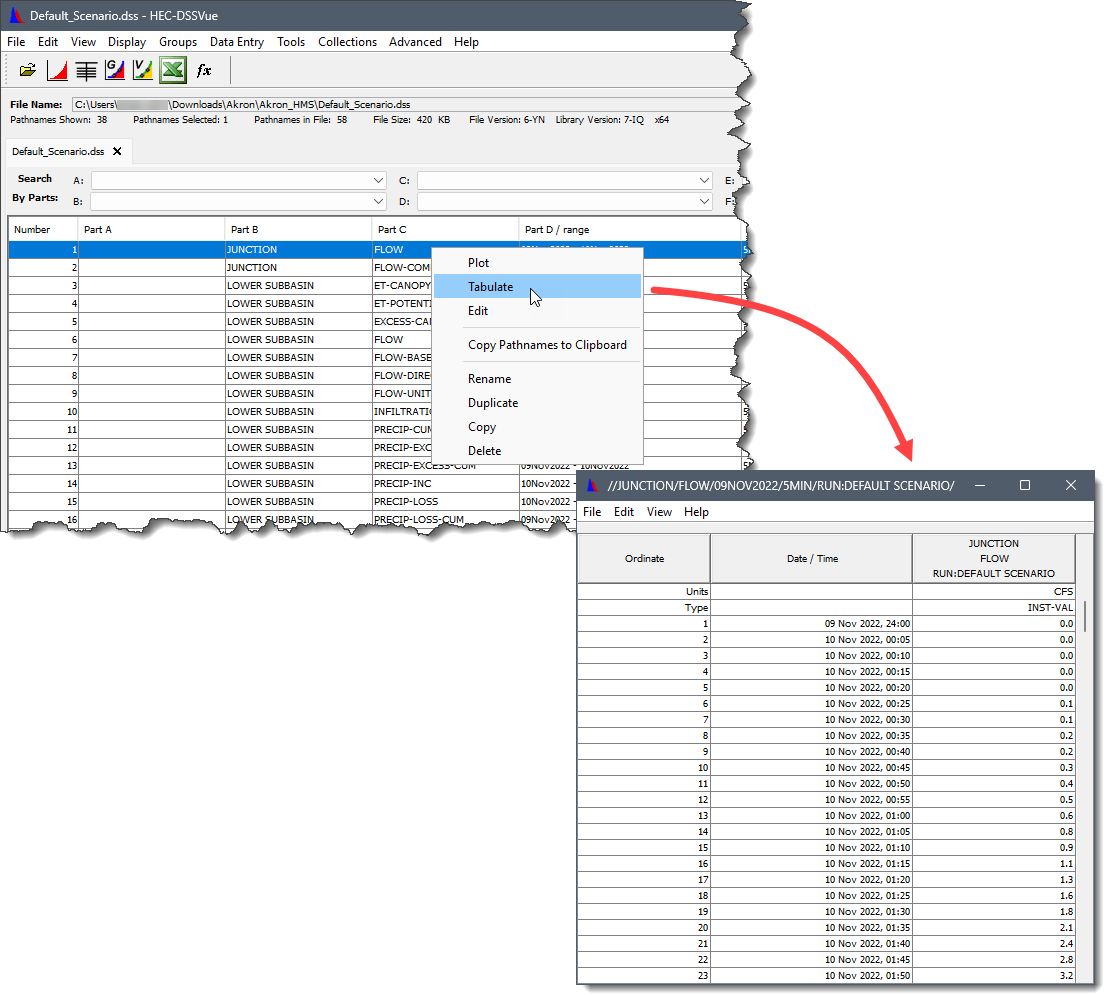
- To see the tabulated results for a particular pathname, select the desired row, right-click and select Tabulate from the displayed context menu. The tabulated results will be displayed in a new window.
Importing Data from a DSS File to a HEC-RAS model
Follow the steps below to import a DSS file in GeoHECRAS:
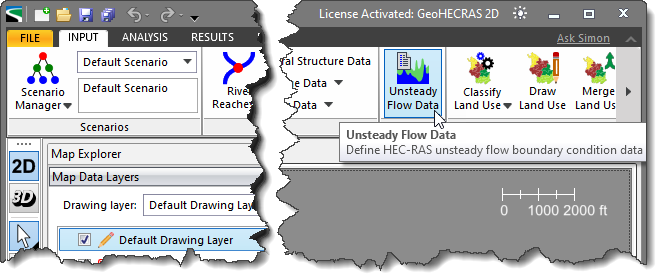
- From the Input ribbon menu, select the Unsteady Flow Data command.
- The Unsteady Flow Data dialog box will be displayed. Select the desired boundary condition type using the dropdown combo boxes provided under the Boundary Condition column. After selecting the boundary condition type, click on the [Define] button to define the boundary condition. Refer to this article in our knowledge base to learn more about boundary conditions.
![Unsteady Flow Data dialog box - [Define] button](/wp-content/uploads/sites/25/2022/11/Linking-Flow-Data-from-HEC-HMS-to-RAS-Imge-10.png)
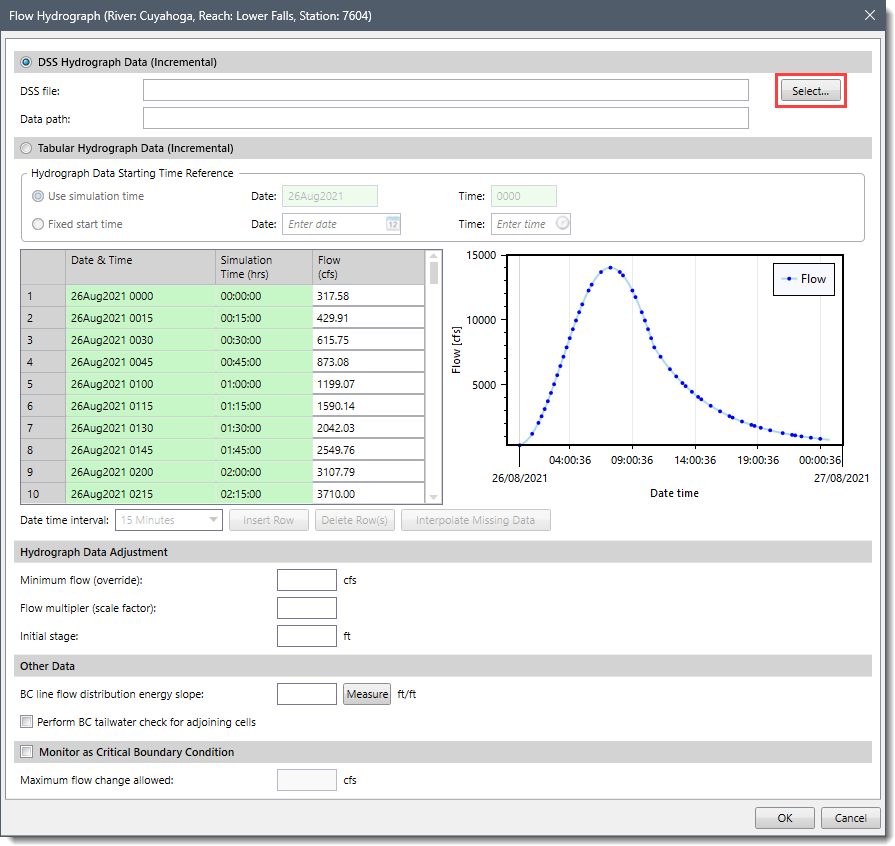
- Enable the DSS Hydrograph Data (Incremental) section and then click the [Select…] button to select a DSS file.
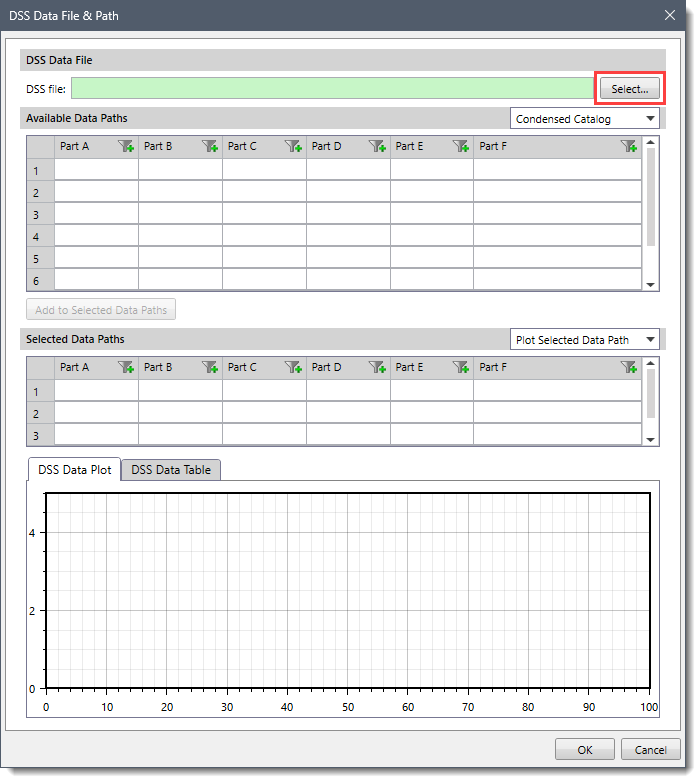
- The DSS Data File & Path dialog box will be displayed. Click the [Select…] button and browse the folder containing the DSS file associated with the HEC-HMS scenario.
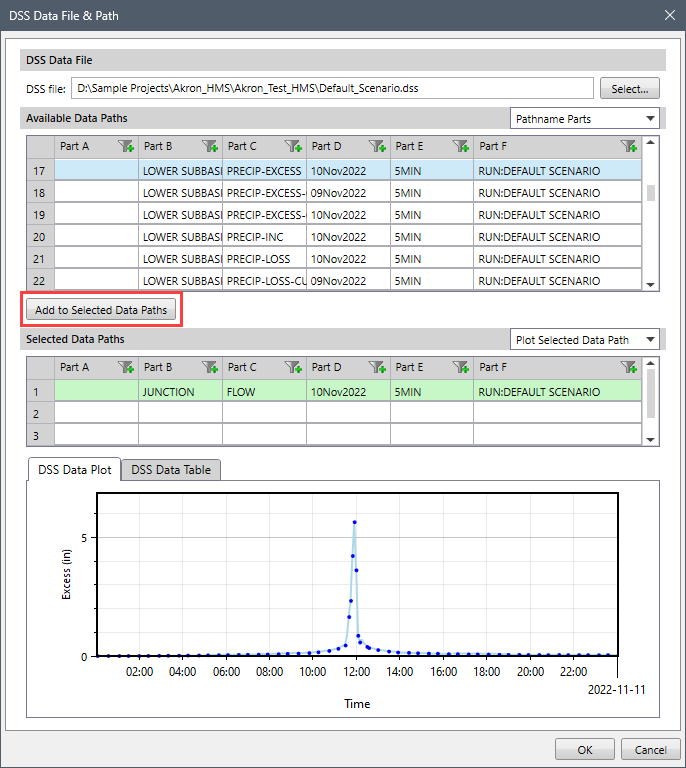
- Once a DSS file is selected, a list of all the DSS pathnames within that file will show up in the table. The user can select the desired data path from the table and then click the [Add to Selected Data Paths] button to add the selected data path in the Selected Data Paths list. The dialog box also displays the graphical plot for the selected data path in the DSS data path plot section as shown below.
 Refer to this article in our knowledge base to view data contained in an DSS Data File and Path dialog box.
- Now, click the [OK] button
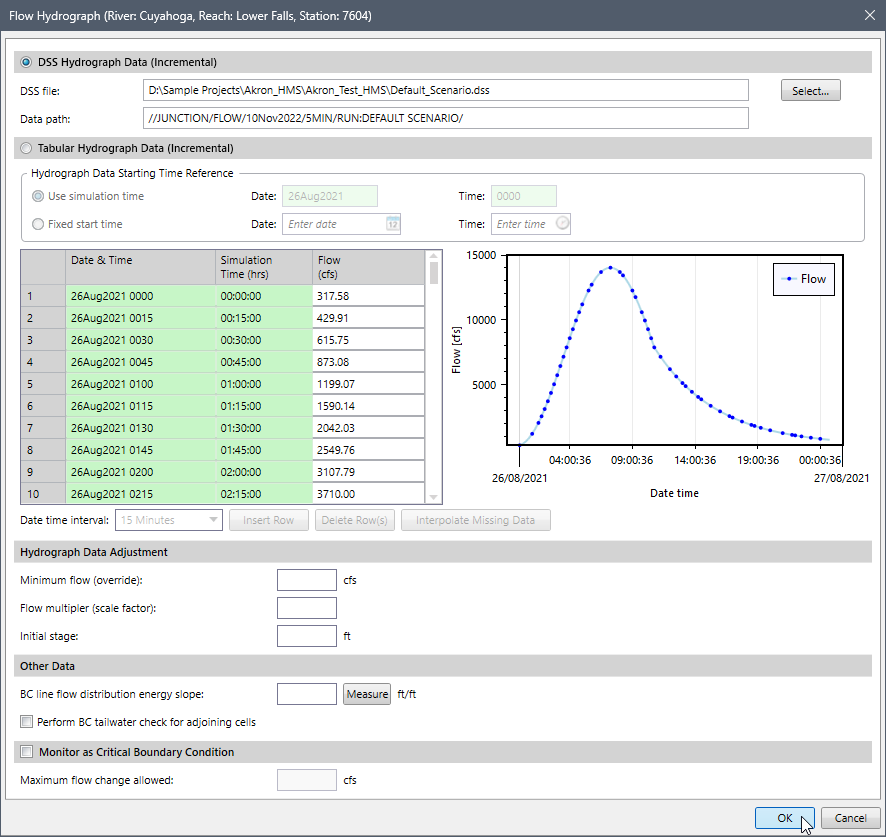
- The Flow Hydrograph dialog box will be redisplayed. Click the [OK] button.
- The Unsteady Flow Data dialog box will be redisplayed. The user can define more boundary conditions as required. Click the [OK] button and then run the analysis.
![Unsteady Flow Data dialog box [OK] button](/wp-content/uploads/sites/25/2022/11/Linking-Flow-Data-from-HEC-HMS-to-RAS-Imge-15.png)


