In GeoHECHMS, the Draw Storage Areas command allows the user to manually draw polygons, one-by-one, as storage areas on the Map View.
Follow the steps below to use the Draw Storage Areas command:
- From the Input ribbon menu, select the Storage Areas dropdown menu and then choose the Draw Storage Areas command.

- The Draw Storage Areas dialog box will be displayed.
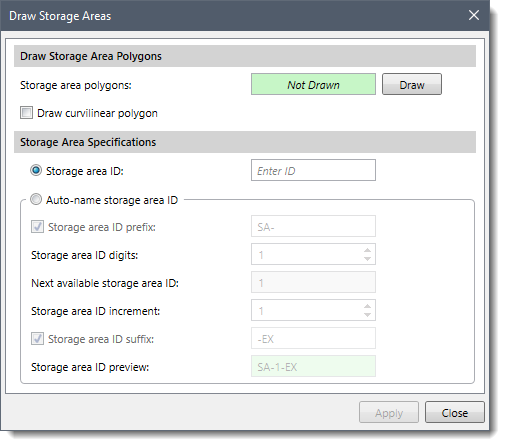
The following sections describe how to use the Draw Storage Areas command and interact with the above dialog box.
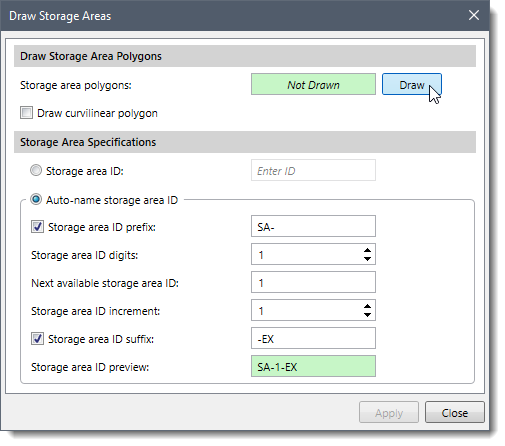
Drawing Storage Area Polygons
Selection of a naming method from the Storage Area Specifications section should be considered before drawing storage areas. If the Storage area ID radio button option is selected, then only one storage area can be drawn at a time. By contrast, if the Auto-name storage area ID radio button option is selected, the user can interactively and continuously draw storage areas on the Map View without having to purposefully interact with the dialog box each time a storage area needs to be identified and named.
Drawing Individual Storage Areas
To draw storage areas one at a time, naming each individual storage area before drawing the next storage area, follow the steps below:
- From the Storage Area Specifications section, select the Storage area ID radio button option.
- From the Draw Storage Area Polygons section, click the [Draw] button, and the dialog box will temporarily disappear. Use the Draw curvilinear polygon checkbox option to draw the polygon using curvilinear segments.
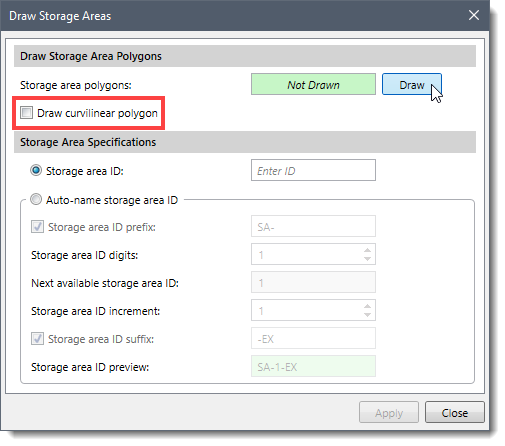
- The status bar (shown under the Map View) will prompt you to draw a storage area on the Map View. Draw the storage area polygon on the Map View. While drawing elements, the user can use the [Ctrl] key to switch between the curvilinear and the linear digitizing. Refer to this article in our knowledge base to learn more about drawing elements on the Map View.
- To finish digitizing the storage area polygon, press the [Enter] key or right-click and select Done from the displayed context menu. To abort the current draw command, press the [Esc] key.
- After completing the storage area digitization, the user is immediately returned to the Draw Storage Areas dialog box, and the Storage area polygons read-only field will be changed from Not Drawn to Drawn.

- After entering the Storage area ID, press the [Enter] key or click the [Apply] button.
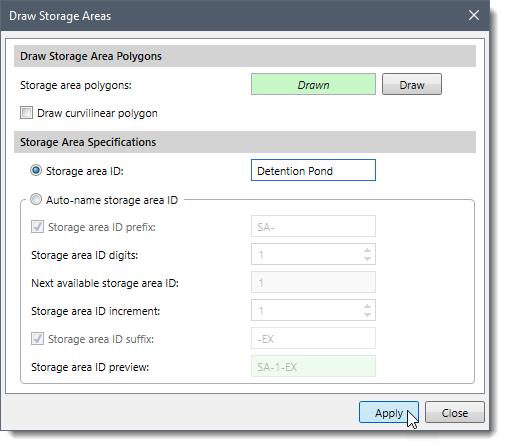
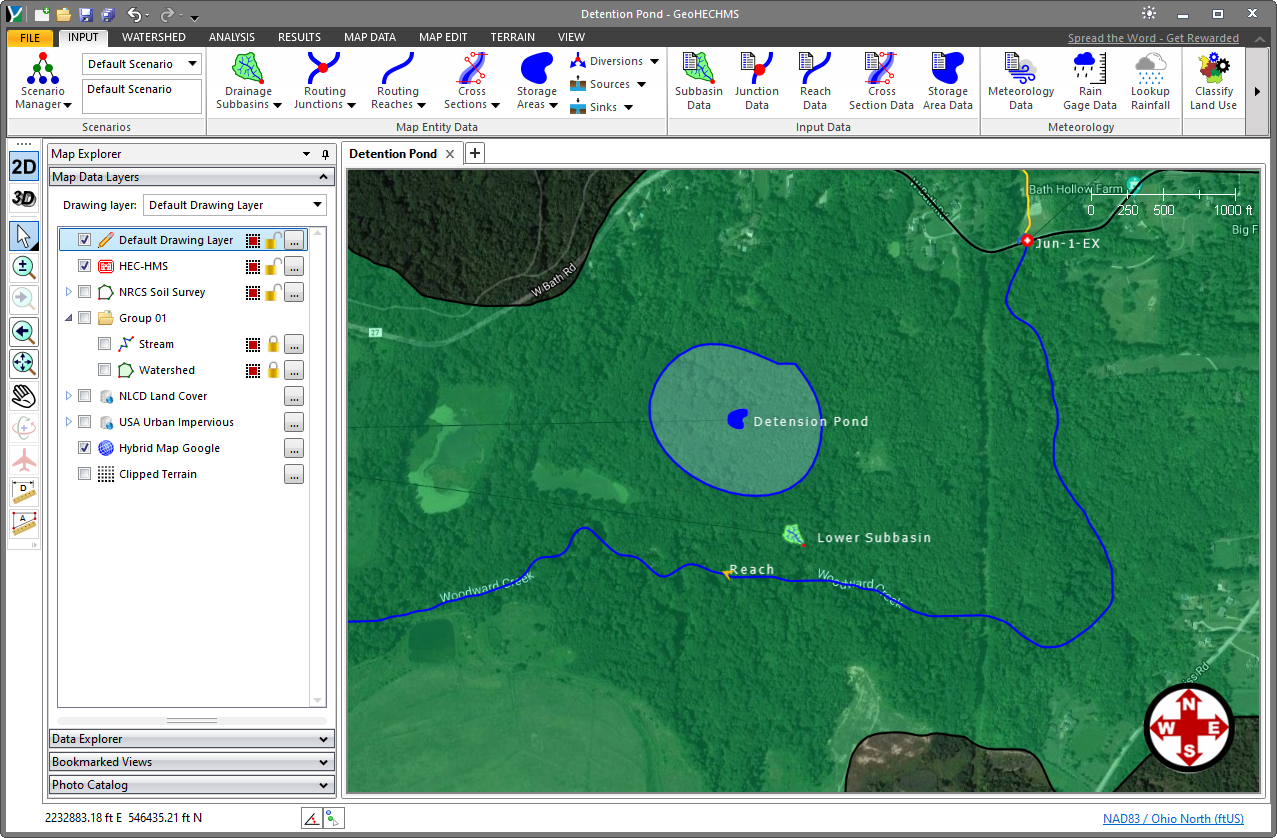
- The drawn storage area will be displayed on the Map View.
Continue this process of drawing one storage area at a time until all the storage areas have been placed on the Map View. When finished, click the [Close] button to close the dialog box.
Drawing Multiple Storage Areas
To draw multiple storage areas continuously and without having to purposefully interact with the dialog box to identify and name each individual storage area, follow the steps below:
- From the Storage Area Specifications section, select the Auto-name storage area ID radio button option.
 The different storage area naming formats present in the Auto-name storage area ID option are as follows:
- Storage area ID prefix: This option allows a prefix to be added to the front of the storage area ID.
- Storage area ID digits: This option permits specification of a set number of digits to use for the storage area ID. For example, using 3 digits causes the storage areas ID to be of the format 001, 002, etc.
- Next available storage area ID: This entry defines the next element ID number to be used.
- Storage area ID increment: This entry defines the increment to use when numbering elements. The default value is 1.
- Storage area ID suffix: This option allows a suffix to be added to the end of the storage area ID.
- Storage area ID preview: This entry provides a preview of the storage area naming specifications defined above.
- From the Draw Storage Area Polygons section, click the [Draw] button, and the dialog box will temporarily disappear.
- The status bar (shown under the Map View) will prompt you to draw a storage area on the Map View. Draw the storage area polygon on the Map View.
- After drawing the first storage area, the status bar will prompt you to draw the next storage area on the Map View.
- Continue this process of drawing one storage area at a time until all the storage areas have been drawn on the Map View. When finished, right-click and choose Done from the displayed context menu or press the [Enter] key. You will be returned to the dialog box. Click the [Close] button to close the dialog box.


