
Welcome to CivilGEO Knowledge Base
Welcome to CivilGEO Knowledge Base
Raster pyramids are a set of reduced-resolution representations of a raster dataset. They are used to enhance the display performance of raster data by retrieving only data at a specific resolution that is required for the display. Raster pyramids are created by downsampling the original raster dataset at a scale of 2:1. This means that each successive layer of the pyramid is half the resolution of the previous layer. For example, if the resolution of the original raster dataset is 100×100 pixels, the first downsampled layer of the pyramid will be 50×50 pixels, the second downsampled layer will be 25×25 pixels, and so on.

When a raster dataset is displayed, the software will automatically choose the most appropriate pyramid level based on the user’s display scale. For example, if the user is zoomed out to a large scale, the software will use the lowest resolution pyramid level. As the user zooms in, the software will automatically switch to higher-resolution pyramid levels.
This article explains how to customize the default location of raster pyramid files in CivilGEO software. It can be useful if the user needs to free up space on their system drive or keep the raster pyramid files organized.
The following image shows the default location of the raster pyramid files in CivilGEO software.
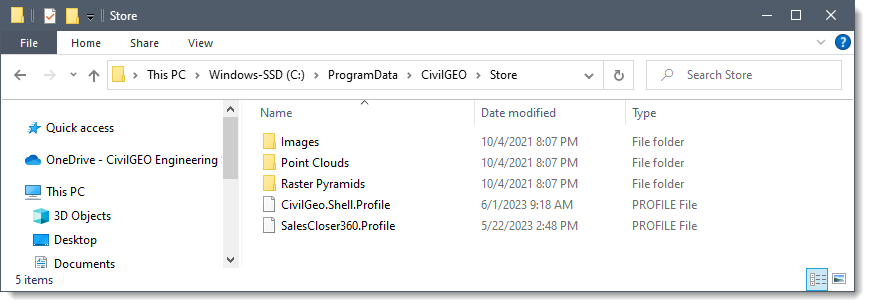
The Images folder refers to a storage location where images or graphic files related to a specific project are stored.
The Point Clouds folder refers to a storage location where point cloud data are stored. Point cloud data represent a collection of 3D coordinate points in digital format, usually captured using remote sensing technologies such as LiDAR (Light Detection and Ranging). By organizing point cloud data in a dedicated folder, the software can easily manage and access the captured data. This folder may contain multiple point cloud files, each representing a specific survey area, project phase, or data collection date. In addition, associated metadata, such as coordinate systems, timestamps, and data acquisition parameters, may also be stored to ensure accurate data interpretation and analysis.
The Raster Pyramids folder refers to a storage location where raster pyramid files are stored. Raster pyramid files contain pre-generated pyramidal representations of raster datasets, such as digital elevation models (DEMs). These pyramids are created to provide efficient and optimized access to different levels of detail within the raster data.
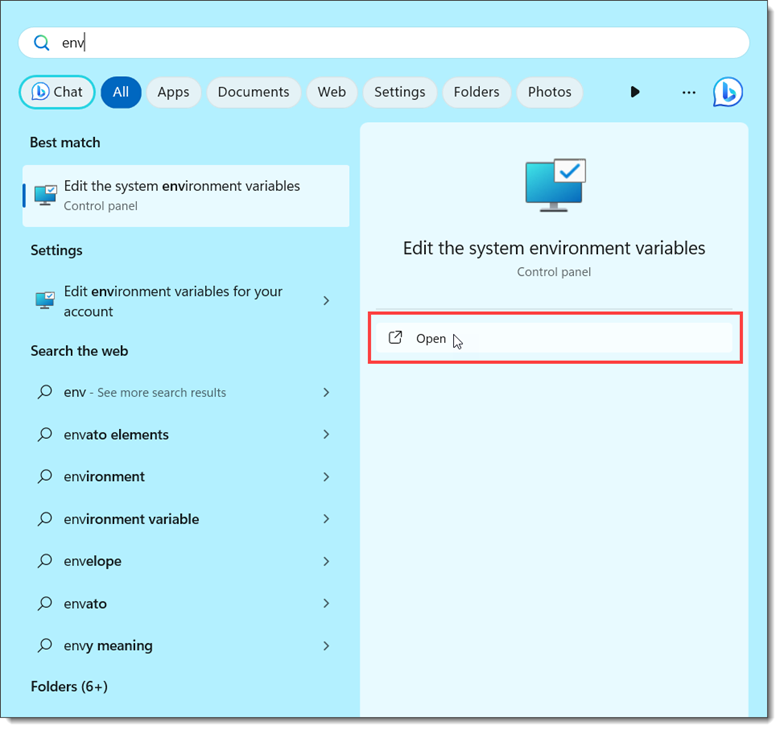
To change the default location of raster pyramid files, follow the steps below:
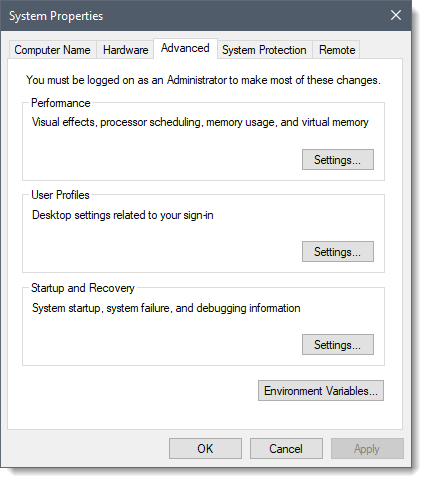
![[Environment Variables…] button](/wp-content/uploads/sites/25/2023/10/Raster-Pyramid-File-Locations-Image-5.png)
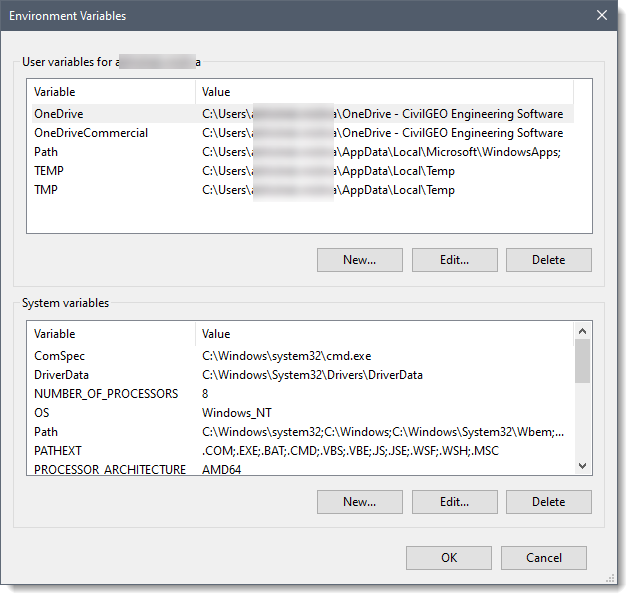 Under the System variables section, the user can set the environment variables as needed.
![[New…] button](/wp-content/uploads/sites/25/2023/10/Raster-Pyramid-File-Locations-Image-7.png)
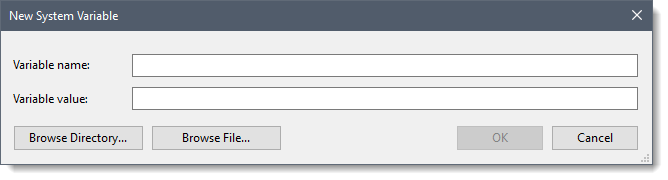
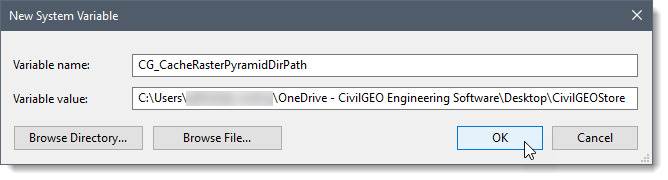 Note: The graphical user interface for creating environment variables may vary slightly, depending on the specific Windows version.
Note: Raster pyramid folders should not be stored in a network location as the user can experience data transmission delays. Also, the user may experience some difficulties in loading data due to an unstable network connection.
If you are still having issues, contact our technical support staff. They will be glad to assist you further.


CivilGEO G2 Reviews
4.8/5.0 Rating, Over 230 Reviews

GeoHECRAS is recognized as the top Civil Engineering Design Software with an average of 4.8 out of 5.0 rating from over 230 real user reviews on G2.


We use cookies to give you the best online experience. By agreeing you accept the use of cookies in accordance with our cookie policy.
When you visit any web site, it may store or retrieve information on your browser, mostly in the form of cookies. Control your personal Cookie Services here.


