
Welcome to CivilGEO Knowledge Base
Welcome to CivilGEO Knowledge Base
Within CivilGEO software, every data layer has its own coordinate reference system which is used to integrate it with other data layers within the Map View. Data layers that are constructed with different coordinate reference systems are automatically reprojected to the Map View so that they align with the assigned project coordinate reference system.
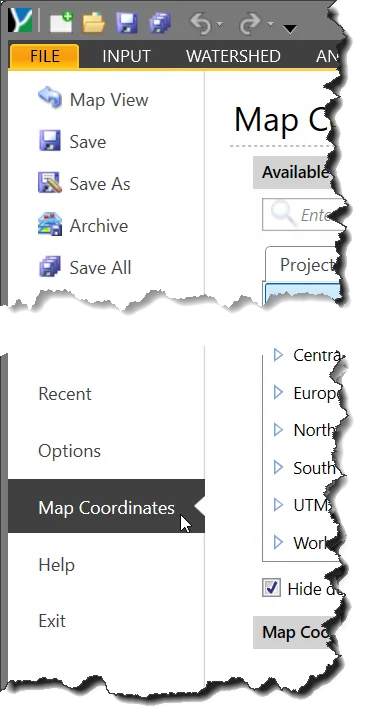
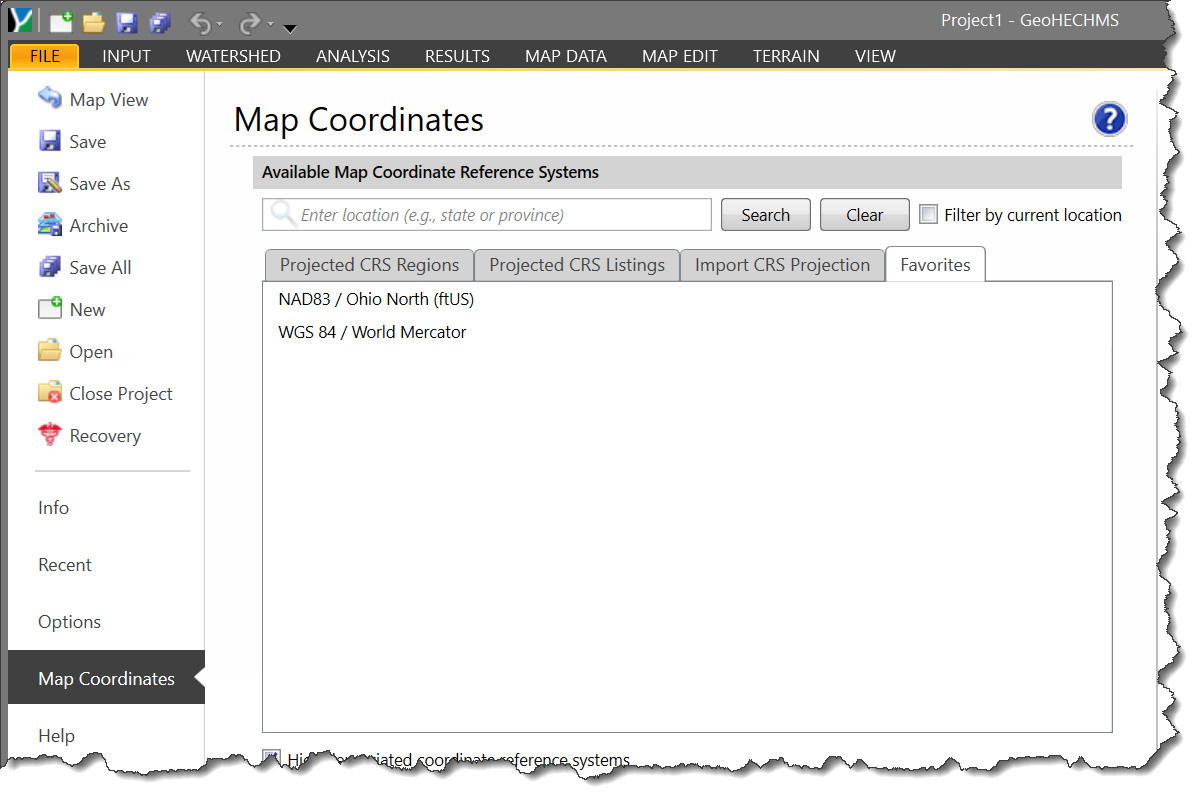
To define a coordinate reference system (CRS) for the project, follow the steps below:
![[Search] button](/wp-content/uploads/sites/25/2014/12/Assigning-a-Coordinate-Reference-System-image-6.png)
![[Load CRS Projection] button](/wp-content/uploads/sites/25/2014/12/Assigning-a-Coordinate-Reference-System-image-7.png)
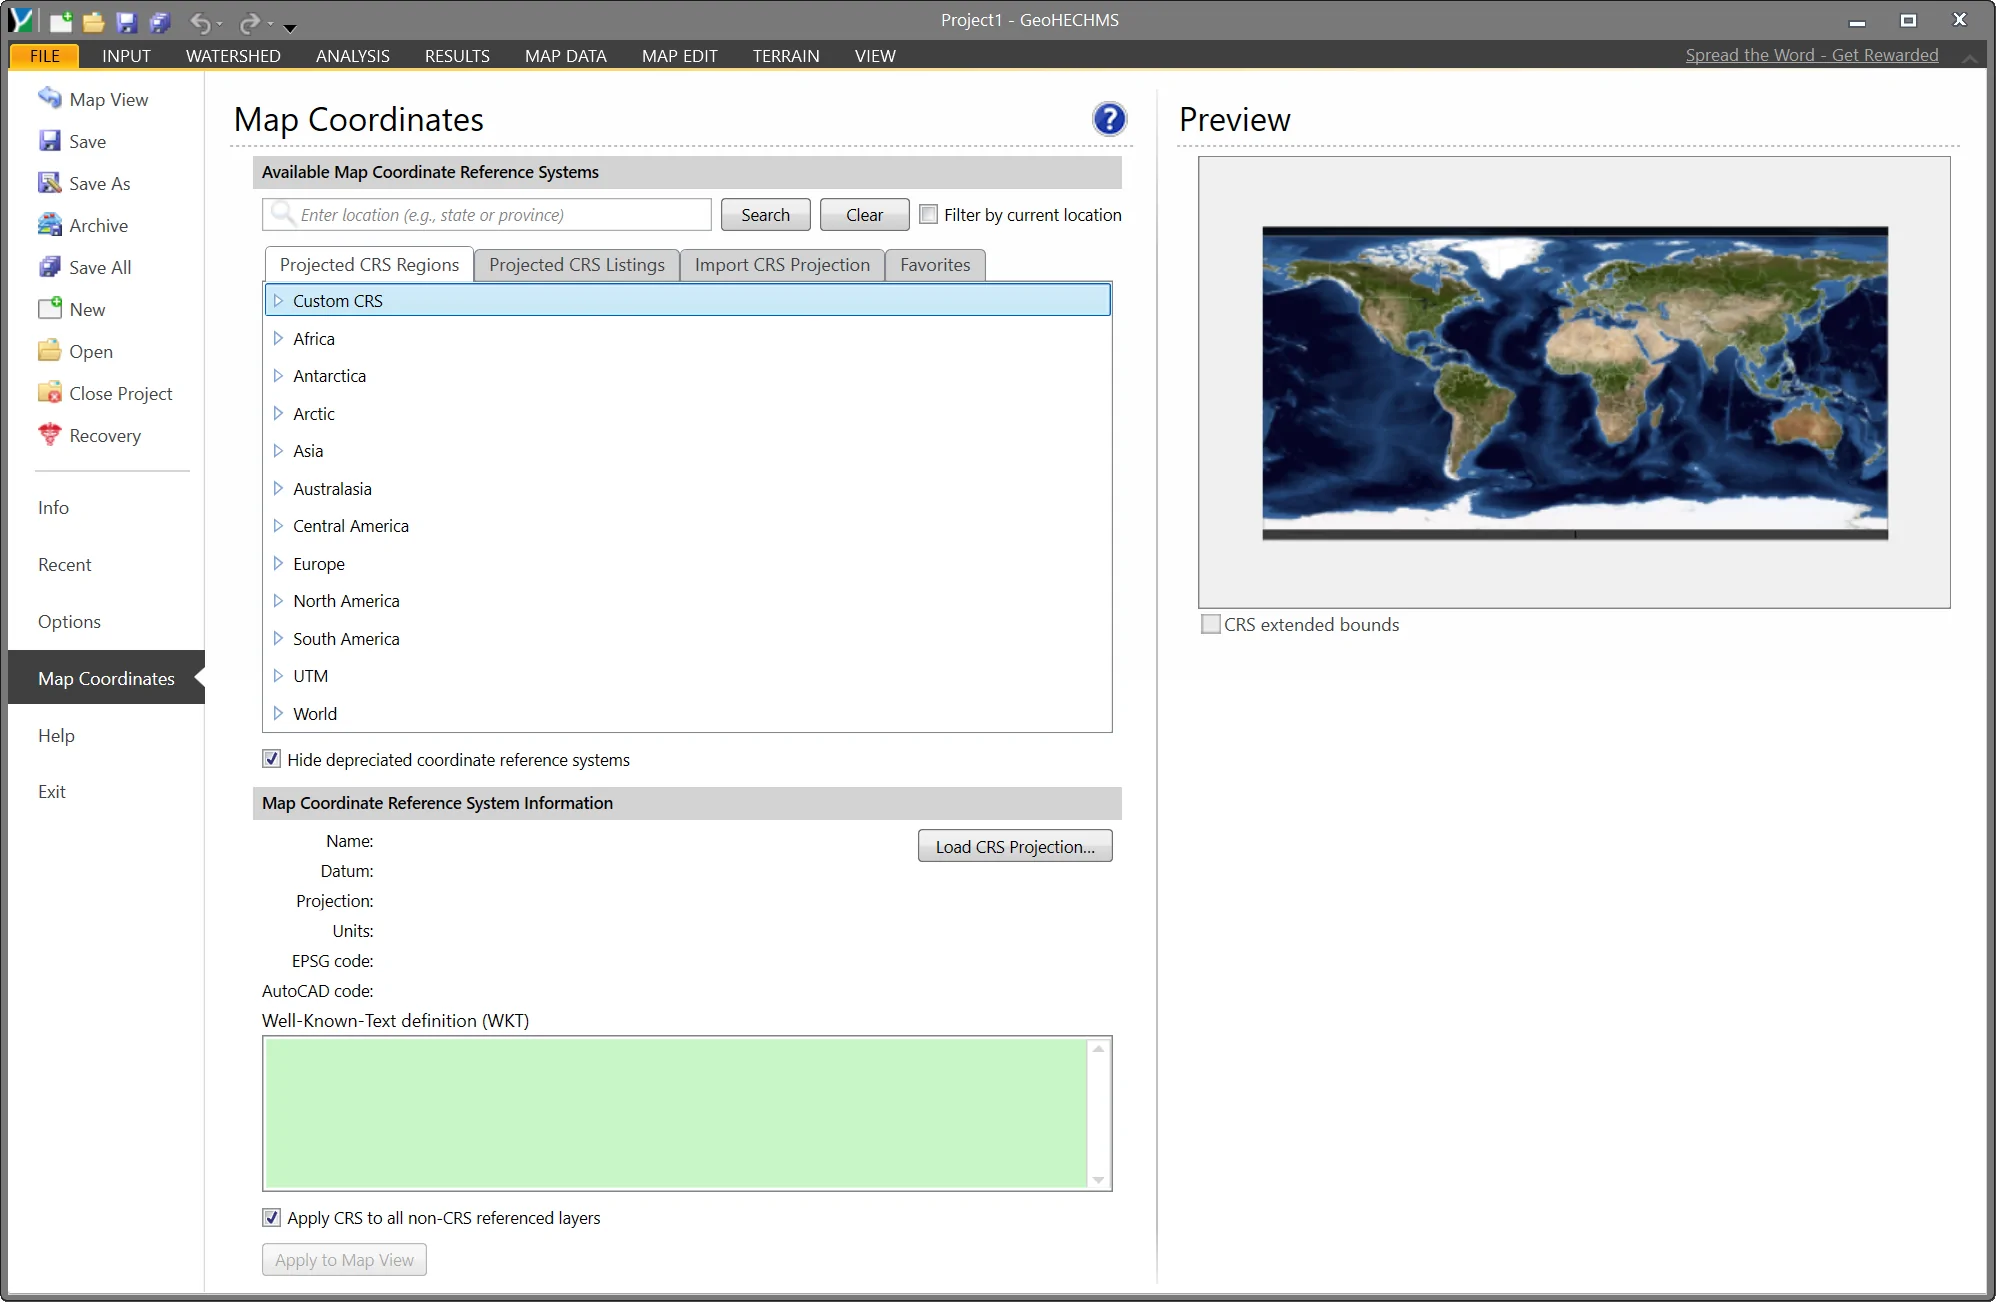
Note that the Hide depreciated coordinate reference systems checkbox is used to hide the old, depreciated coordinate reference system. By default, this checkbox is checked.
While assigning the coordinate reference system (CRS) to the project, the Map Coordinates backstage page provides a checkbox option (Apply CRS to all non-CRS referenced layers), which assigns the selected CRS to layers that are not yet assigned a specific CRS system.
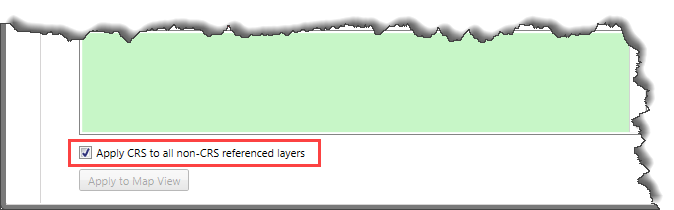
By default, this checkbox is checked (i.e., selected). However, some non-CRS referenced data layers may not lie within the selected project CRS. If this occurs, the software will display an informational dialog box describing this issue for each of the data layers whose coordinates lie outside the assigned CRS. The user has the option to continue with the CRS assignment for the data layer or skip over it. This commonly happens with HEC‑RAS models that were not created in a coordinate reference system. In these situations, it is better to skip over the assignment of the CRS. The data layer may need to be manually georeferenced.
If a data layer has been added to a project and does not have a CRS defined for it, the layer will display in its own local coordinate reference system. This might happen, for example, when importing an elevation grid data file to the project.
After loading the data layer, only that data layer will be shown in the Map View. The other data layers lie in a different projection of the Map View. The user can then manually assign the project’s CRS to the data layer if the data layer coordinates lie within the project’s CRS. Refer to this article in our knowledge base to learn how to manually assign a CRS to a data layer.


CivilGEO G2 Reviews
4.8/5.0 Rating, Over 230 Reviews

GeoHECRAS is recognized as the top Civil Engineering Design Software with an average of 4.8 out of 5.0 rating from over 230 real user reviews on G2.


We use cookies to give you the best online experience. By agreeing you accept the use of cookies in accordance with our cookie policy.
When you visit any web site, it may store or retrieve information on your browser, mostly in the form of cookies. Control your personal Cookie Services here.


