1. Home
  2. Knowledge Base
  3. Cross Sections
  4. Reverse Cross Section Geometry Command
  1. Home
  2. Knowledge Base
  3. GeoHECRAS
  4. Reverse Cross Section Geometry Command
  1. Home
  2. Knowledge Base
  3. HEC-RAS Model Troubleshooting
  4. Reverse Cross Section Geometry Command
  1. Home
  2. Knowledge Base
  3. Working with a HEC-RAS Project
  4. Reverse Cross Section Geometry Command

Reverse Cross Section Geometry Command

In HEC-RAS projects, the presumed direction of the horizontal stationing for the cross section geometry is from left to right, from the vantage point of the downstream direction. For HEC-RAS projects whose  horizontal stationing for the cross section geometry is not in the presumed direction, the Reverse Cross Section Geometry command can be used to correct the direction of the cross section geometry.

Refer to the steps below to use the Reverse Cross Section Geometry command:

  1. From the Input ribbon menu, click on the Cross Sections dropdown menu and select the Reverse Cross Section Geometry command. Alternatively, press the [Ctrl+Shift+R] shortcut keys directly on the Map View.
    Reverse Cross Section Geometry command
  2. The Reverse Cross Section Geometry dialog box will be displayed.
    Reverse Cross Section Geometry dialog box
  3. The data table under the Select Cross Sections section lists river, reach, and river stations for each cross section. If a hydrological structure is defined over a cross section, then it will be displayed in the Type column of the data table against the corresponding river station.
  4. Check the River Station checkbox entries from the data table corresponding to the cross sections whose geometry is to be reversed. Click the [Select All] button to select all the available cross sections at once. Click the [Clear All] button to cancel all the previous selections and redo the entire process.
  5. Alternatively, click the [Pick] button to manually select cross sections from the Map View. Clicking the [Pick] button temporarily removes the dialog box and redirects the user to the Map View. On the Map View, either select cross sections or river reach to automatically select all the associated cross sections.
  6. After the Map View selection, the dialog box will be redisplayed showing the selected cross sections as well as the total number of cross sections.
    Cross sections selection
  7. The selected cross sections will also be highlighted on the Map View. To abort the Map View selection process, press the [Esc] key or right-click and select Cancel from the displayed context menu.
  8. After selecting the cross sections, click the [OK] button and the software will reverse the geometry of the selected cross sections.

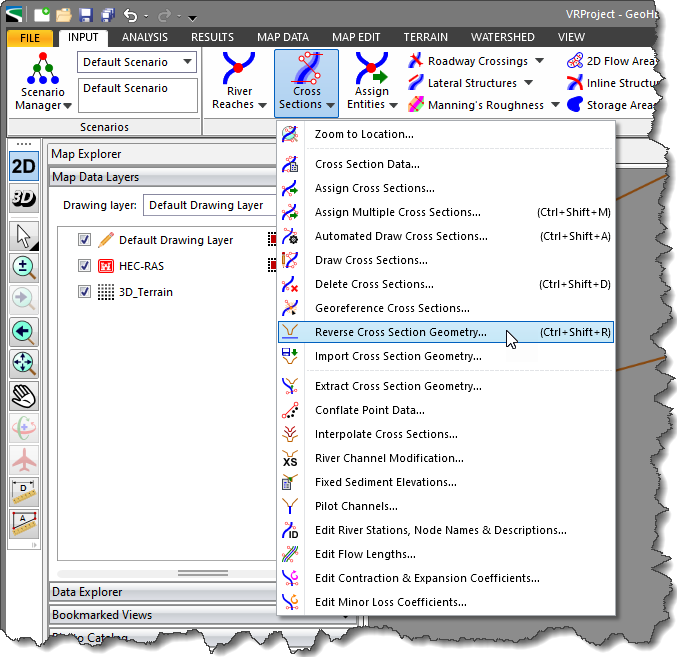
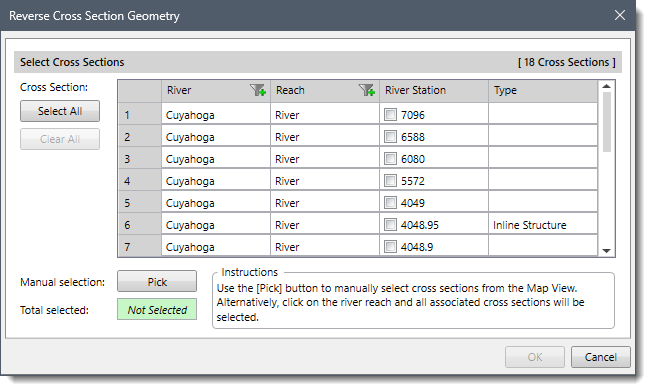
Refer to this article in our knowledge base to observe how the cross section geometry changes after using the Reverse Cross Section Geometry command.

About the Author cxscvlgeo

  • Was this helpful?
  • YesNo

Was this article helpful?

Related Articles