The Classify Land Use command uses AI machine learning to geospatially analyze the orthophoto base map and compute the corresponding land use. The user can select areas from the orthophoto base map to train the software, and then machine learning examines the entire orthophoto base map for similar land use areas. The software then creates a polygonized shapefile containing land use areas extracted from the orthophoto base map. The Draw Land Use command can be used to cleanup areas where the Classify Land Use command did not work completely. Refer to this article in our knowledge base to learn more about this command.
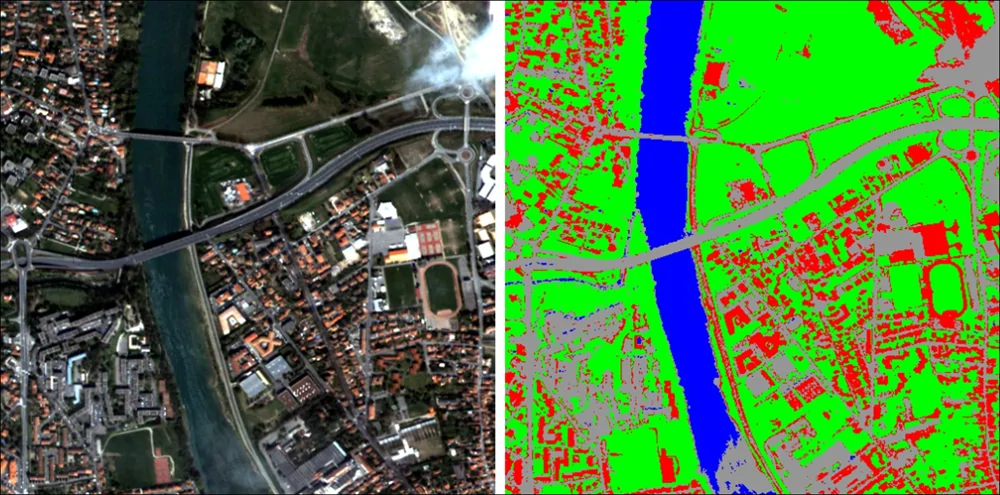
The user first trains the software to recognize various land types based upon selected target areas on the orthophoto. The software reviews the colors and patterns of the selected targets, and then segments the remaining orthophoto into regions to match selected targets using raster recognition. From this, it merges adjacent matching land use regions and creates a thematic land use layer, as shown below.
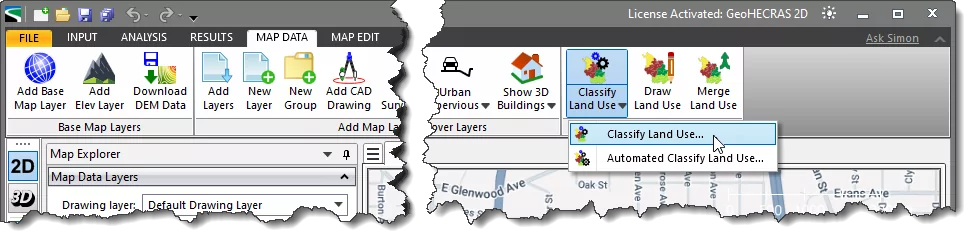
From the Map Data ribbon menu, click the Classify Land Use dropdown menu and select the Classify Land Use command.
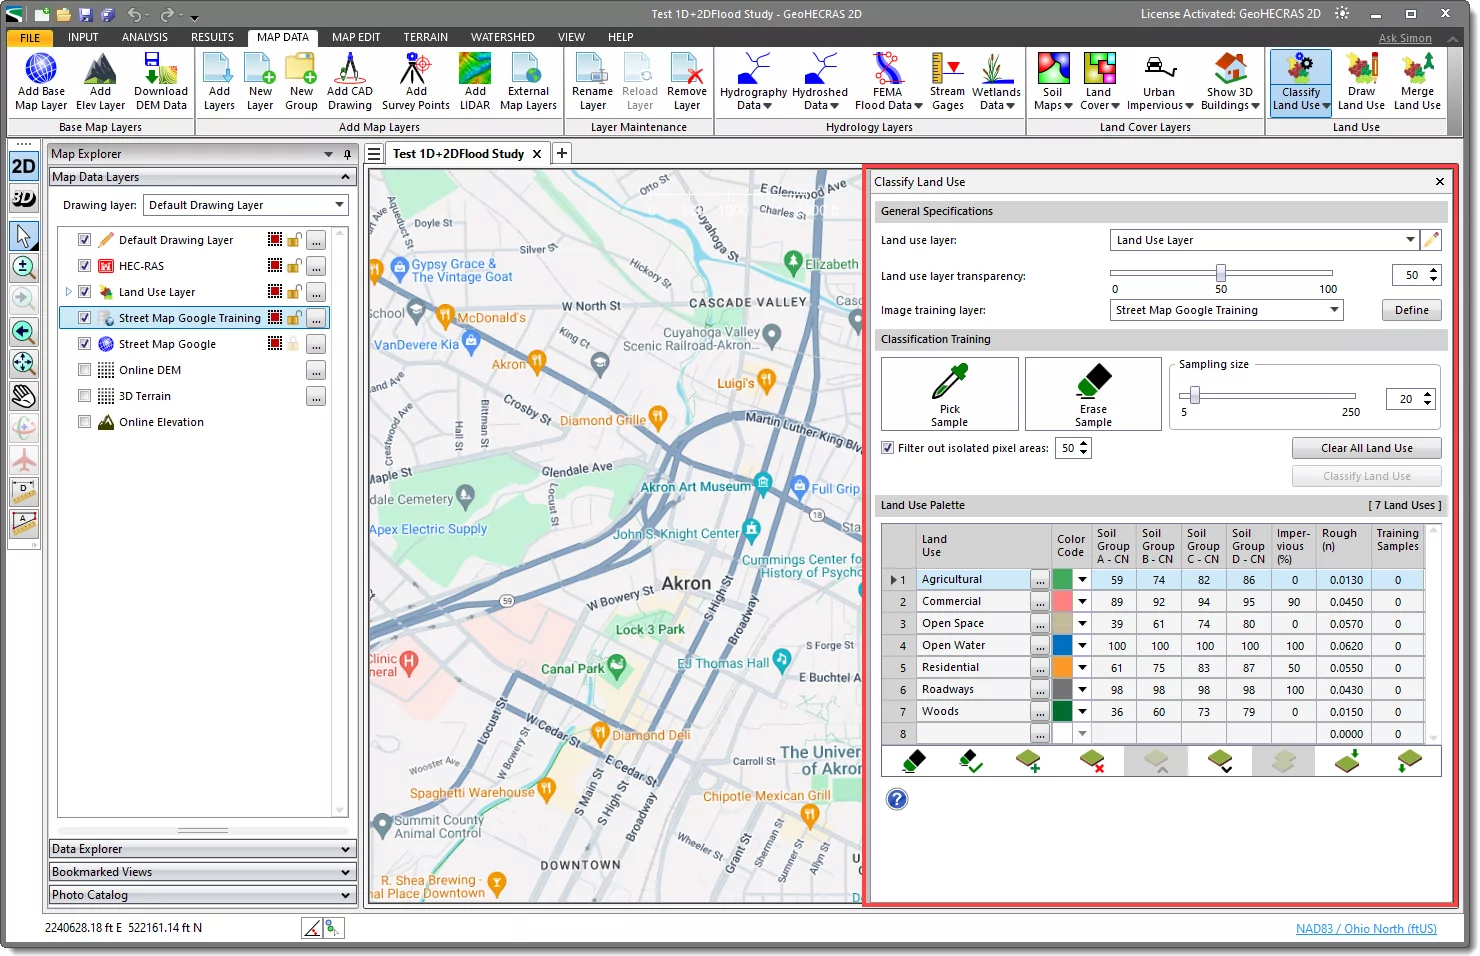
Selecting this command causes the following panel to be displayed, floating to the right side of the Map View.
When selecting this command, if the Map View is in 3D view mode (even if viewing from directly above) the software will force the Map View into 2D view mode. This is because the Map View must be in 2D mode to perform this task.
Note that prior to using this command, the user needs to assign a CRS to the project. Refer to this article in our knowledge base to learn about how to assign a coordinate reference system to a project.
The various subsections of the Classify Land Use panel are discussed below.
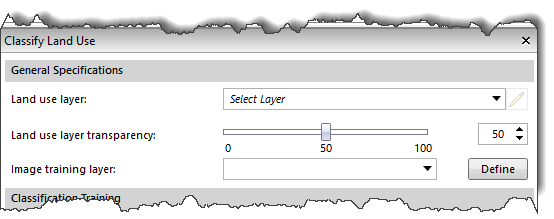
General Specifications
The General Specifications section of the Classify Land Use panel is used to define the following properties:
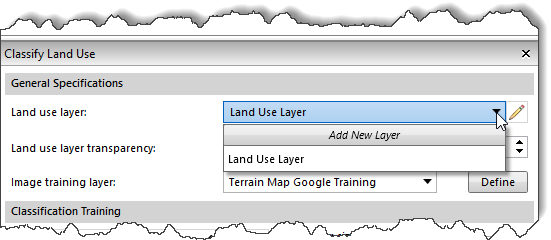
Land use layer
This entry is used to define the land use layer in order to add the land use polygon data. Clicking on the pencil icon will allow the user to rename the selected land use layer. In addition, at the top of the listing is an Add New Layer entry which will create a new layer.
Land use layer transparency
This option is used to adjust the transparency of the land use being painted using the horizontal slider, allowing the user to see through the defined land use areas to the underlying displayed map. Default transparency value is 50%.
Image training layer
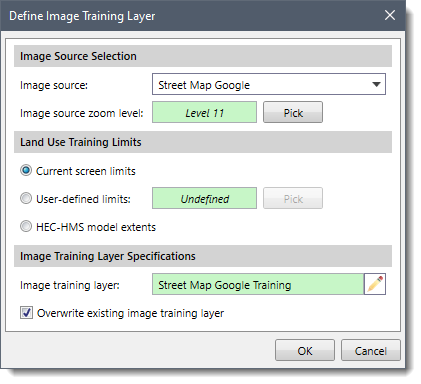
This option is used to define the image source and extents of the training layer. Clicking on the [Define] button will cause the software to open the Define Image Training Layer dialog box.
Image Source Selection The Image Source Selection section allows the user to select an image source from the dropdown combo box and the zoom level to be used to create the image training layer by zooming in and out of the base map.
Land Use Training Limits
The Land Use Training Limits section allows the user to define the land use limits using three different options: current screen limits, user-defined limits, and HEC-HMS model extents.
Image Training Layer Specifications
The Image Training Layer Specifications section allows the user to define the image training layer. The Overwrite existing image training layer is checked by default to automatically overwrite any existing image training layer.
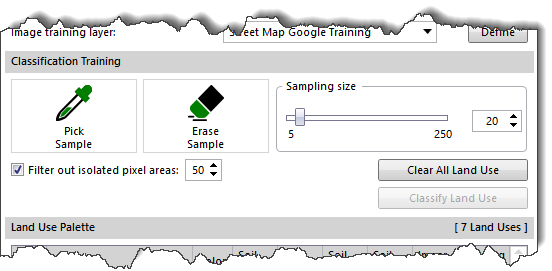
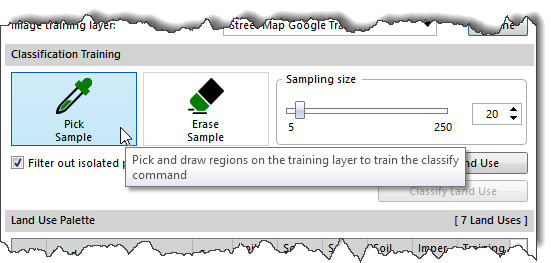
Classification Training
The Classification Training section of the Classify Land Use panel is used to train the software to recognize various land uses for the loaded orthophoto imagery.
The following details how to train the software to classify land uses from the loaded orthophoto imagery.
Pick Sample
The Pick Sample tool is used to train the software to recognize land use areas from the loaded orthophoto imagery.
To use the Pick Sample tool, follow the steps below:
Select the Pick Sample tool. The sampling cursor is round, and the size can be adjusted if desired.
Select the appropriate land use from the Land Use Palette to identify on the Map View.
Position the nib pointer on the Map View where you want to start sampling.
Choose locations on the loaded orthophoto imagery that match the selected land use. The more training samples selected, the better the software will be trained to recognize land uses from the orthophoto imagery.
Press and hold down the mouse button to paint-in areas where samples should be taken from. As you drag the nib pointer around the Map View, the land use training sample area is painted in real time.
Now, release the mouse button. After a sample has been selected, the software will create an equivalent polygon at the sample location matching the painted-in sample area.
If more training sample area needs to be added to an existing sample, simply start painting-in more sample areas. Where a new training sample area overlaps an existing sample area, the areas are merged into a single polygon.
The following observations apply to the Pick Sample tool:
The Land Use Palette shows the number of training samples that have been selected for each land use.
The Pick Sample tool is always in overwrite mode. It overwrites any existing overlapping sample polygons.
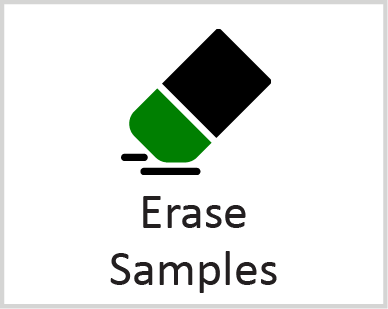
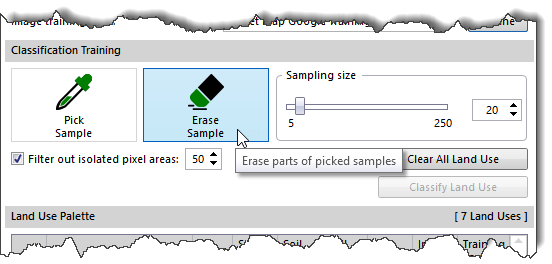
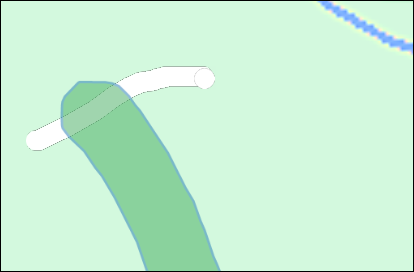
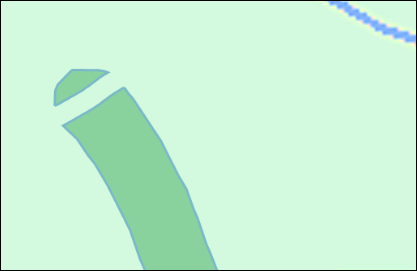
Erase Sample
The Erase Sample tool can be used to erase all or part of a land use sample polygon area.
To use the Erase Sample tool, follow the steps below:
Select the Erase Sample tool.
Position the nib pointer on the Map View where you want to start erasing a land use sample.
Press and hold down the mouse button to erase.
Drag the nib pointer around the land use sample area that is to be erased.
On releasing the mouse button, the land use sample area traced by the nib will be erased. The software will convert the remaining area into a land use sample polygon.
The following observation applies to the Erase Sample tool:
Creation of interior holes (doughnuts) is supported when erasing land use sample areas. For example, the user may erase the park area that is surrounded on all sides by a street land use.
Sampling Size
The Sampling Size slider allows the user to adjust the nib size used to select training samples from the loaded orthophoto imagery.
Clear All Land Use
The [Clear All Land Use] button causes the software to remove the classified land use polygon areas from the Map View. This command allows the user to iteratively select training samples to better inform the software how to classify land use areas from the loaded orthophoto imagery.
Classify Land Use
The [Classify Land Use] button causes the software to classify land use polygon areas from the loaded orthophoto imagery based upon the defined training samples.
Filter Out Isolated Pixel Areas
This entry is checked by default. This checkbox entry causes the software to reclassify small, isolated regions of pixels that might give a “salt and pepper” or speckled appearance to the nearest land use classes. Small regions with pixel count less than or equal to the defined pixel threshold will disappear; being essentially dissolved away based on the closest surrounding cell land use types. A default threshold value of 50 pixels is provided.
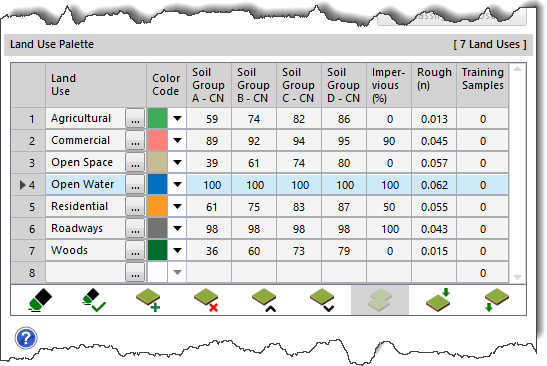
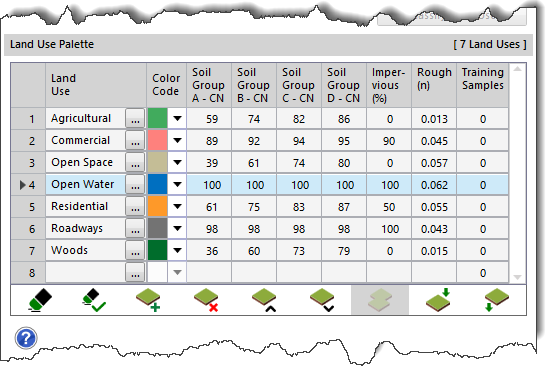
Land Use Palette
The Land Use Palette section of the Classify Land Use panel is similar to what is provided in the Draw Land Use command. This section is used to define the various land uses and their associated properties, as well as allow the user to easily switch between various land uses while painting the land use areas onto the Map View.
The following features are provided in the land use palette section.
The […] lookup button is used to select land use with associated curve numbers and impervious values. Clicking on this button will display a Select Land Use lookup table dialog box.
The Impervious (%) column displays the imperviousness associated with a specific land use or land type.
The Rough(n) column displays the Manning’s roughness for a particular land use type. Note that this column is only available in GeoHECRAS.
The Training Samples column displays the number of training samples assigned to each defined land use.
The following button commands are listed at the bottom of the land use palette.
Erase Sample: Selecting this button causes the software to erase all or part of a land use sample polygon area of the currently selected (highlighted) land use listed in the palette. If a land use is not selected in the palette, then this button is grayed out (unavailable).
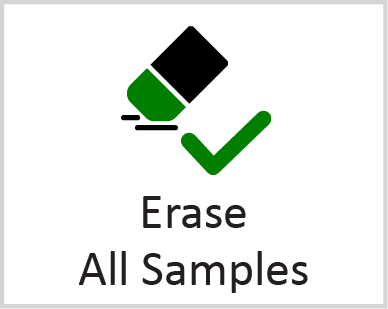
Erase All Samples: Selecting this button causes the software to remove all training samples from the defined land uses. The software will display a confirmation dialog box to make certain that the training samples should be erased.
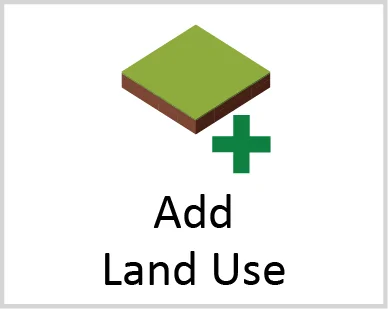
Add Land Use: Selecting this button creates a land use with the default name of Land Use #, where # is replaced with the next number of the total land uses listed. For example, if there are currently four land uses defined and the user clicks on this button, the software will create a new land use with the name Land Use 5. In the event of a naming conflict (i.e., a land use with the same name already exists), the number count gets incremented until there is no duplication. The user can rename the default land use name using the Properties command. Any number of land uses can be created.
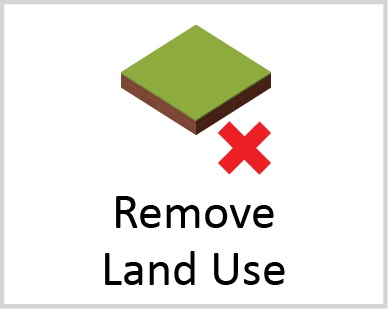
Remove Land Use: Selecting this button will remove the currently selected (highlighted) land use listed in the palette. If a land use is not selected in the palette, then this button is grayed out (unavailable). If land use polygons have already been assigned to the land use to be removed, then the software will display a confirmation dialog box to confirm that it should remove the land use. Any assigned land use polygons will then be deleted from the Map View as well. If there is no land use polygon(s) assigned to the land use to be removed, no confirmation dialog box is displayed.
Move Land Use Up: Selecting this button will move the currently selected (highlighted) land use up by one within the palette. If the currently selected land use is at the top of the palette, this button is grayed out (unavailable). If a land use is not selected in the palette, then this button is grayed out.
Move Land Use Down: Selecting this button will move the currently selected (highlighted) land use down by one within the palette. If the currently selected land use is at the bottom of the palette, this button is grayed out (unavailable). If a land use is not selected in the palette, then this button is grayed out.
Merge Land Use: Selecting this button will move the selected (highlighted) land use(s) into the current land use. If only the current land use is selected, this button is grayed out (unavailable). More than one land use can be merged at a time. Any assigned land use polygon(s) will also be merged into the current land use (potentially causing adjacent polygons of the same land use to merge as well).
Import Land Use Palette: Selecting this button will display the Import Land Use Palette dialog box, allowing the user to import a previously defined land use palette so that it can be used in the current project.
Export Land Use Palette: Selecting this button will display the Export Land Use Palette dialog box, allowing the defined land use palette data to be exported so that it can be used in other projects.
Once the land cover grid has been created, it is loaded as a layer in the Map Data Layers panel. Clicking on the […] Properties button will display the Land Use Properties dialog box, which allows the user to perform the following:
To define various land uses and their associated properties
To style the border associated with the land use polygon(s)
To change the image’s transparency
To change the current CRS (coordinate reference system) of the project, etc.
Refer to this article in our knowledge base to learn more about the Land Use Properties dialog box.
When you visit any web site, it may store or retrieve information on your browser, mostly in the form of cookies. Control your personal Cookie Services here.
For perfomance reasons we use Cloudflare as a CDN network. This saves a cookie "__cfduid" to apply security settings on a per-client basis. This cookie is strictly necessary for Cloudflare's security features and cannot be turned off.
__cfduid
Preference cookies enable a website to remember information that changes the way the website behaves or looks, like your preferred language or the region that you are in.
For purposes of marketing, optimization of products and services, we use services of ZoomInfo on this website.
The ZoomInfo WebSights snippet drops three cookies to track Unique Visits:
1. _pxhd - Related to the Perimeter X security layer (Perimeter X isused to prevent bot attacks).
2. _cfduid - Related to the CloudFlare security layer (CloudFlare is the Network Security protocol that ZoomInfo uses to orchestrate the rate limiting rules).
3. visitorId - This is how WebSights identifies recurring visitors

![The […] lookup button](/wp-content/uploads/sites/25/2023/04/Classify-Land-Use-Command-Img-16.png)