
Welcome to CivilGEO Knowledge Base
Welcome to CivilGEO Knowledge Base
The user should develop data in a format that is easily recognizable, storage efficient, and user-friendly for uploading and downloading project data. The naming conventions of project elements play an important role in standardizing and ensuring the consistency of the project. This article describes how the user can edit the name (or ID) and description of the project elements in the CivilGEO software.
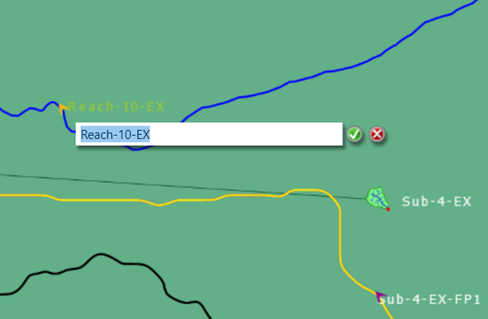
The software allows the user to edit the element ID directly on the Map View. From the Map View, double-clicking on the element ID displays the editing field where the user can edit the existing element ID.
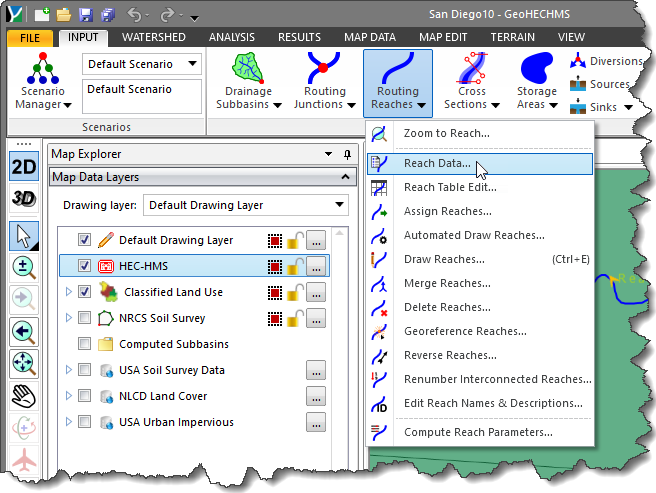
The user can also edit the ID of the project element along with the description from the data dialog box of the corresponding element. For example, from the Map View, double-clicking on a Reach displays the Reach Data dialog box. Alternatively, from the Input ribbon menu, click on the Routing Reaches dropdown menu and select the Reach Data command.
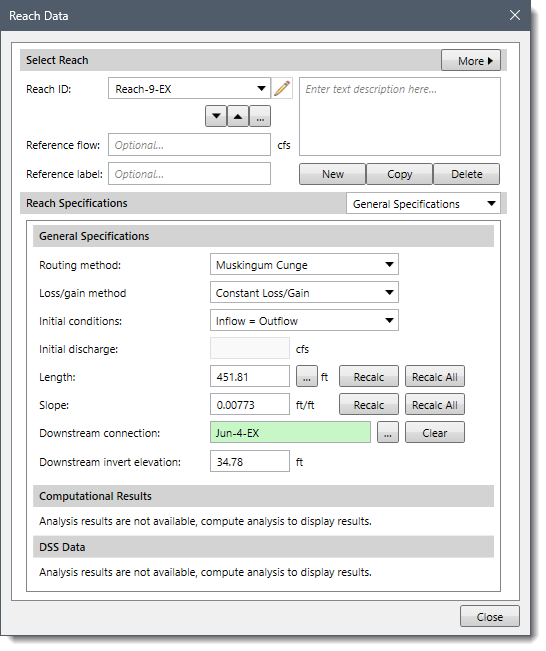
 The Reach Data dialog box will be displayed.
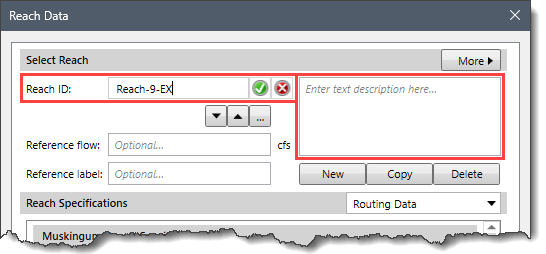
 The user can select the reaches available in the project from the Reach ID dropdown entry. After selecting the reach, the edit option (i.e., Pencil icon) next to the Reach ID dropdown entry can be used to enable the editing of the reach ID. In addition, the user can also edit the description associated with the selected reach in the Description field.
 Similarly, the user can edit the ID and description of other project elements such as subbasins, junctions, diversions, sources, and sinks using the data dialog boxes of the corresponding elements.
In GeoHECHMS, there is an additional Edit Element Names & Descriptions command that allows the user to edit the name and description of all the similar HEC-HMS elements using a dedicated editing dialog box. The Edit Element Names & Description command is available for the following project elements:
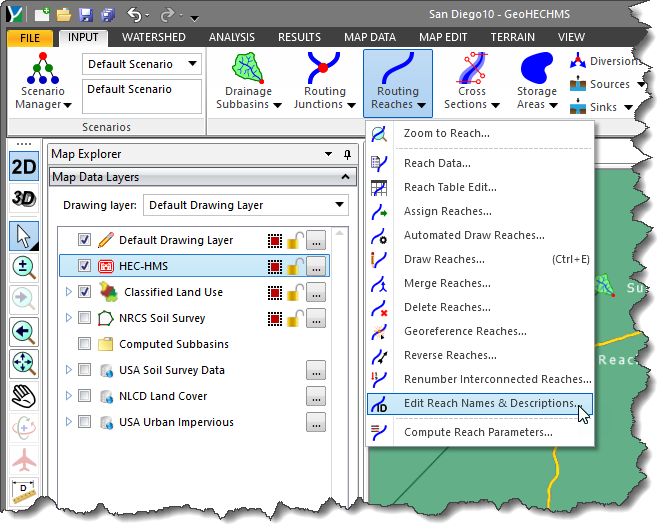
For example, from the Input ribbon menu, click on the Routing Reaches dropdown menu and select the Edit Reach Names & Descriptions command.
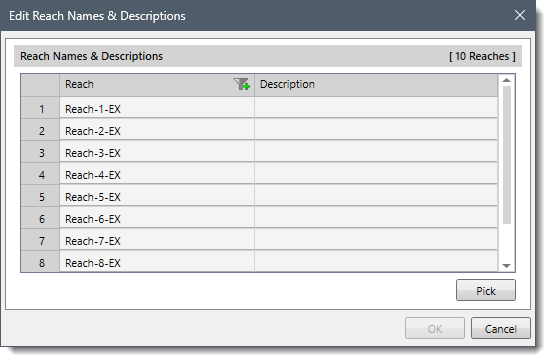
 The Edit Reach Names & Descriptions dialog box will be displayed, which can be used to edit the IDs and descriptions of all the available reaches.


CivilGEO G2 Reviews
4.8/5.0 Rating, Over 230 Reviews

GeoHECRAS is recognized as the top Civil Engineering Design Software with an average of 4.8 out of 5.0 rating from over 230 real user reviews on G2.


We use cookies to give you the best online experience. By agreeing you accept the use of cookies in accordance with our cookie policy.
When you visit any web site, it may store or retrieve information on your browser, mostly in the form of cookies. Control your personal Cookie Services here.


