
Welcome to CivilGEO Knowledge Base
Welcome to CivilGEO Knowledge Base
Selecting multiple elements can get frustrating, especially if the project has a lot of complex data loaded. To simplify this, CivilGEO software provides additional selection modes to assist the user.
From the toolbar, click on the Select tool and a tool space will slide out showing the available selection modes. Each selection mode is represented by its own icon.
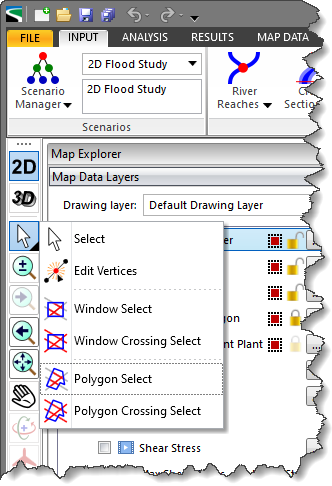
The following sections describe the various selection modes in detail.
The Select Mode is the default selection mode. This mode allows you to select one element at a time.
Holding down the [Shift] or [Ctrl] key allows you to select multiple elements. Clicking on an already selected element will cause the element to become deselected.
The Edit Vertices mode allows you to edit the individual vertices that make up an element. Choose this mode and then click on the element to be edited. You will see all of the individual vertices that make the object become visible. These vertices can then be moved, deleted, or added to.
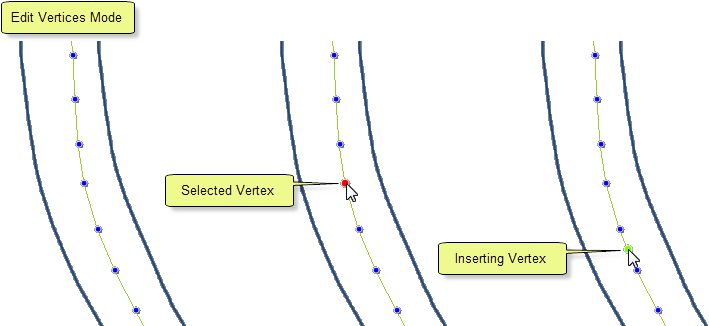
Vertices can also be edited by selecting the element and then pressing Function Key F4.
You can perform a window selection by clicking and then dragging. Click the first point on the left side and drag to the right and then release the mouse. This will select all elements that are located inside of the dragged window area.
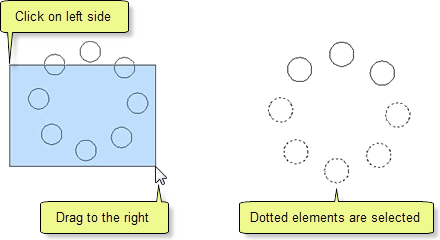
You can also choose the Select Window tool from the toolbar to perform the same selection operation.
You can perform a window crossing selection by reversing the direction of a window selection. Click the first point on the right side and drag to the left and then release the mouse. This will select all elements that are contained inside and are touching the dragged window.
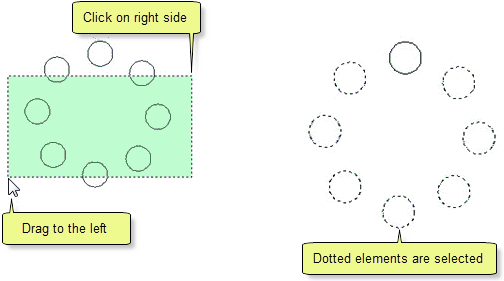
You can also choose the Select Window Crossing tool from the toolbar to perform the same selection operation.
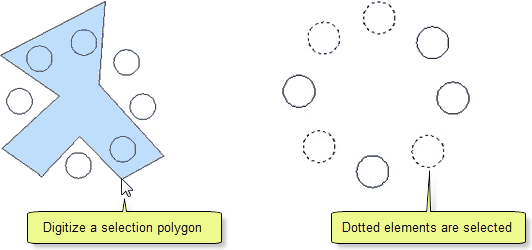
Choose the Select Polygon Window tool from the toolbar. This tool operates similarly to the Select Window tool, but you can define an unlimited number of points for the selection window. This tool will select all elements that are contained within of the digitized polygon area.
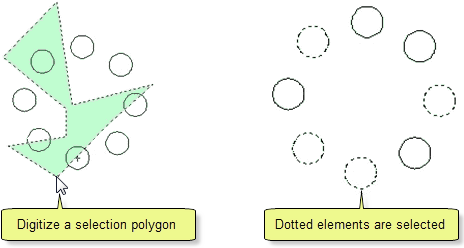
Choose the Select Polygon Crossing tool from the toolbar. This tool operates similarly to the Select Window Crossing tool, but you can define an unlimited number of points for the selection window. This tool permits selection of all elements that are contained inside and are touching the digitized polygon.


CivilGEO G2 Reviews
4.8/5.0 Rating, Over 230 Reviews

GeoHECRAS is recognized as the top Civil Engineering Design Software with an average of 4.8 out of 5.0 rating from over 230 real user reviews on G2.


We use cookies to give you the best online experience. By agreeing you accept the use of cookies in accordance with our cookie policy.
When you visit any web site, it may store or retrieve information on your browser, mostly in the form of cookies. Control your personal Cookie Services here.


