
Welcome to CivilGEO Knowledge Base
Welcome to CivilGEO Knowledge Base
When using CivilGEO’s engineering software, the Windows Open dialog box sometimes fails to locate the mapped network drives, even though it is visible in Windows Explorer. This issue can also occur while performing the installation of a CivilGEO software product on Windows 10, where you are unable to view or access mapped network drives.
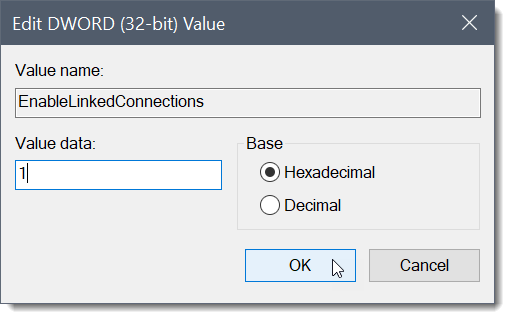
This issue can be easily corrected by configuring the EnableLinkedConnections registry value.
Disclaimer: This article contains information about modifying the registry. Improperly editing the registry can lead to software corruption and data loss. Before you modify the registry, make sure you back up the registry and understand how to restore the registry if a problem occurs. By proceeding beyond this point, you acknowledge that you understand the risks inherent in incorrectly editing the registry and that by proceeding, you agree to accept these risks.
Follow the steps given below to configure the EnableLinkedConnections registry value:
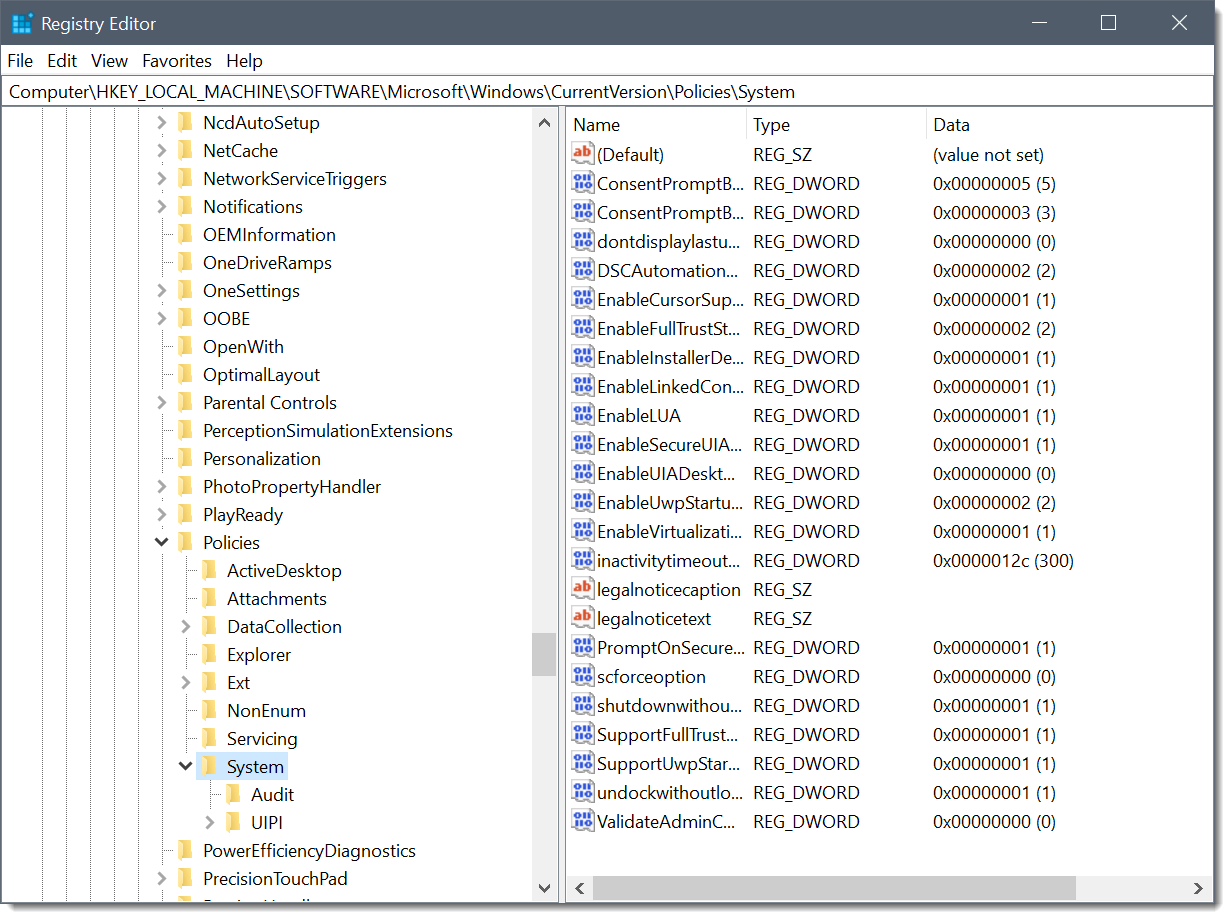
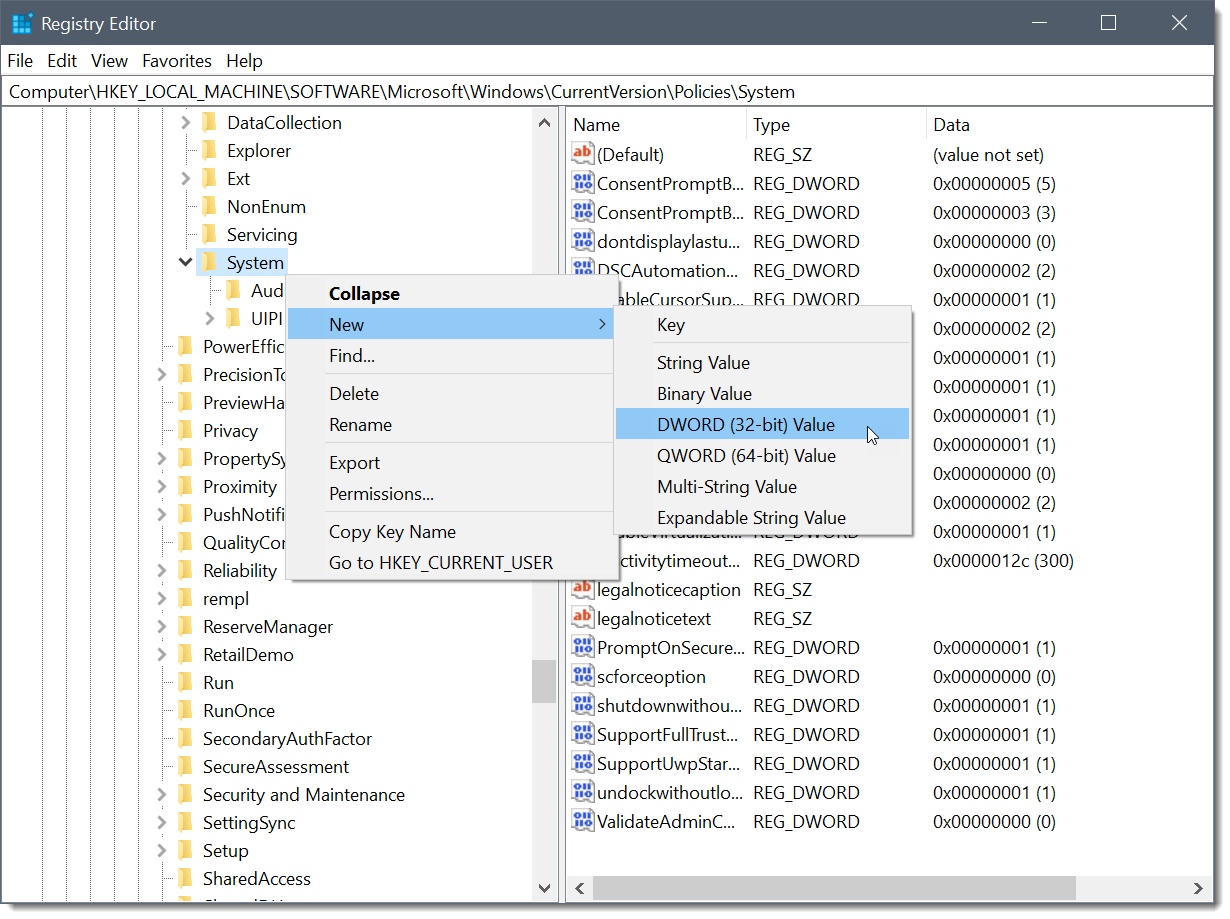
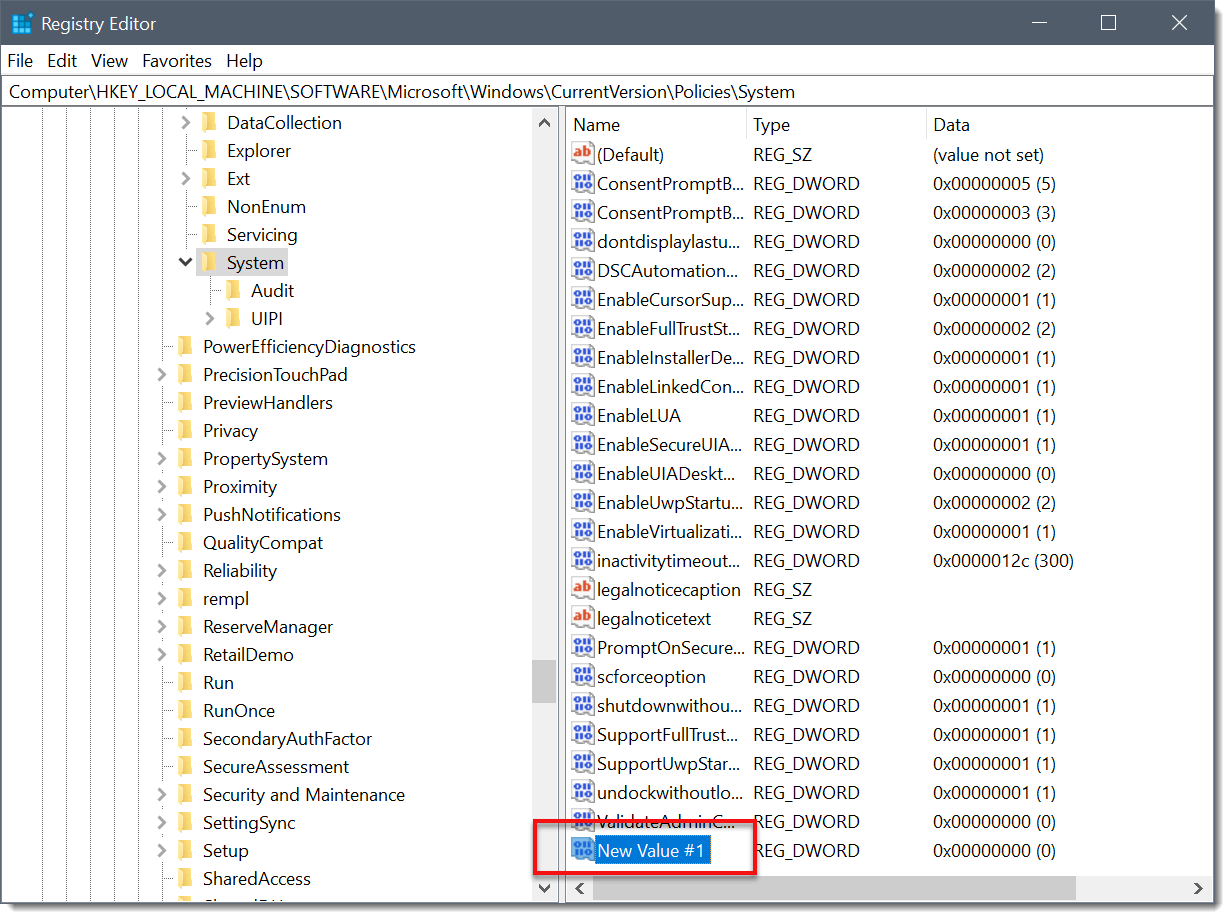
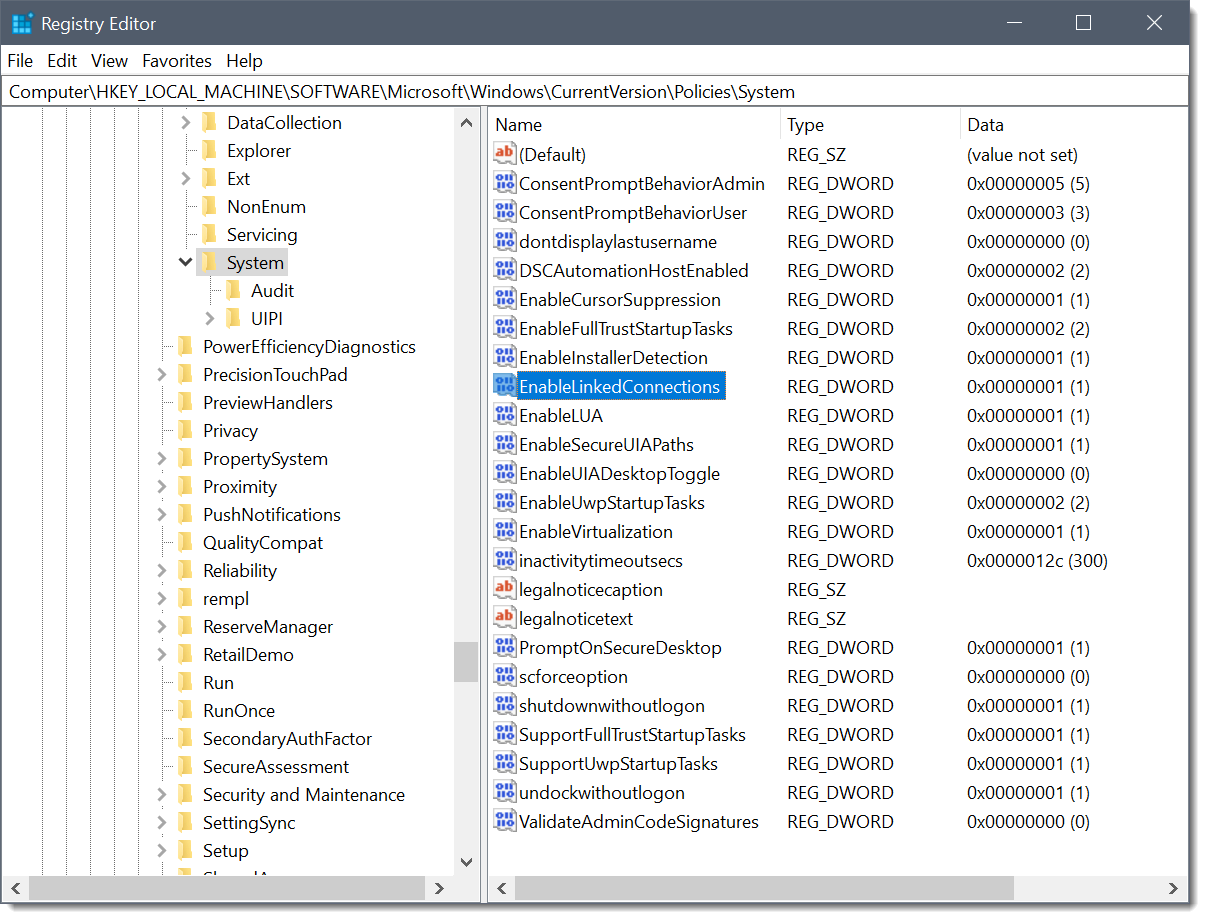 Note that if the EnableLinkedConnections value already exists, the user does not need to create a new DWORD (32-bit) Value, they can simply modify it using the steps below.
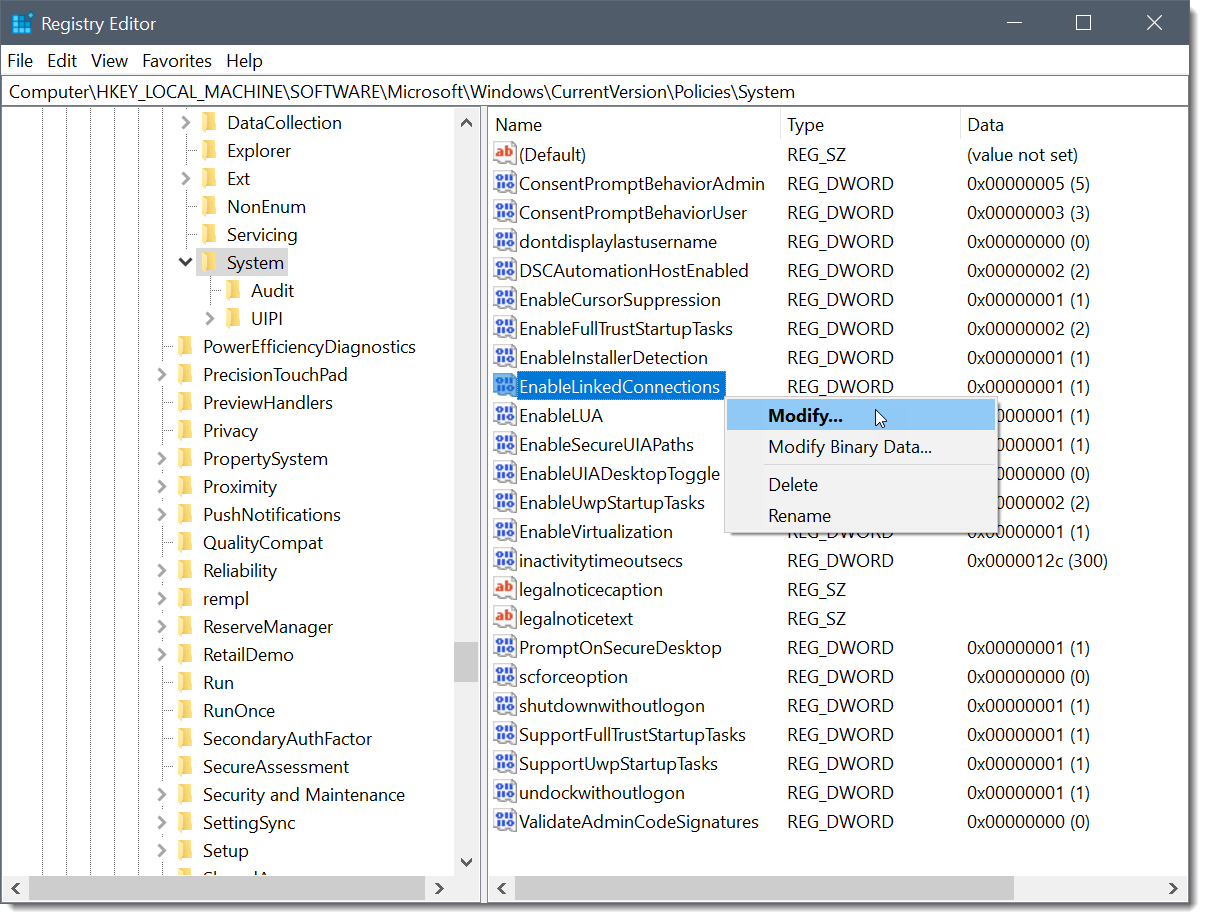


CivilGEO G2 Reviews
4.8/5.0 Rating, Over 230 Reviews

GeoHECRAS is recognized as the top Civil Engineering Design Software with an average of 4.8 out of 5.0 rating from over 230 real user reviews on G2.


We use cookies to give you the best online experience. By agreeing you accept the use of cookies in accordance with our cookie policy.
When you visit any web site, it may store or retrieve information on your browser, mostly in the form of cookies. Control your personal Cookie Services here.


