This article describes the necessary administrative steps to add a new user or new administrator to the CivilGEO Customer Portal.
Follow the steps below to add a new user or new administrator:
- Log in to the CivilGEO Customer Portal as a Customer Portal administrator. The Customer Portal dashboard will be displayed.
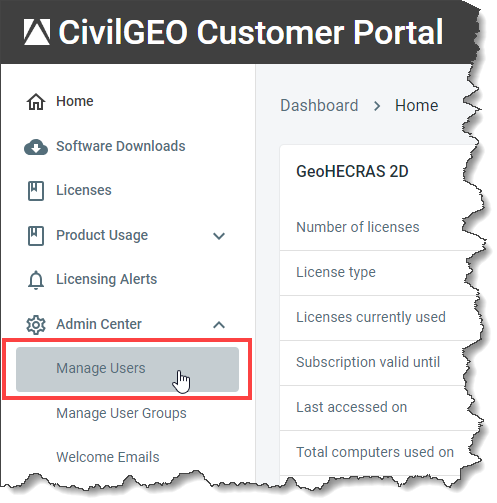
- From the left side panel, click on the Manage Users menu item under the Admin Center section.
- The Users page will be displayed. This page lists the users associated with your organization that have access to software licenses and/or the Customer Portal.
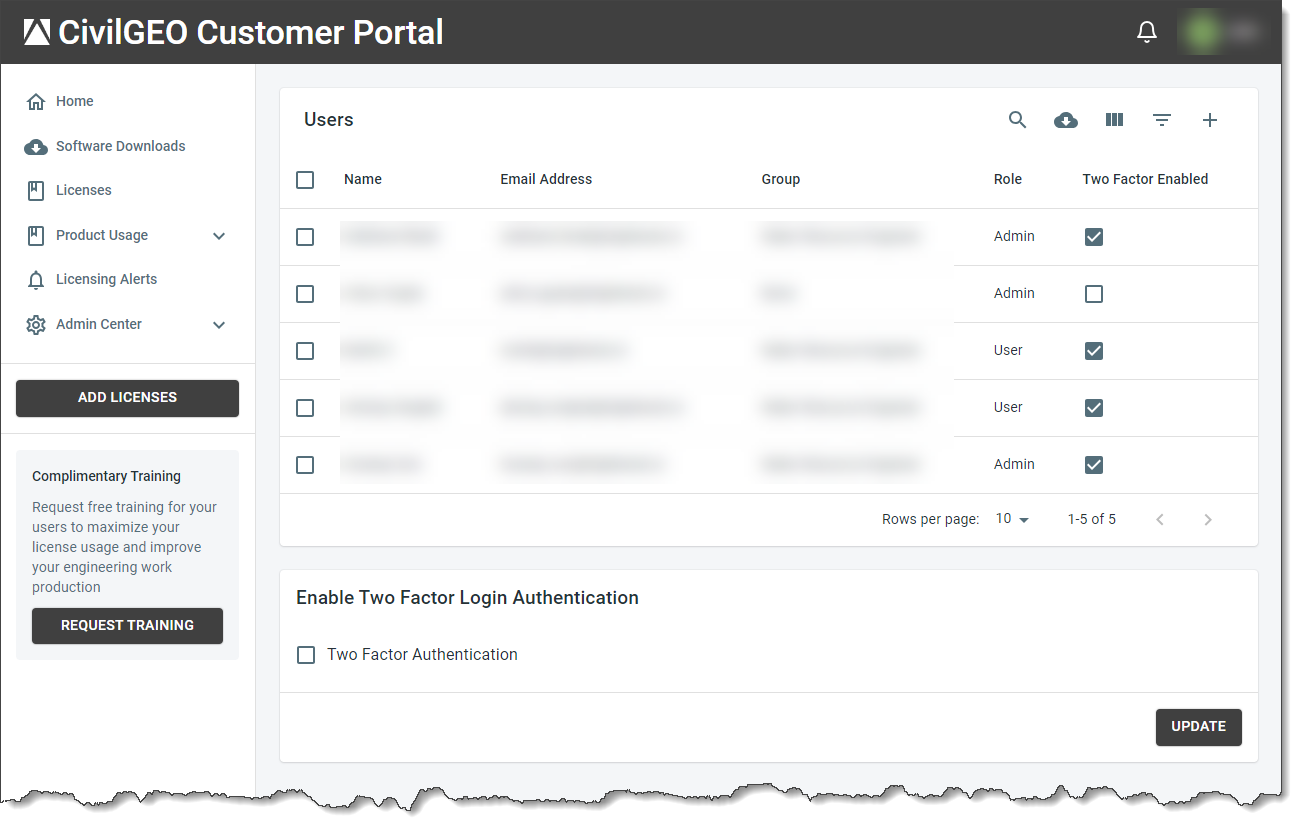
- Each line item includes the username, email address, group, role, and two-factor login authentication.
- Before adding a new user or administrator, make certain that the user’s name does not already exist in the list. If the user already exists, then you can edit or delete the user by clicking on the user’s name. Otherwise, continue to the next step to create a new user.
- Click the Add [+] symbol as shown below.
![Add [+] symbol](/wp-content/uploads/sites/25/2023/10/Customer-Portal-Creating-New-Users-Image-3.png)
- The Add User page will be displayed.

- Fill the required fields to be completed such as First Name, Last Name, Email, and Group.
- The fields under the Custom User Information section are optional as they are added by the administrator in your organization. These custom fields allow your organization to store additional data that may be specific to the organization’s needs, beyond the standard information provided by CivilGEO Customer Portal. Refer to this article in our knowledge base to learn how to add custom user fields in the Customer Portal.
- Before saving the user information, you need to choose the role for this user in your organization. Selecting the Admin checkbox will allow the user to manage all other users in your organization contained in the portal. By default, this checkbox is unchecked, and the user can only see the licenses and entitlements granted for his or her specific use. The user will not be able to see any other information about your organization.
- The Two-Factor Authentication checkbox is used to enable or disable two-factor authentication (2FA) for a newly added user to the Customer Portal. This allows the administrator to control whether two-factor authentication is required for specific individuals or all users in the Customer Portal. Refer to this article in our knowledge base to learn more about two-factor authentication in the Customer Portal.
- When finished, click the [ADD] button.
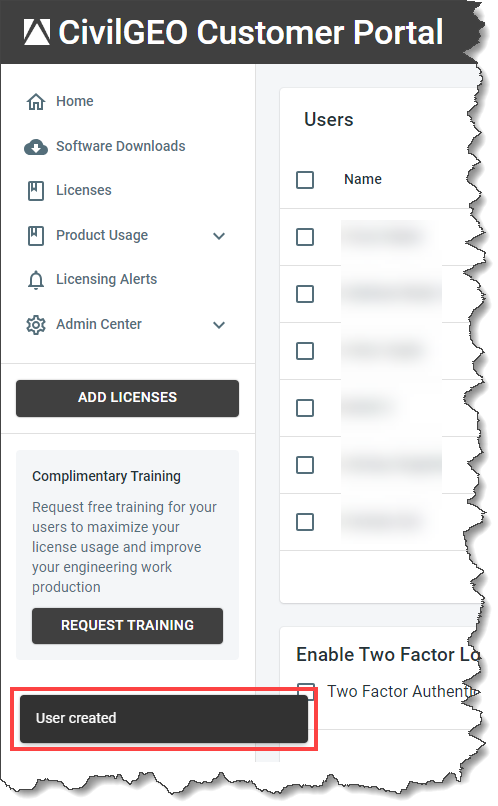
- A confirmation will be displayed indicating that the new user has been successfully created.
- The new user or administrator will soon receive an email with a link and password for initial login. The user will be prompted to change his password when he first logs in to the Customer Portal.
If you encounter any issues while adding a new user or administrator to the Customer Portal, please contact CivilGEO technical support. Our team will be glad to assist you further.


