The Raster Image Layer Properties dialog box allows the user to customize the display properties of a raster image (such as an aerial photo, scanned map, or other background image used for visual reference) within the project. This dialog box provides options to define the raster image’s visibility, color, border styling, and transparency. Additionally, it allows the user to change the current CRS (Coordinate Reference System) of the project and automatically apply the transformation scale factor on any particular layer to accurately map it to the project CRS. To learn more about the coordinate reference system (CRS), refer to this article in our knowledge base.
Follow the steps below to view and edit the raster image properties:
- Under the Map Data Layers panel, click the […] button next to the raster image layer.
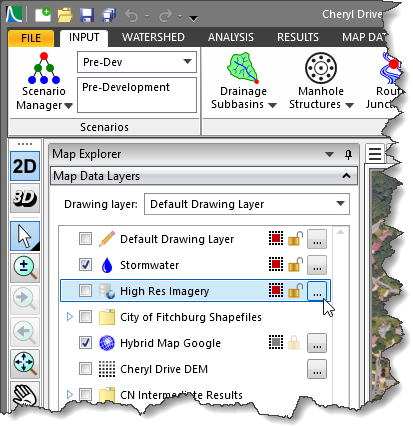
- The Raster Image Layer Properties dialog box will be displayed.

The Raster Image Layer Properties dialog box contains three tabs, as shown below:
- General Options
- Spatial Reference
- Transformation
General Options
The General Options tabbed panel allows the user to control the general settings and stylization options of the raster image layer. This tabbed panel contains the following two sections:
- General Information
- Stylization Options
General Information
This section contains read-only information about the directory location and name of the raster image file.
Stylization Options
This section allows the user to customize how the raster image is visually displayed on the Map View.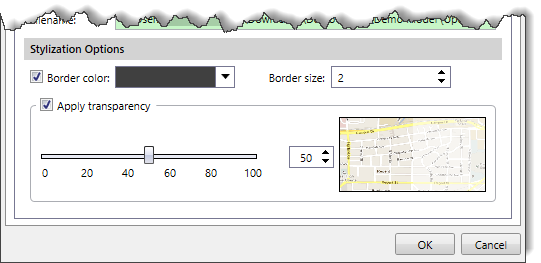
The following options are available in this section:
- Border color
This checkbox option allows the user to select the border color of the raster image. The user can define the border color using the Border color dropdown color palette. By default, the Border color checkbox is checked.
- Border size
This spin control entry field allows the user to define the thickness of the raster image border. By default, the software uses a value of 1. The user can enter a different value ranging from 1 to 11.
- Apply transparency
This checkbox option allows the user to adjust the transparency of the raster image so that the background Base Map or other underlying layers remain visible on the Map View. By default, the Apply transparency checkbox is unchecked. The user can modify the transparency value using the horizontal slider control or spin control button. A transparency value of 40 to 50% works well. A preview displayed within the dialog box provides real-time visual feedback of how the image will appear on the Map View after applying the selected transparency.
Spatial Reference
The Spatial Reference tabbed panel allows the user to manually assign the project’s CRS to the non-CRS referenced data layer if the data layer coordinates lie within the project’s CRS. Refer to this article in our knowledge base to learn more about spatial reference.
Transformation
The Transformation tabbed panel allows the user to automatically apply the transformation scale factor to any particular layer and accurately map it to the project coordinate reference system (CRS). Refer to this article in our knowledge base to learn more about layer transformation.