In GeoHECRAS, the Edit Flow Lengths command allows the user to view and edit flow lengths of a river reach measured between cross sections (or river stations). These flow lengths are defined for the left overbank, channel, and right overbank.
Note: For a specific river reach, the flow lengths for the left overbank, channel, and the right overbank are defined in the Geometry Data dropdown panel of the Cross Section Data dialog box. Refer to this article in our knowledge base to learn more about the Cross Section Data command in GeoHECRAS.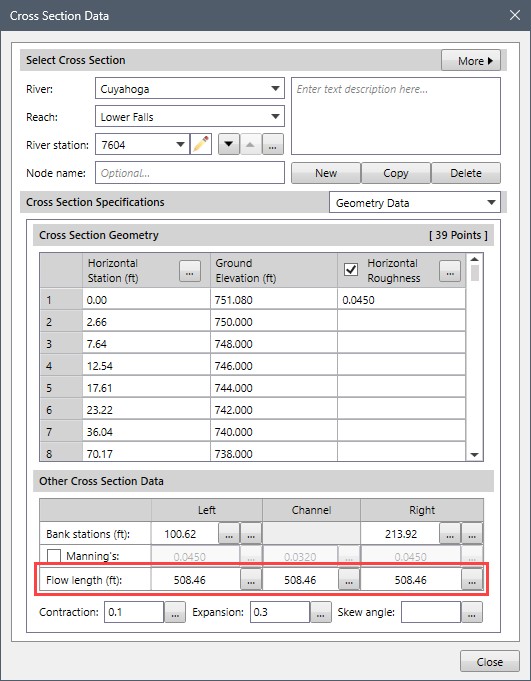
Typically, the channel flow length is measured along the thalweg, while the overbank flow lengths are measured along the anticipated flow paths of the center of mass of the overbank.
Although the three flow lengths are often similar, they can vary significantly in cases such as river bends or meandering channels. In such conditions, a discharged weighted flow length is determined based on the discharges in the main channel and left and right overbank segments of the river reach.
Follow the steps below to use the Edit Flow Lengths command:
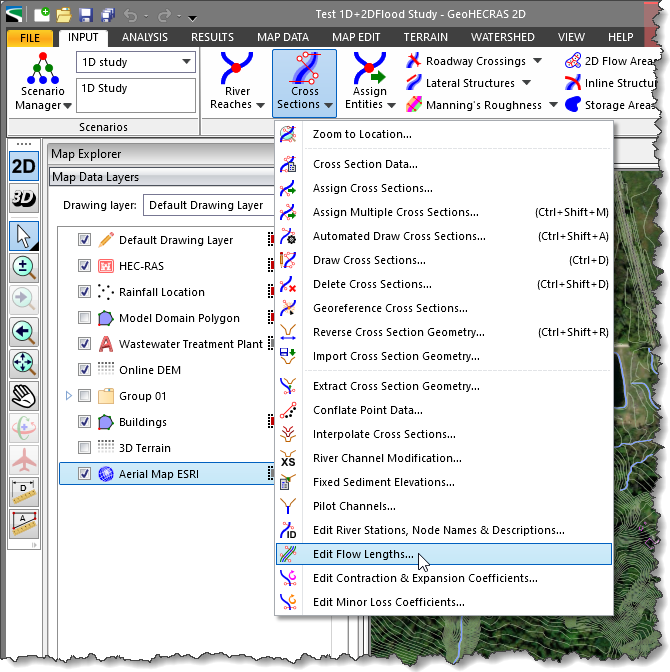
- From the Input ribbon menu, click the Cross Sections dropdown menu and select the Edit Flow Lengths command.
- The Edit Flow Lengths dialog box will be displayed.

The following sections describe how to interact with the Edit Flow Lengths dialog box.
Downstream Flow Length Data
The Downstream Flow Length Data section allows the user to select the river and the corresponding reach for editing flow lengths.
Follow the steps below to manually select the river and reach to be assigned for editing flow lengths:
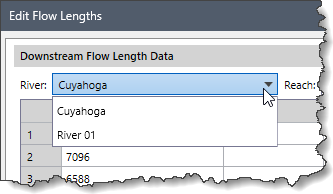
- Click on the River dropdown combo box and select the river to be assigned for purposes of editing the flow length.
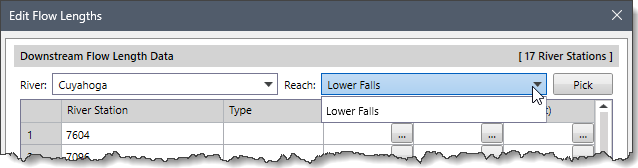
- Then, click the Reach dropdown combo box and select the corresponding reach to be assigned for editing the flow length.
Alternatively, click the [Pick] button to select the river and reach from the Map View, as shown below.![[Pick] button](https://knowledge.civilgeo.com/wp-content/uploads/2025/11/Edit-Flow-Lengths-Command-Image-6.png)
The Edit Flow Lengths dialog box will temporarily disappear, allowing the user to select the river reach from the Map View. After selecting the river reach, press the [Enter] key or right-click and select Done from the displayed context menu. The dialog box will be redisplayed with the river and reach shown as selected in the respective dropdown combo boxes.Notes:
- If a river reach is preselected from the Map View prior to running this command, then the selected river reach will be displayed in the River and Reach dropdown combo boxes.
- If the model contains a single river and reach, they will be automatically selected in the River and Reach dropdown combo boxes.
Downstream Flow Length Data Table
The Downstream Flow Length Data section contains a table that lists all the corresponding cross sections of the selected river reach, along with their left overbank, channel, and right overbank flow length values.
Note that structures such as culverts, lateral structures, and roadway crossings falling within the reach are identified in the Type column, as shown below. In addition, the corresponding Left, Right, and Channel flow length values will be disabled.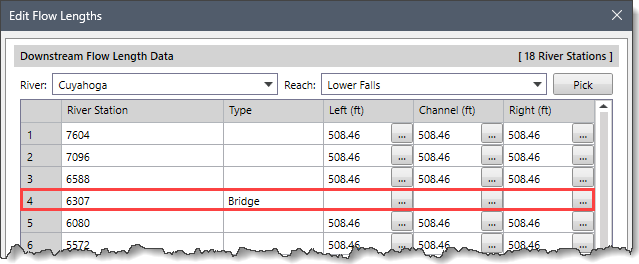
The right-click context menu of the data grid displays the commands to cut, copy, and paste data to and from the Windows clipboard. In addition, the user can export the grid data to Excel or PDF format and delete the grid data.
Selected Cells Group Editing
This section allows the user to edit the downstream flow length data in the Downstream Flow Length Data summary table (described above).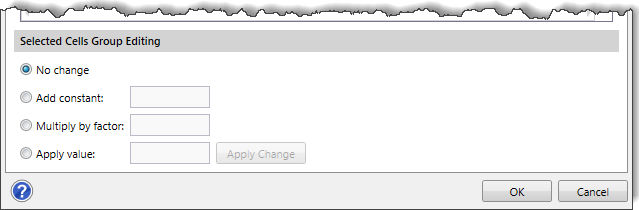
Follow the steps below to update the downstream flow length data:
- Select the cell in the Downstream Flow Length Data table whose data is to be updated. Hold down the [Ctrl] key to select multiple cells.
- After selecting the desired cell(s) to be updated, use one of the following options:
- No change
This is the default option. This radio button option will not make any changes to the selected cell’s value. - Add constant
This radio button option adds a constant value to the selected cell’s value. After selecting this option, enter the constant value (to be added to the selected cell’s value) into the adjacent entry field. - Multiply by factor
This radio button option multiplies the selected cell’s value by a user-defined number. After selecting this option, enter the value (to be multiplied by the selected cell’s value) into the adjacent entry field. - Apply value
This radio button option replaces the selected cell’s value with the user-defined value. After selecting this option, enter the value (to be replaced with the selected cell’s value) into the adjacent entry field.
- No change
- Click the [Apply Change] button to apply the defined downstream flow length adjustment. Note that the [Apply Change] button is disabled when the No Change radio button option is selected.
When all the downstream flow length information is updated in the Downstream Flow Length Data table, click the [OK] button to save the changes.