In GeoSTORM software, the Assign Routing Junction Elevations command allows the user to assign elevations to the selected routing junction(s). This command uses the elevation terrain surface to compute the elevation of an individual routing junction(s) with respect to the terrain surface available in the project.
Follow the steps below to use the Assign Routing Junction Elevations command:
- From the Input ribbon menu, click the Routing Junctions dropdown menu and select the Assign Routing Junction Elevations command.

- The Assign Routing Junction Elevations dialog box will be displayed, as shown below.

The following sections describe how to use the Assign Routing Junction Elevations command and interact with the above dialog box.
Selecting Routing Junctions
The Select Routing Junctions section allows the user to select single or multiple routing junction(s) for which elevations are to be assigned. This section includes a table that lists all the routing junction (s) contained within the current scenario of the project, as shown below.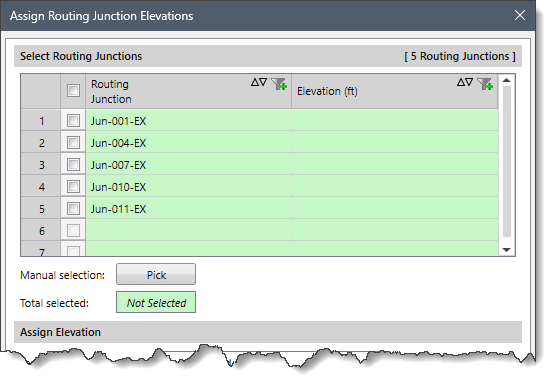
The user can select the routing junction(s) using any of the following methods for assigning elevations:
- Check the checkboxes corresponding to each routing junction in the Select Routing Junctions section.
- Click the [Pick] button, the Assign Routing Junction Elevations dialog box will temporarily disappear, and a prompt will be displayed on the status bar instructing the user to select the routing junction(s) from the Map View. After selecting the routing junction(s), press the [Enter] key or right-click and choose Done from the displayed context menu. The Assign Routing Junction Elevations dialog box will be redisplayed.
- Alternatively, press and hold down the [Ctrl] key while selecting the routing junction(s) directly from the Map View. After the selection is done, open the Assign Routing Junction Elevations dialog box, and the selected routing junction(s) will be shown as selected/checked within the Select Routing Junctions section.
After selecting the routing junction(s), the total number of selected routing junction(s) will be displayed in the Total selected read-only field, as shown below.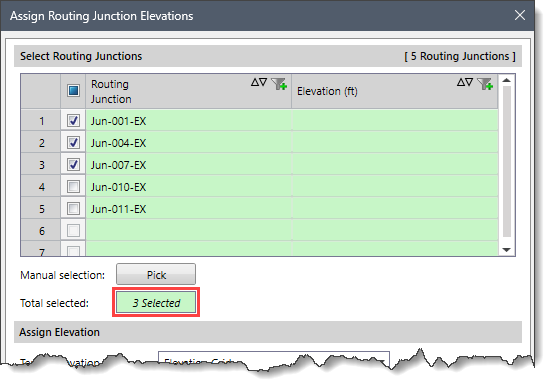
Assign Elevation
This section allows the user to assign elevations to the routing junction(s) using a terrain model.
Terrain Elevation Source
Depending upon the terrain elevation source type selected, the contents of the Assign Elevation section changes to specify additional elevation data information.
The Terrain elevation source dropdown combo box supports the following surface types:
- Elevation Grid
- LandXML Data
- TIN surface
Elevation Grid
If the user selects Elevation Grid as the terrain elevation source, the contents of the Assign Elevation section changes, as shown below.
The following option is displayed when Elevation Grid is selected as the terrain elevation source:
- Elevation grid layer
This dropdown combo box allows the user to select the elevation grid layer available in the project.
LandXML Data
If the user selects LandXML Data as the terrain elevation source, the contents of the Assign Elevation section changes, as shown below.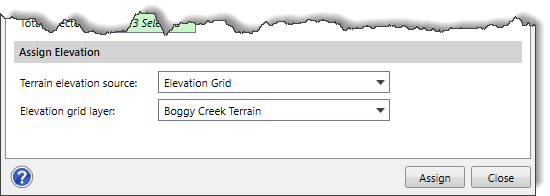
The following options are displayed when LandXML Data is selected as the terrain elevation source:
- TIN surface layer
This dropdown combo box allows the user to select the TIN surface layer type.
- TIN surface
This dropdown combo box allows the user to select the TIN surface type.
TIN Surface
If the user selects TIN Surface as the terrain elevation source, the contents of the Assign Elevation section changes, as shown below.
The following options are displayed when TIN Surface is selected as the terrain elevation source:
- TIN surface layer
This dropdown combo box allows the user to select the TIN surface layer type.
- TIN surface
This dropdown combo box allows the user to select the TIN surface type.
Assigning Routing Junction Elevations
Once the data have been defined in the Assign Routing Junction Elevations dialog box, click the [Assign] button and the software will assign elevations to the selected routing junction(s).