
Welcome to CivilGEO Knowledge Base
Welcome to CivilGEO Knowledge Base
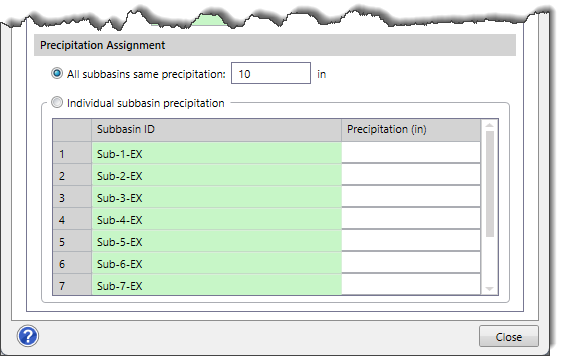
GeoHECHMS software supports rainfall distributions in addition to those included in the HEC-HMS software to define precipitation data. The user can browse to the location of interest by selecting the country and then the local region, and the software will provide the rainfall distribution for the specified storm frequency. In addition, the user can define his own “custom” rainfall distributions. The user can either assign the same rainfall to all subbasins or vary the rainfall on a subbasin-by-subbasin basis.
Follow the steps below to select the rainfall distribution or create custom rainfall distributions to be used in the HEC-HMS model:
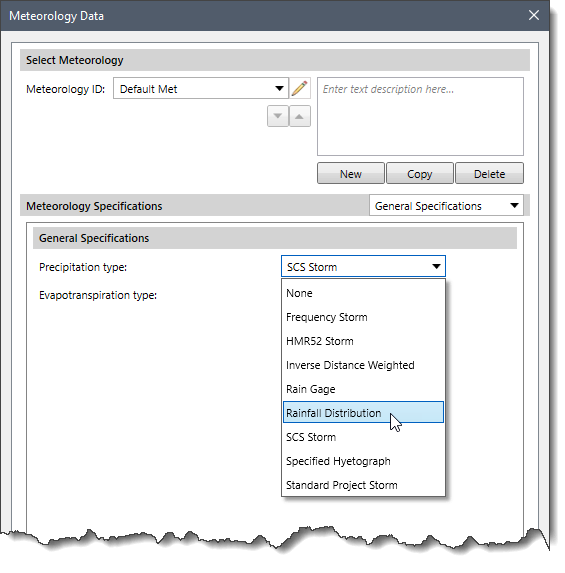 Refer to this article in our knowledge base to learn about other precipitation types.
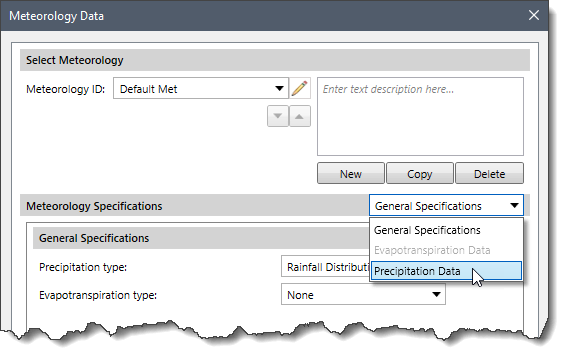
![Click [Select] button](/wp-content/uploads/sites/25/2024/02/Rainfall-Distribution-Img-5.png)
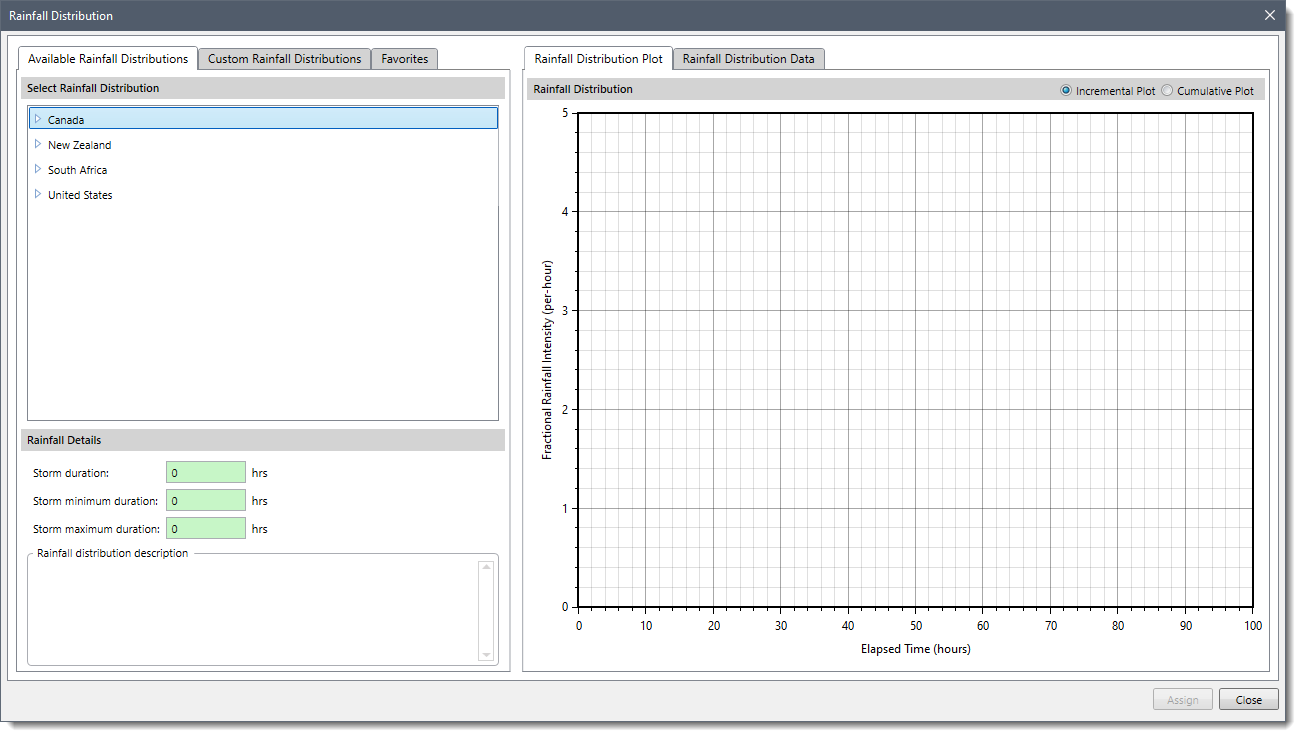
The below sections explain how to define the rainfall distribution and interact with the above dialog box.
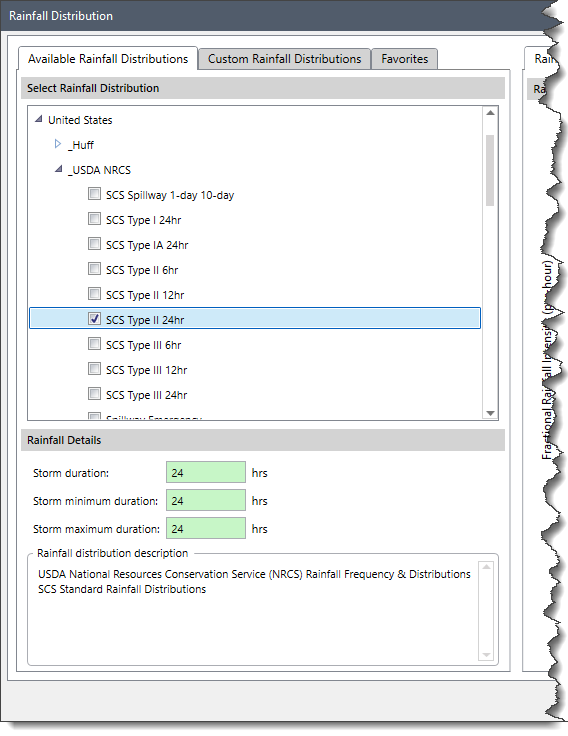
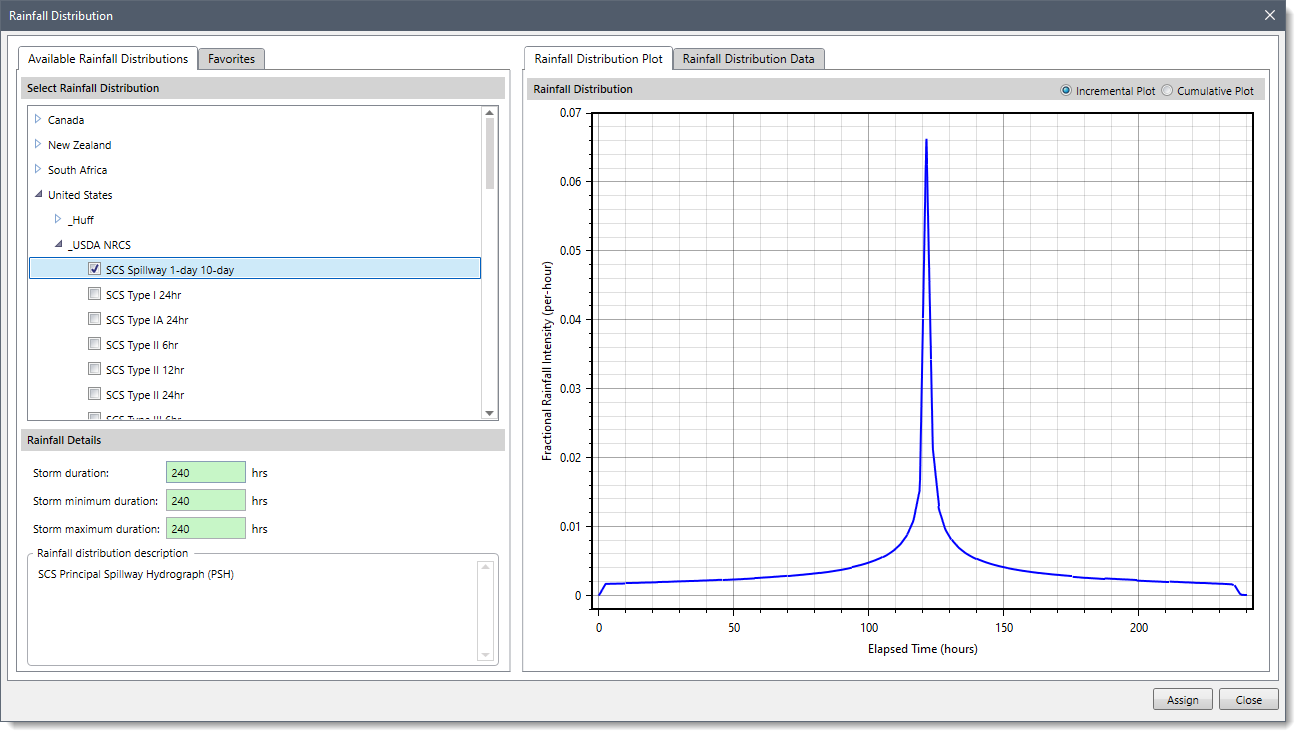
The Available Rainfall Distributions panel lists all the rainfall distributions for various world regions in alphabetical order. Both predefined “factory” rainfall distributions and custom rainfall distributions are listed in this panel.
Note that more than one checkbox entry can be checked in the list to compare rainfall distributions in the Rainfall Distribution Plot panel.
The Rainfall Details section provides various details for the currently selected rainfall distribution.
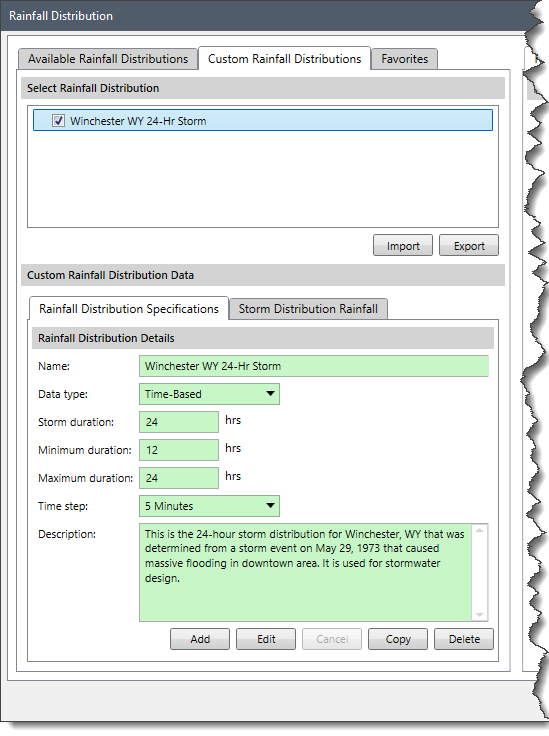
The Custom Rainfall Distributions panel allows the user to define custom rainfall distributions not included in the software’s rainfall distribution database.
The following sections are provided in this panel:
This section lists all the custom rainfall distributions that are defined. The custom rainfall distributions are also listed in the Available Rainfall Distributions panel.
The software allows the user to share custom rainfall distributions with other users using the [Import] and [Export] buttons.
Clicking the [Import] button will display the Open dialog box. The user can import *.storm_dist file type, which can contain one or multiple rainfall distributions. When importing a rainfall distribution file with rainfall distributions that are already contained in the software, the software will ignore the duplicate rainfall distributions contained in the imported file.
Clicking the [Export] button will display the Export Custom Storm Distributions dialog box. This dialog box allows the user to export all the custom rainfall distributions that are defined.
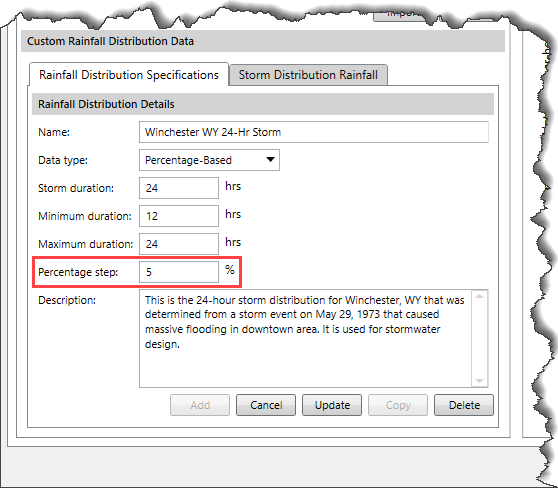
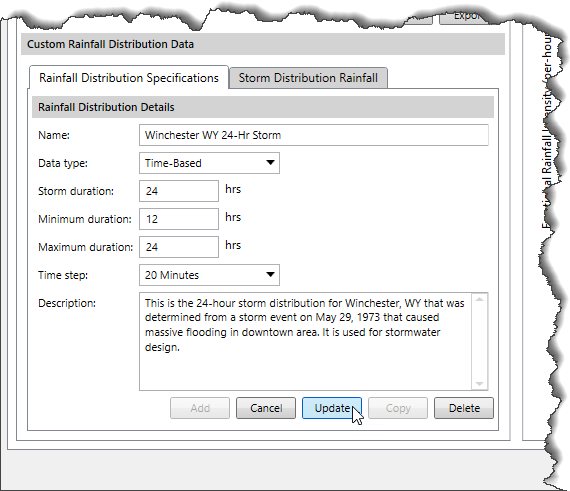
This panel contains fields that define the custom rainfall distribution. The fields display the details of the already defined custom rainfall distribution selected in the Select Rainfall Distribution section. Additionally, it also allows the user to add, edit or delete custom rainfall distribution.
Note that the fields in this panel are read-only by default.
The following fields are available in the panel:
Based on the option selected by the user, different parameters will be provided to the user for additional information.
The fields will become editable by clicking the [Edit] or [Add] button.
Clicking the [Edit] button allows the user to edit the already defined custom rainfall distribution selected in the Select Rainfall Distribution section. On clicking the [Edit] button, the [Cancel] button is replaced with the [Update] button, and the [Edit] button is replaced with the [Cancel] button. After editing the field values, the user can click the [Update] button to save the changes.
Clicking the [Add] button allows the user to define a new custom rainfall distribution to be added to the Select Rainfall Distribution section.
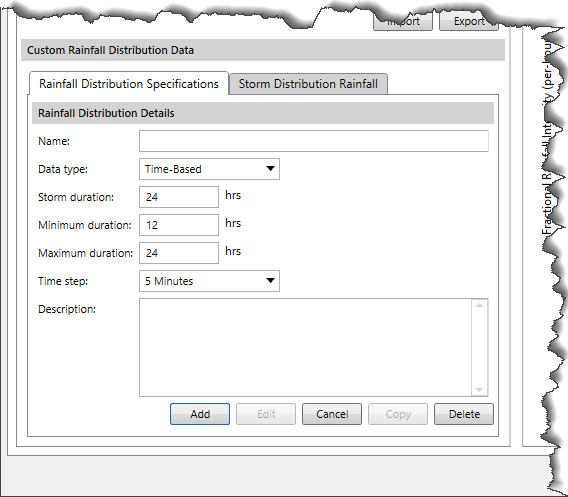
On clicking the [Add] button, the fields become editable. The user can define the data for the new custom rainfall distribution and then click the [Add] button again to add this rainfall distribution to the Select Rainfall Distribution section.
The user can cancel defining the custom rainfall distribution any time by clicking the [Cancel] button.
The user can also create a copy of or delete the currently selected custom rainfall distribution using the [Copy] and [Delete] buttons.
This panel contains a data grid that is used to store the fractional rainfall data for the custom storm distribution.
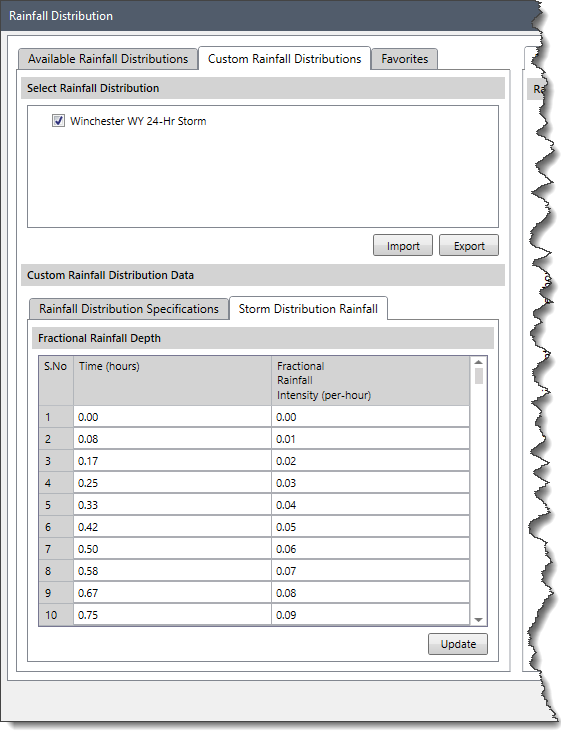
The total number of rows in the data grid is calculated using the Time step and Storm duration values.
The following columns are provided in the data grid:
The Favorites panel allows the user to store the predefined rainfall distributions that are used on a regular basis.
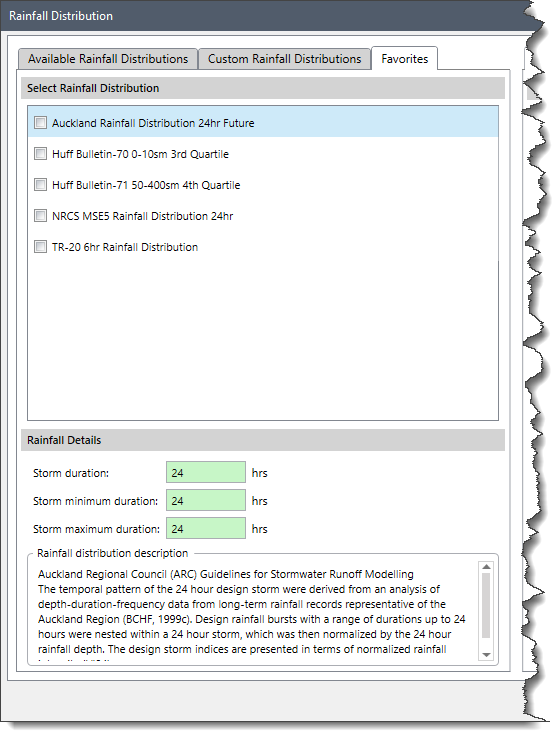
The user can select a favorite rainfall distribution and add it to the Favorites panel. In this manner, the user does not have to scroll through the general listing in the Available Rainfall Distributions panel each time he or she sets up a model.
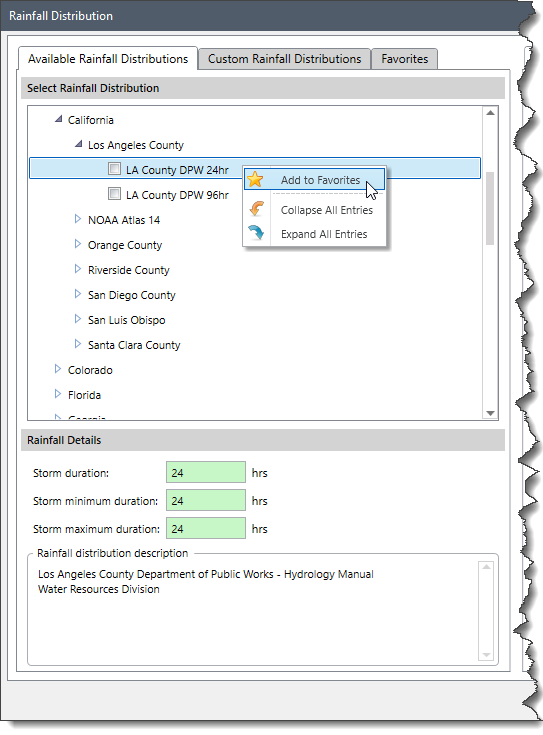
To add a rainfall distribution to the Favorites panel, the user can select the rainfall distribution from the Available Rainfall Distributions panel. Then, right-click and choose the Add to Favorites option from the displayed context menu. The rainfall distribution will be added to the Favorites panel.
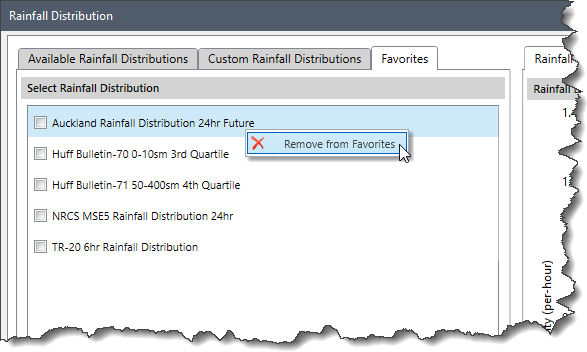
If the user wants to remove any rainfall distribution from the Favorites panel, select the entry and then right-click and choose Remove from Favorites from the displayed context menu.
The Rainfall Distribution Plot panel on the right side of the dialog box displays a plot for the selected rainfall distribution(s).
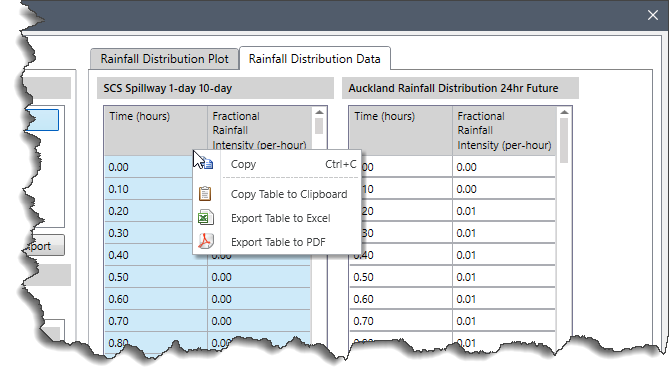
The Rainfall Distribution Data panel shows a data grid with information that is contained in the graphical plot. Note that there are separate data grids for each rainfall distribution since they may have a different Time step and/or Storm duration defined.
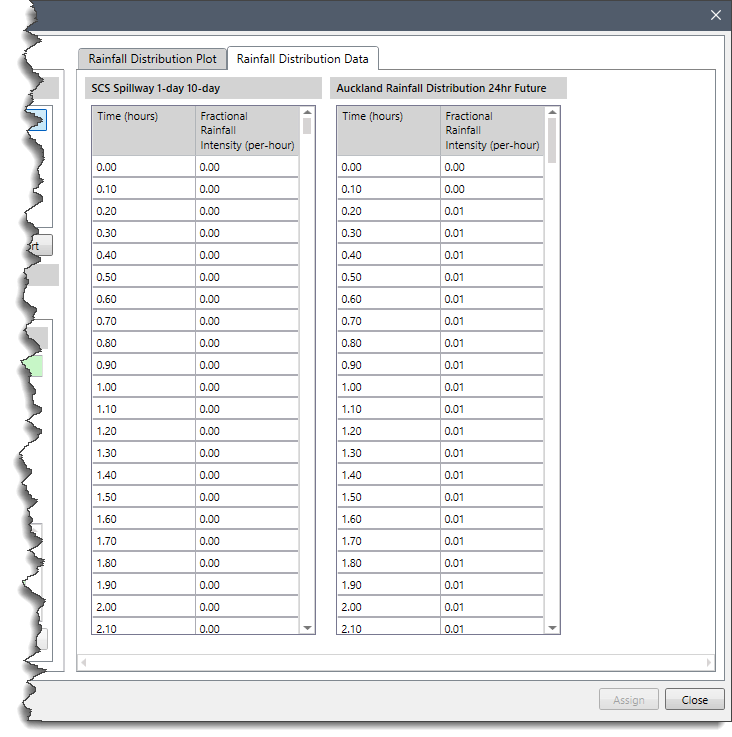
The user can right-click anywhere on the data grid to display a context menu. The context menu provides various commands to copy the data to the Windows clipboard and export the data to a spreadsheet or pdf document.
Once the desired rainfall distribution is selected, the user can click the [Assign] button. The selected rainfall distribution will be assigned for the meteorological model.
![[Assign] button](/wp-content/uploads/sites/25/2022/11/Rainfall-Distribution-Img-14.png)
Note that only one rainfall distribution can be selected from the Available Rainfall Distributions panel or the Custom Rainfall Distributions panel. If no rainfall distribution or multiple rainfall distributions are selected, then the [Assign] button is disabled.
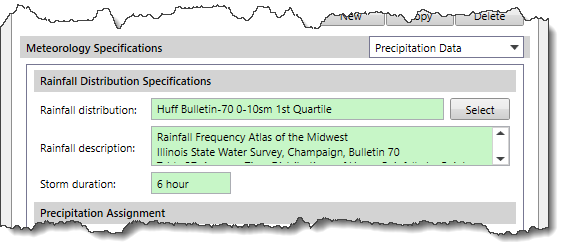
Once the user clicks the [Assign] button and the selected rainfall distribution is assigned for the meteorological model, the Precipitation Data panel of the Meteorology Data dialog box is redisplayed.
The following sections describe how to interact with the Precipitation Data panel of the Meteorology Data dialog box.
This section of the data panel includes the following parameters.
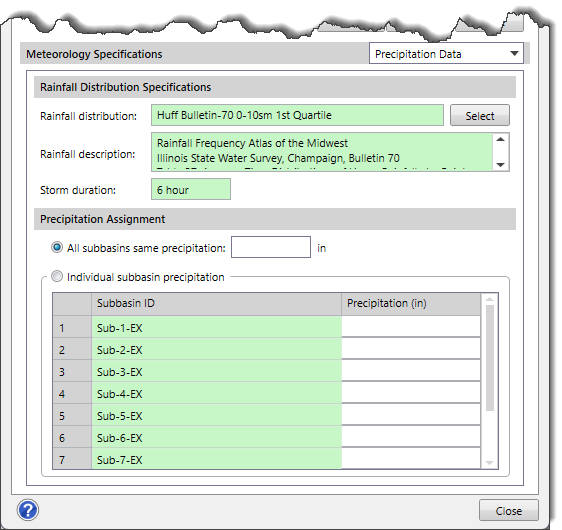
This section of the data panel includes the following input parameters:


CivilGEO G2 Reviews
4.8/5.0 Rating, Over 230 Reviews

GeoHECRAS is recognized as the top Civil Engineering Design Software with an average of 4.8 out of 5.0 rating from over 230 real user reviews on G2.


We use cookies to give you the best online experience. By agreeing you accept the use of cookies in accordance with our cookie policy.
When you visit any web site, it may store or retrieve information on your browser, mostly in the form of cookies. Control your personal Cookie Services here.


