1. Home
  2. Knowledge Base
  3. Polyline and Polygon Vertices Editing

Polyline and Polygon Vertices Editing

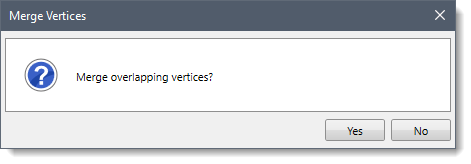
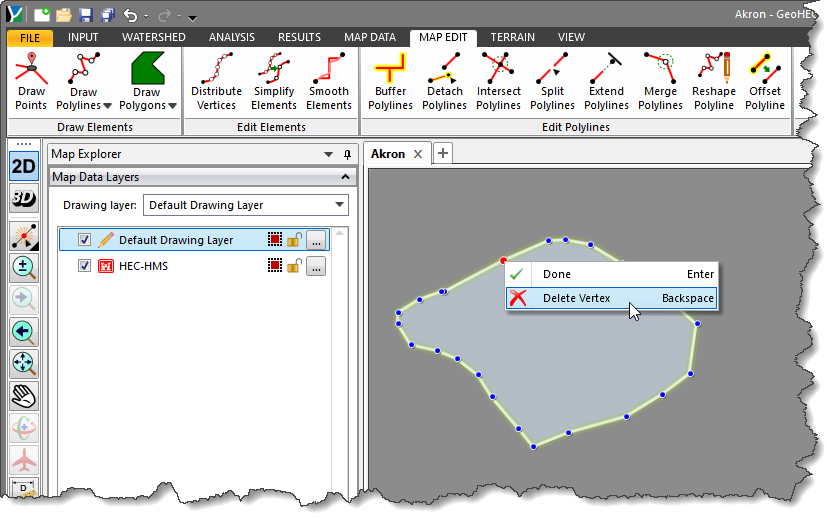
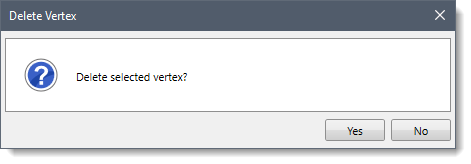
Polylines and polygons are constructed with individual line segments and connecting vertices. When working with polylines and polygons, the user may sometimes need to edit vertices, or points that define the shape of the polyline and polygon feature. Editing vertices allows the user to modify the shape and size of the polyline and polygon, as well as add, remove, move, or merge vertices as needed. This article describes how to edit the vertices that make up polylines and polygons.

Vertex Tracking

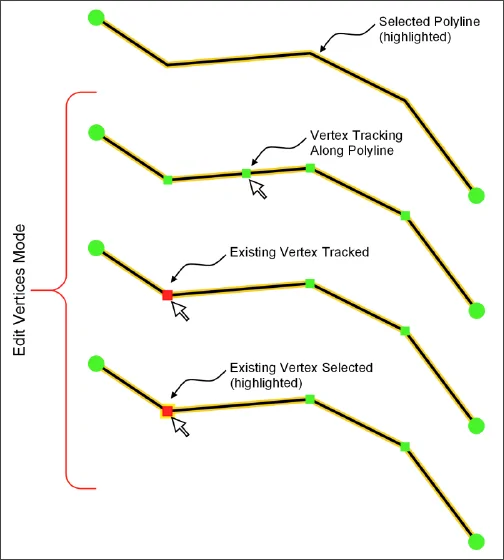
In the vertex editing mode, as the user moves the cursor over the selected polyline or polygon edge, a tracking vertex follows the cursor along the polyline and polygon edge. If the user moves outside of the selected polyline or polygon boundary, the tracking vertex is no longer displayed. If the user moves back within the polyline or polygon boundary, the tracking vertex is again displayed.

Notes:

  • When the cursor is over an existing vertex (including the ends of the polyline), the tracking vertex is displayed as red.
  • When the cursor is not over an existing vertex, the tracking vertex is displayed as green.

The following example illustrates vertex tracking:
vertex tracking illustration

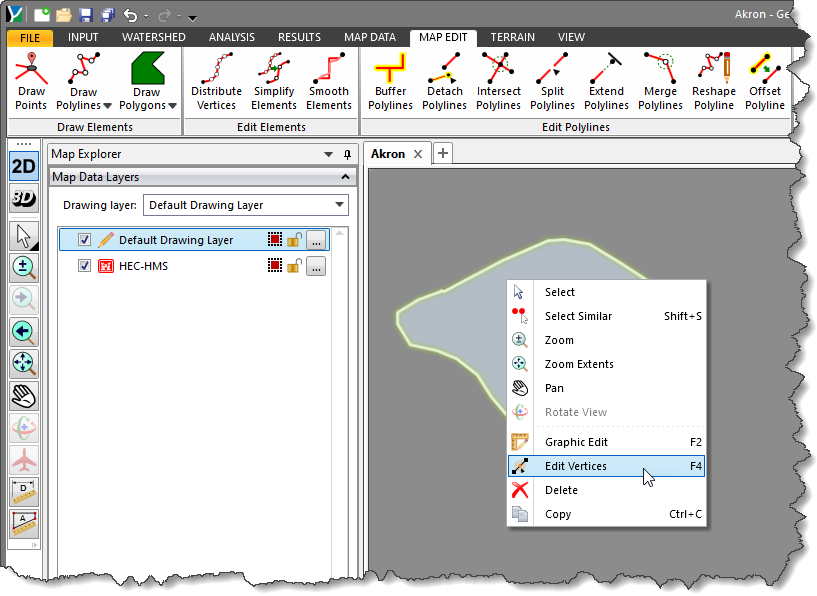
Follow the steps below to edit polyline or polygon vertices:

  1. Click on the polyline/polygon to be edited. The selected polyline/polygon will be highlighted on the Map View.
  2. Press the function key [F4] or right-click and select the Edit Vertices command from the displayed context menu.
    Edit Vertices right-click context menu command
  3. The selected polyline/polygon will remain highlighted, and its vertices will be ready to be graphically edited.
  4. Click on the vertex that you want to edit to select it.
  5. The user can move a vertex to a new location, add new vertices, merge vertices, or delete vertices that are no longer needed.
  6. To move a vertex:
    • Position the pointer on the vertex to be moved, the tracking vertex will be displayed as red.
    • Click and hold down the mouse button to drag the selected vertex to a new position.
    • Once finished, release the mouse button to stop moving the selected vertex.
  7. To add a vertex:
    • Position the cursor along the polyline or polygon edge and click on it to add a new vertex.
    • Reposition the new vertex as described above, if needed.
  8. To merge vertices:
    • Click and hold down the mouse button to drag the selected vertex over an adjacent vertex.
    • The following confirmational dialog box will be displayed.
      Merge Vertices dialog box
    • Click the [Yes] button to merge the vertices.
  9. To delete a vertex:
    • Select the vertex to be deleted.
    • Press the [Backspace] key or right-click and choose the Delete Vertex command from the displayed context menu.
      Delete Vertex right click context menu command
    • The following confirmational dialog box will be displayed.
      Delete Vertex dialog box
    • Click the [Yes] button to delete the vertex.
  10. Once finished, the software will save the changes and update the feature with the new shape.
  11. The user can press the [Esc] key to abort the editing process.

About the Author cxscvlgeo

  • Was this helpful?
  • YesNo

Was this article helpful?