
Welcome to CivilGEO Knowledge Base
Welcome to CivilGEO Knowledge Base
Engineering software—such as CivilGEO’s engineering software—are resource-intensive programs. Even computers with the most modern hardware capabilities can become slower with regular updates to these software programs. A computer system running civil engineering software can be sluggish for a variety of reasons, including compatibility issues and bugs, slow operating system performance, viruses, or other kinds of malware, increased graphical workload, and more.
If you notice that your computer is getting slower, it does not necessarily mean you have to replace it immediately. A few simple optimizations can significantly speed up the performance of your computer.
This article describes various techniques that can be used for optimizing the performance of a computer.
Microsoft Windows 11 is a fast operating system, especially on modern hardware. At times, however, factors such as time-consuming antivirus checks, unnecessary background, and startup software, low hard disk space, and defective device drivers can degrade the computer’s performance. The overall performance of a computer can be significantly improved by adjusting some basic settings in Microsoft Windows.
The following sections describe how to optimize the performance of a computer:
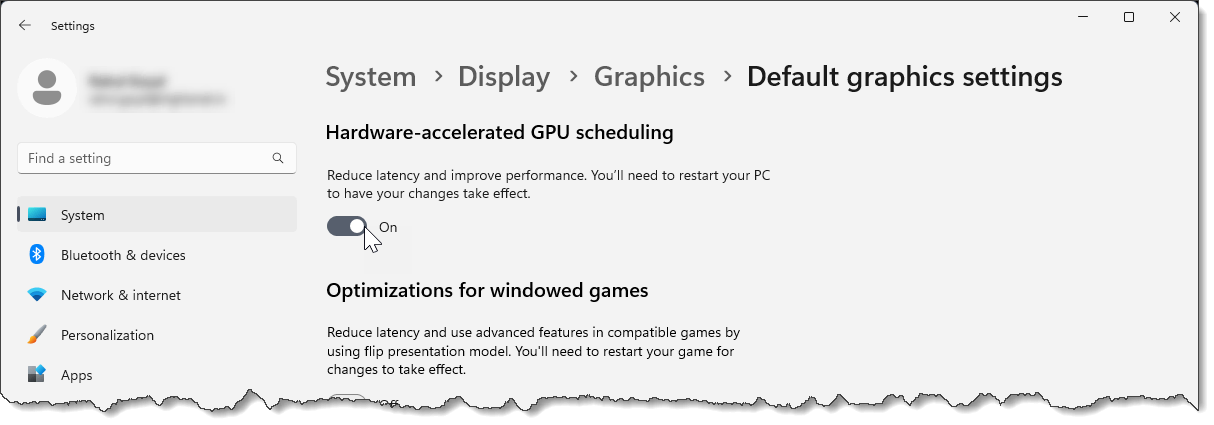
The Windows hardware acceleration (introduced with Windows 10 May 2020 update) feature helps users boost Windows performance and run the software hang-free. Hardware acceleration shifts the processing load of the general-purpose processor (CPU) to other specialized hardware to improve the CPU’s processing power and the system’s overall performance.
Note that the hardware acceleration feature is only supported on the recent graphics cards that have the necessary hardware, combined with a WDDMv2.7 driver that exposes this support to Microsoft Windows.
To enable hardware acceleration in your computer, follow the steps below:

Many modern computers contain integrated graphics (graphics card inbuilt into the motherboard) for basic graphics display and a discrete high-performance graphics card for more demanding graphical tasks to reduce power consumption.
When working with graphically intense software, such as CivilGEO engineering software, switching the graphics adapter in the middle of operation can lead to display and performance issues or software crashes. Also, by default, the system may load the software with the low-end video option and not switch to the high-performance GPU (Graphics Processing Unit). Therefore, configuring the system to always use high-performance discrete graphics for the software will avoid these issues.
Beginning with Windows 10 20H1, the Windows operating system has its own option to assign high-performance graphics card to use for the software. It overrides any settings made in the graphics card’s control panel.
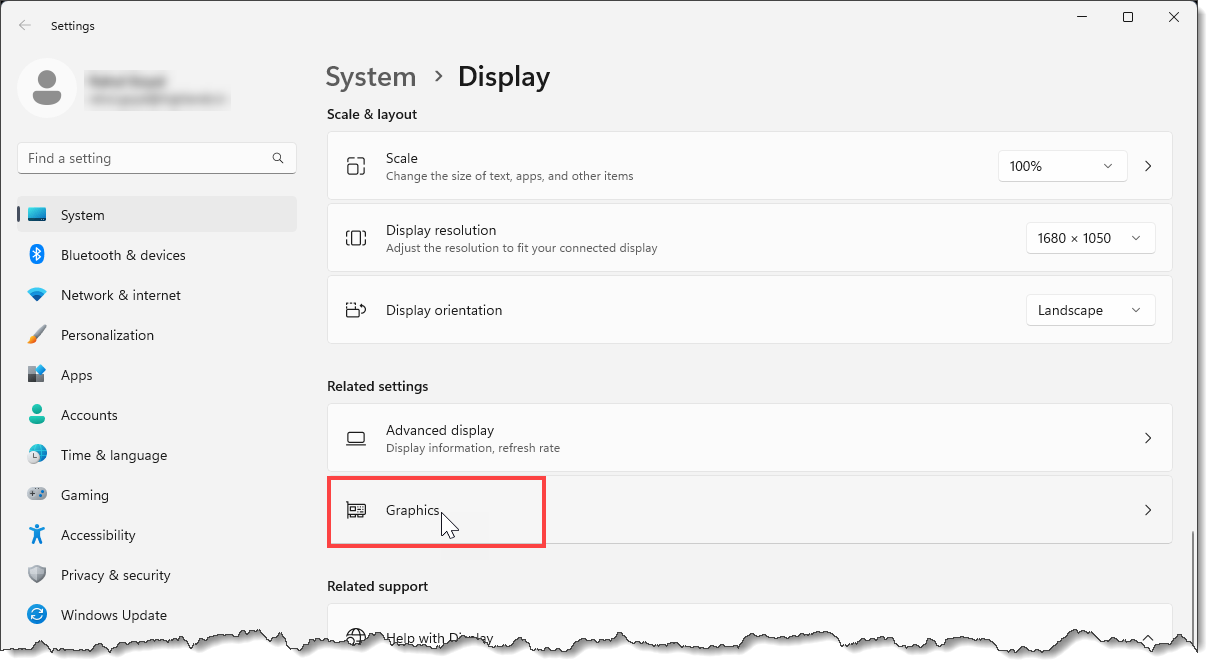
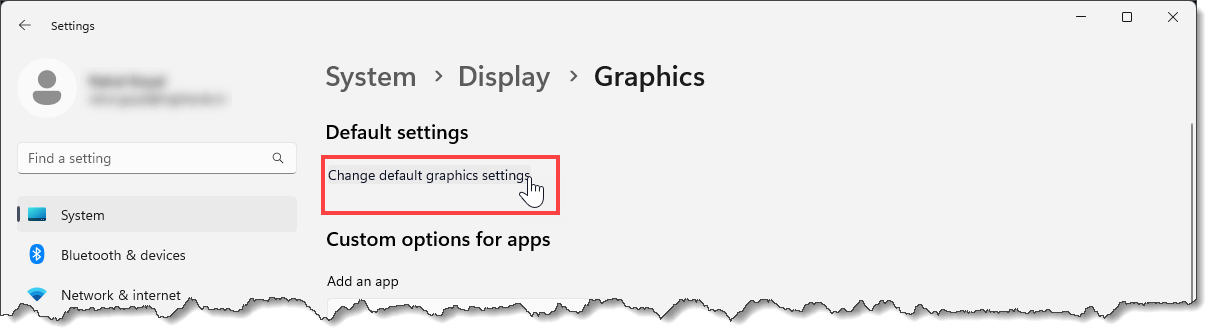
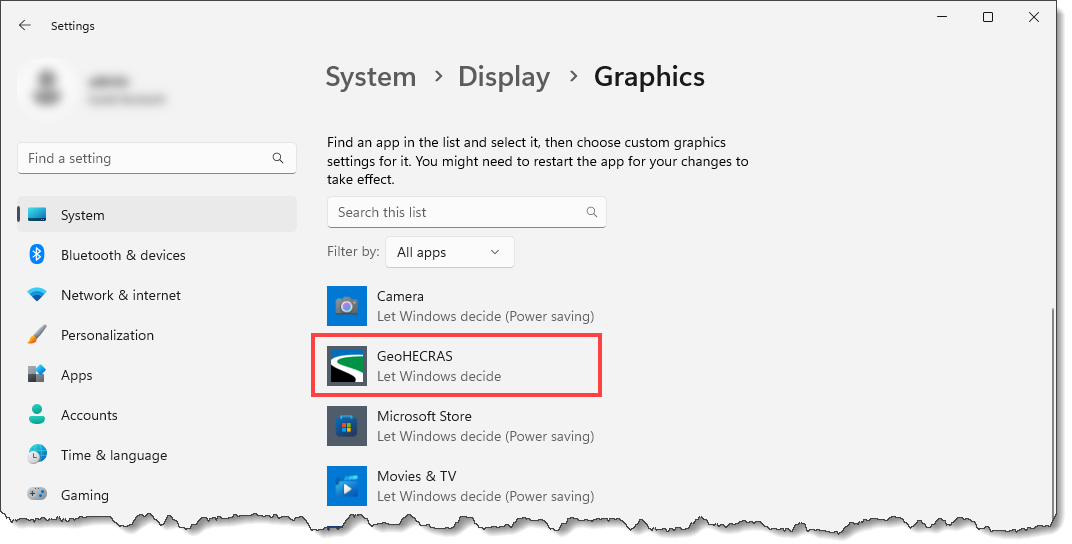
To assign the high-performance graphics card for engineering software, follow the steps below:
![[Browse] button under the Custom options for apps section](/wp-content/uploads/sites/25/2023/03/Optimize-Your-Computer-for-Civil-Engineering-Software-Img-6.png)
![[Options] button](/wp-content/uploads/sites/25/2023/03/Optimize-Your-Computer-for-Civil-Engineering-Software-Img-8.png)
![[Save] button](/wp-content/uploads/sites/25/2023/03/Optimize-Your-Computer-for-Civil-Engineering-Software-Img-9.png)
To learn how to enable GPU rendering on a remote desktop, refer to this article in our knowledge base.
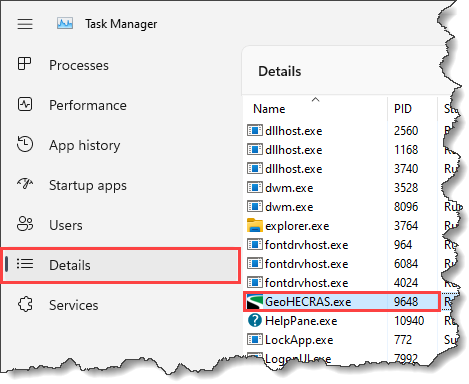
The user can change the priority of any software in Task Manager to guarantee that it runs smoothly. When the priority of any software is set to highest, Windows will prioritize that software above less essential software and distribute system resources accordingly.
To prioritize your engineering software over other software, follow the steps below:
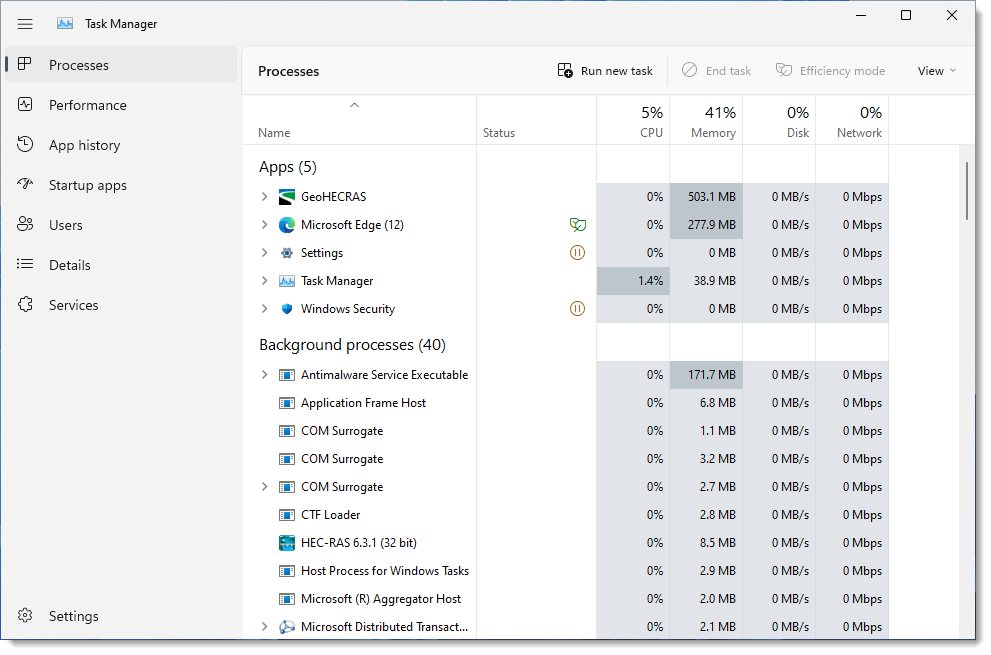
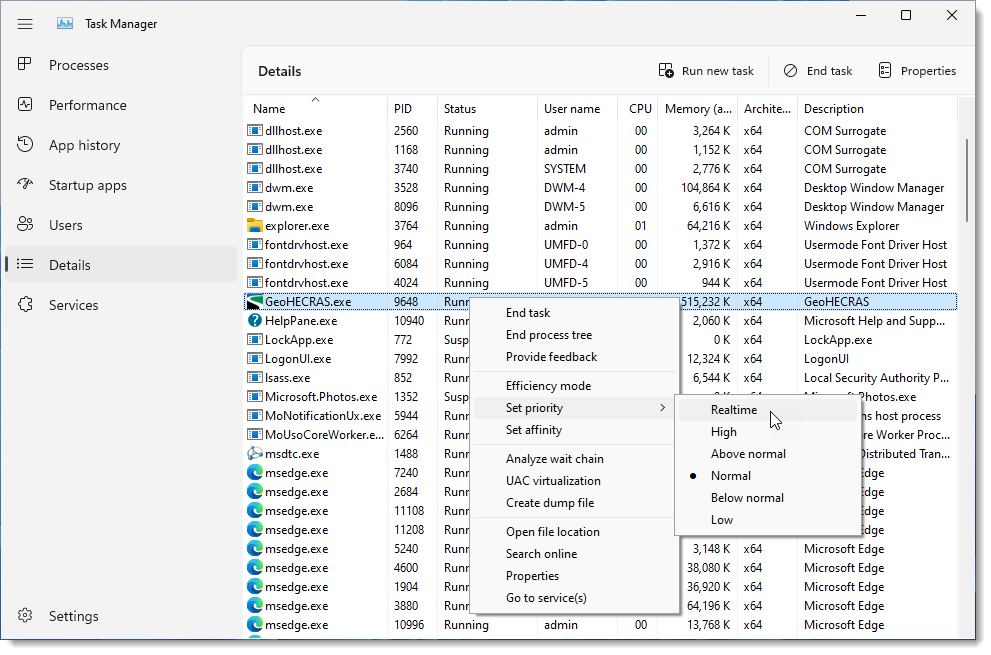
Note that the allotted priority will only remain active until your engineering software session is active. Once the software is closed or the system is restarted, the changes made will return to default settings.
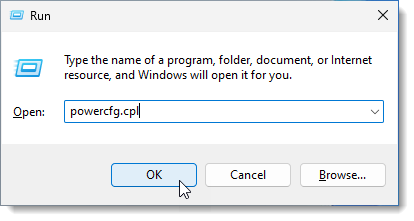
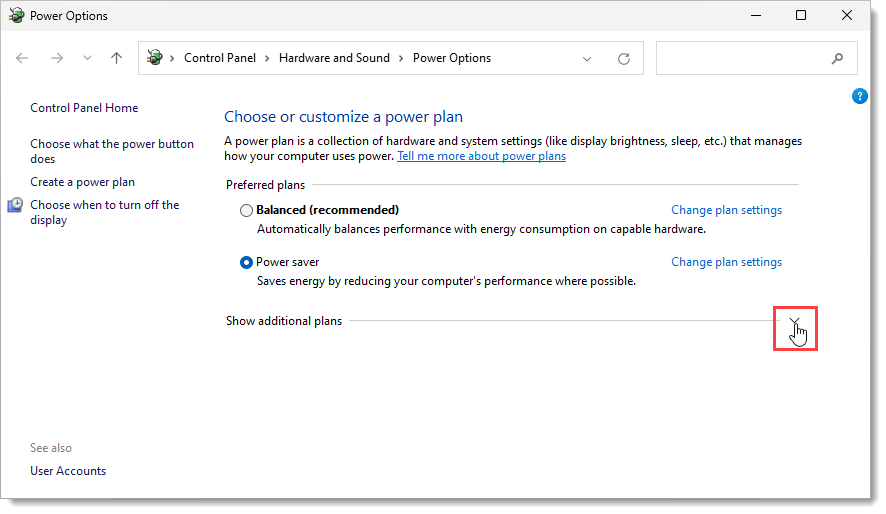
Microsoft Windows provides different power plans (Balanced, Power saver, and High performance) to optimize the computer’s performance based on users’ needs. The High performance power plan option improves computer performance allowing the computer to consume more power and run faster.
To switch to High performance power plan, follow the steps below:

Certain software can continue running in the background even when they are not being used. This consumes computer resources and can slow down the computer’s performance. To speed up your computer performance, you can deactivate such software running in the background or allow only specific software to run in the background.
Refer to this article from Microsoft to learn how to disable unnecessary background software.
Antivirus scans typically results in performance problems because failure to correctly define antivirus exclusions may cause software and services to fail due to resource contention. To avoid issues with the antivirus software, create exceptions for reading, writing, or scanning your engineering software in accordance with your corporate policy.
Disclaimer: Implementing antivirus exceptions may increase vulnerabilities to computers or networks by malicious users or malware or viruses. Before making any changes, it is recommended that the attack vulnerability risks associated with implementing these settings be evaluated.
Refer to this link in our knowledge base to find articles on how to add an exception to antivirus software.
Fragmentation occurs when the computer is unable to provide contiguous space to store the entire file as a single unit. In turn, the computer stores the files in multiple different areas of memory scattered throughout the hard drive. Due to this, the computer becomes slow as a hard drive is required to perform additional work to access data from multiple locations. Disk defragmentation can help reorganize the fragmented data and make the hard drive run more efficiently.
Disk defragmentation can be scheduled or performed manually. Refer to this article from Microsoft to learn how to perform a disk defragmentation.
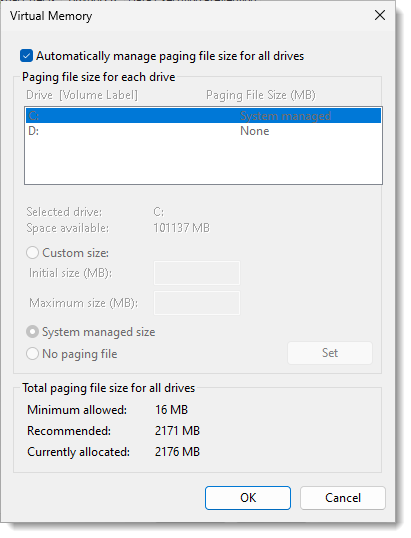
In Microsoft Windows, a page file is a hidden file on the hard drive used to extend the random-access memory (RAM) and temporarily transfer data from RAM to disk storage and vice-versa. Page file acts as an overflow of the system memory and holds data for currently running software. Computers do not use page file until the physical memory has been exhausted, and extra space is required to hold additional information.
Increasing the page file size can help the computer to handle large software applications (such as engineering software) more efficiently and boost the system’s performance.
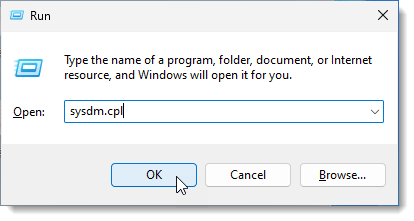
To modify the page file size, follow the steps below:
![[Settings] button under the Performance section](/wp-content/uploads/sites/25/2023/03/Optimize-Your-Computer-for-Civil-Engineering-Software-Img-17.png)
![[Change] button under the Virtual memory section](/wp-content/uploads/sites/25/2023/03/Optimize-Your-Computer-for-Civil-Engineering-Software-Img-18.png)
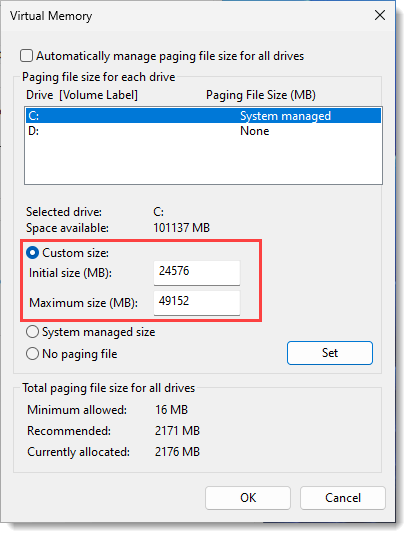 The initial and maximum size should be specified based on the available physical memory (RAM) in the computer. Generally, the initial size is set to 1.5 times the total available physical memory and the maximum size to 3 times the total available physical memory (RAM). For example, for a system running on 4GB (4096 MB) of RAM, the initial page file size would be 1.5 × 4096 = 6144 MB, and the maximum allowed page file size would be 3 × 4096 = 12288 MB.
The performance of any engineering software is not only influenced by the operating system environment. Factors within the software, such as the format and location of the source data, the properties defined for different layers, and the version of the software in use, can all slow down the system’s performance.
Implementing the below recommendations can significantly improve the performance of your computer while running any of the engineering software:
Note: The user can also refer to these suggestions from Microsoft to improve the performance of Windows.


CivilGEO G2 Reviews
4.8/5.0 Rating, Over 230 Reviews

GeoHECRAS is recognized as the top Civil Engineering Design Software with an average of 4.8 out of 5.0 rating from over 230 real user reviews on G2.


We use cookies to give you the best online experience. By agreeing you accept the use of cookies in accordance with our cookie policy.
When you visit any web site, it may store or retrieve information on your browser, mostly in the form of cookies. Control your personal Cookie Services here.


