
Welcome to CivilGEO Knowledge Base
Welcome to CivilGEO Knowledge Base
Floating debris, such as tree limbs, logs, roots, brush, and other material, can get caught on the upstream side of a bridge pier under the right conditions. The debris gets tangled up with the bridge pier and moves up and down with the rise and fall of the water surface. Debris will cause the river flow to slow down, creating additional backwater and effectively raising the water surface elevation at the roadway crossing. This can cause a significant problem during high flow events.
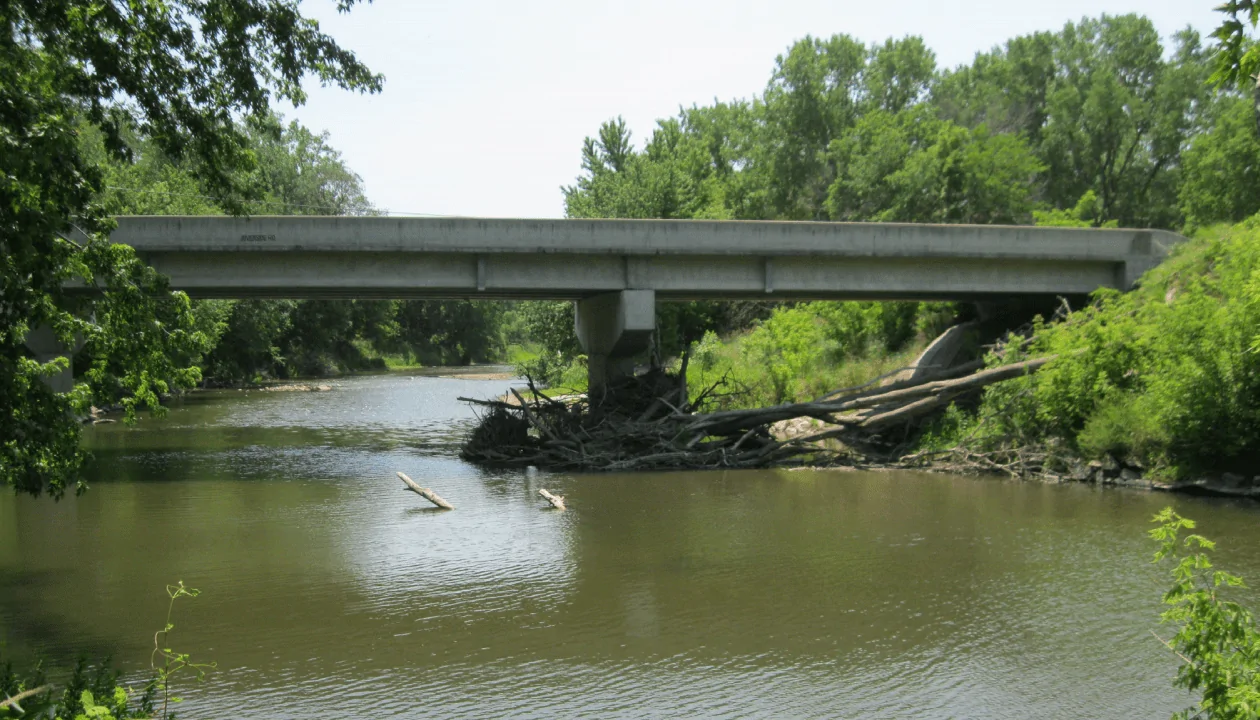
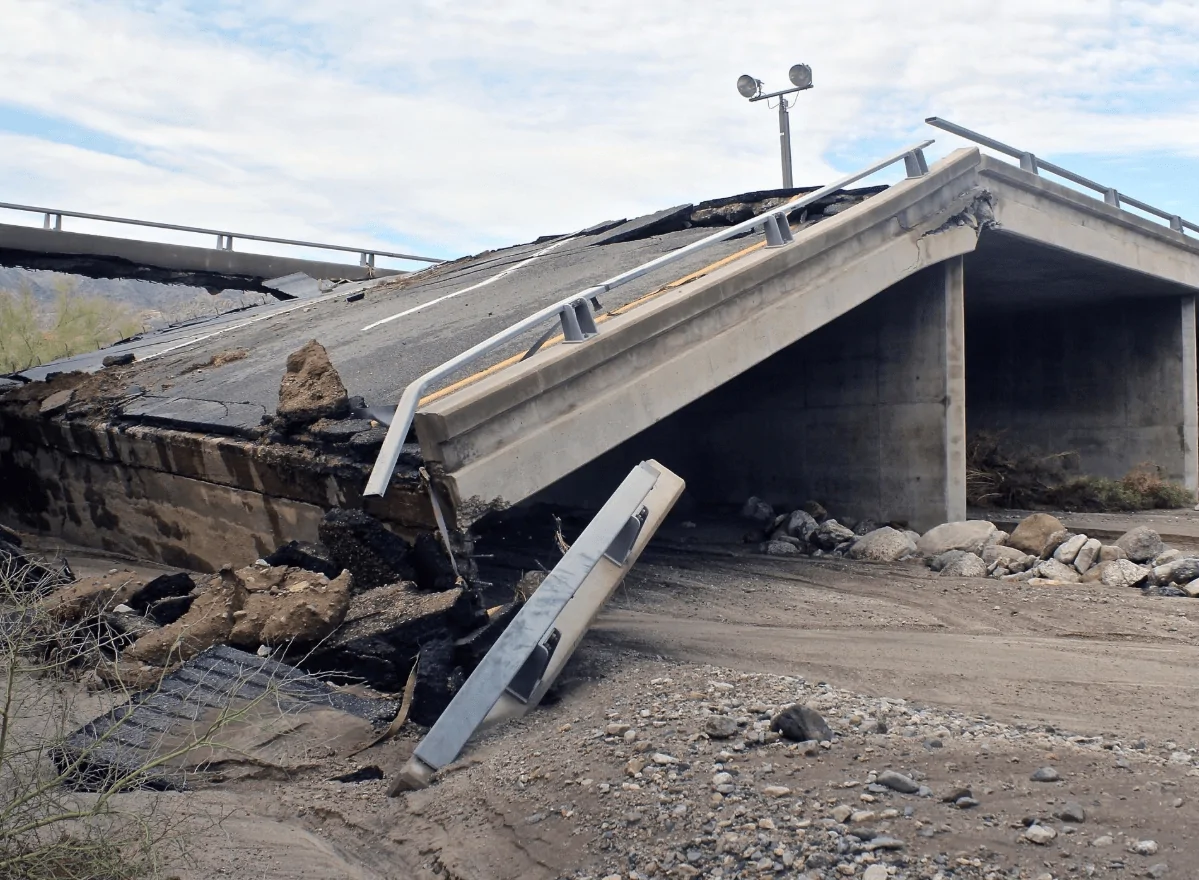
Debris accumulation on bridge piers is an ongoing national problem, which results in obstructions of waterway openings at bridges and results in significant erosion of stream banks and scour at abutments and piers. In some cases, the accumulation of debris can adversely affect the operation of the waterway opening or result in failure of the bridge structure.
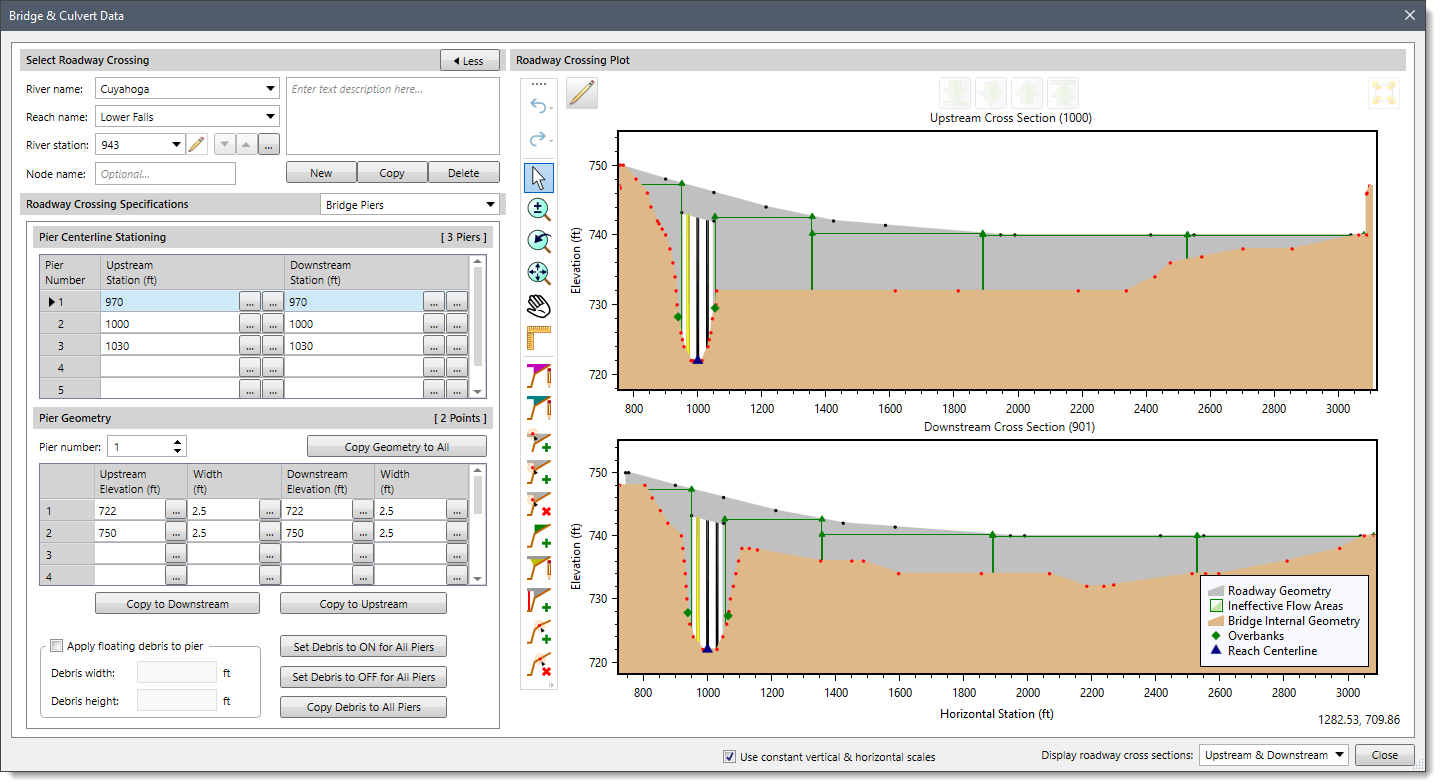
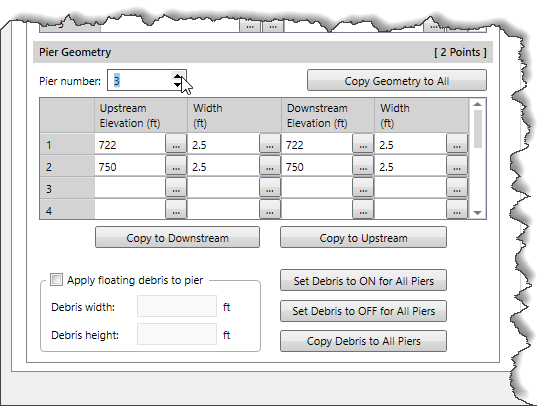
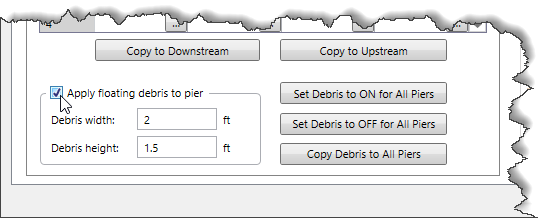
GeoHECRAS allows the user to enter floating debris information into the HEC-RAS model, so that the effects of floating debris can be analyzed during a flooding event. Debris can be defined at specific piers or at all piers. The debris height and width can be the same for all the piers, or different for each pier.
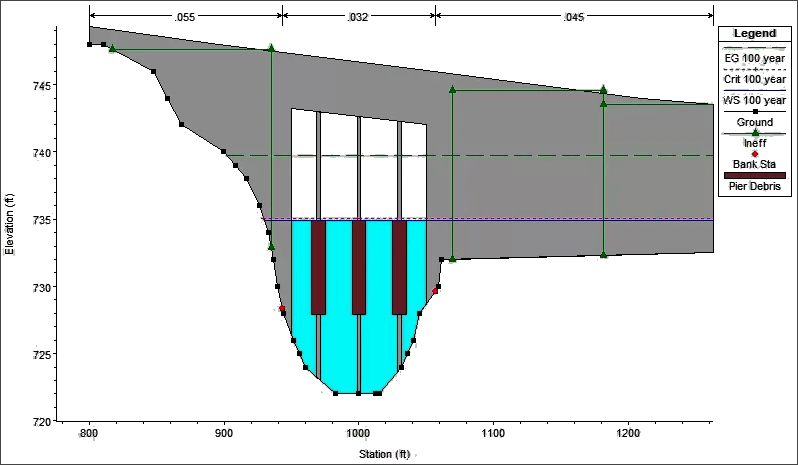
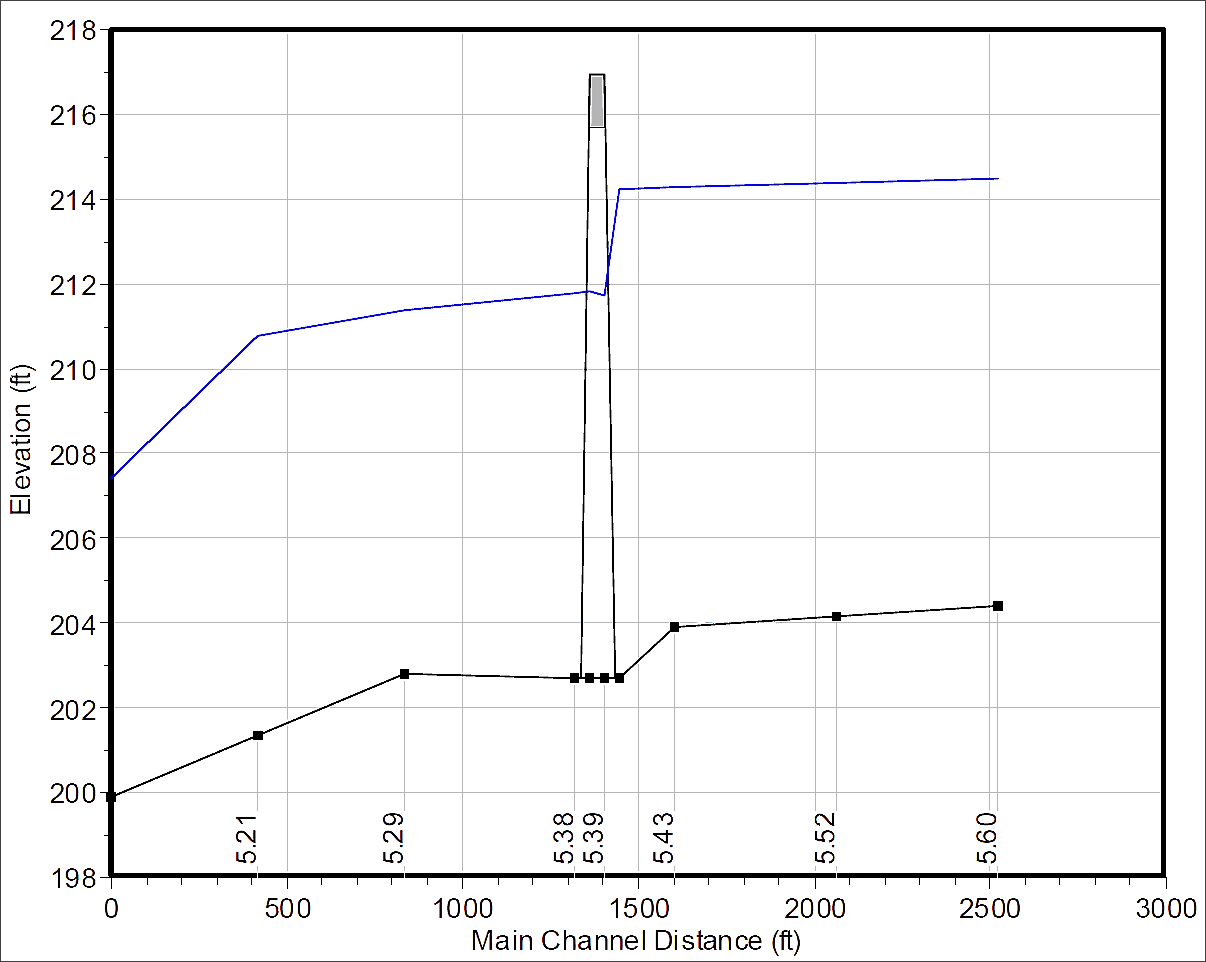
The pier debris blocks out a rectangular shaped area on the upstream side of the pier. While the HEC-RAS analysis is performed, the software adjusts the area and wetted perimeter of the bridge opening to account for the pier debris. The rectangular block is centered on the centerline of the upstream pier. The pier debris floats at the top of the water surface, where the top of the rectangular block is set to the same elevation as the computed water surface.
The pier debris does not form until the specified pier experiences flow. If the bottom of the pier is above the water surface, then there is no area or wetted perimeter adjustment for that pier. However, if the computed water surface is above the top of the pier, the debris is assumed to lodge underneath the bridge, where the top of the pier intersects with the bottom of the bridge deck. It is assumed that the debris completely blocks the flow and that the debris is part of the pier. If the debris field is large enough, it can completely block the underside of the bridge superstructure.
While the simulation is running, the program changes the geometry of the bridge to account for the pier debris. This is to ensure that there is no double accounting of blocked flow area or wetted perimeter. The Yarnell and momentum bridge methods include pier debris in their computations. And, if the pier debris extends past the abutment, into the ground, or overlaps an adjacent pier, the computations ignore this overlap.
Actual values specified for debris height and width is left to the modeler to decide, but conservative values often used are:
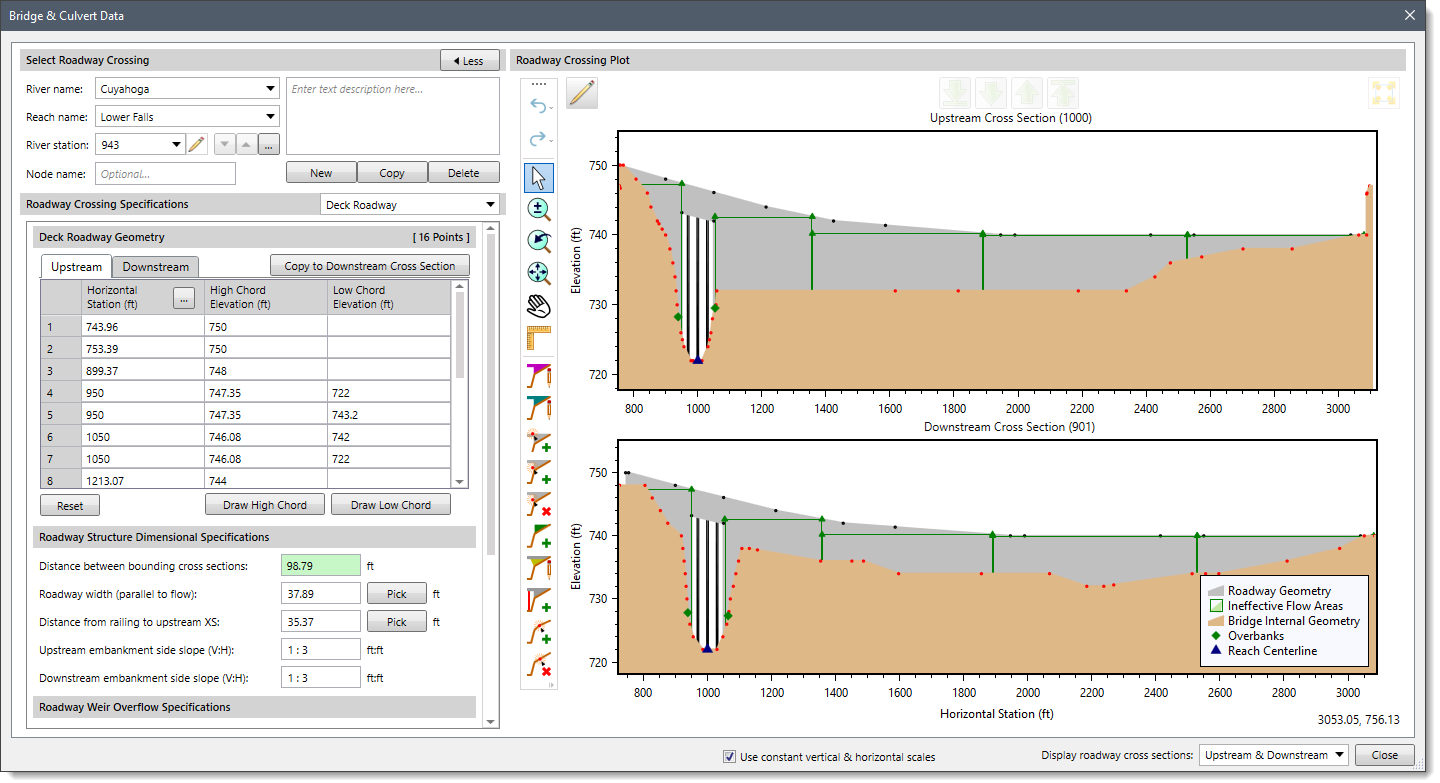
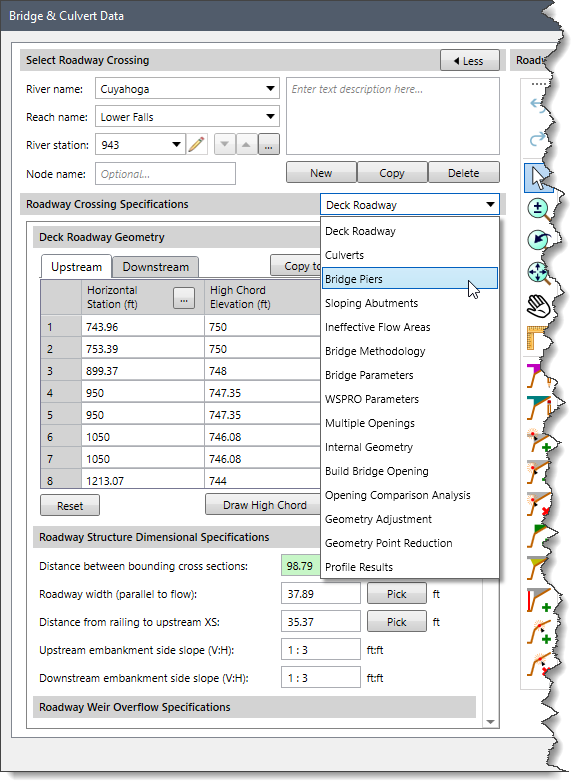
Follow the steps below to add debris data at the bridge piers:
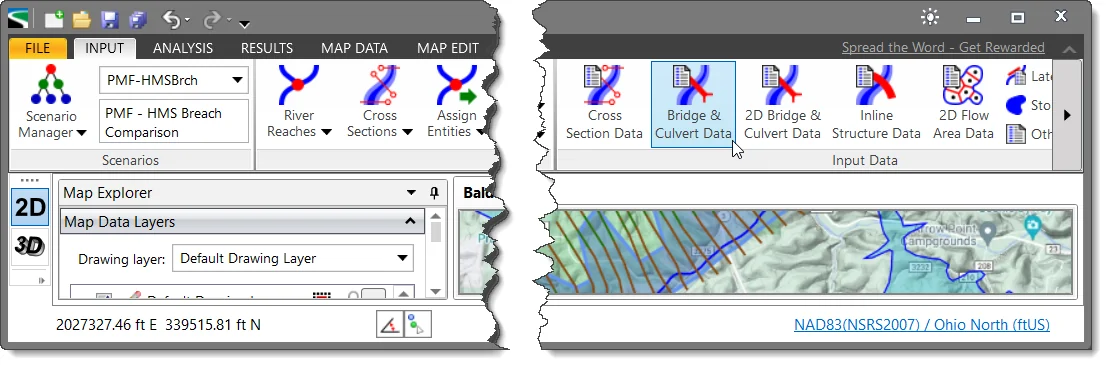
The software will accept the pier data and close the dialog box. The user can then run a simulation of the model and see the effects of debris on the model.
There are additional buttons provided for specifying bridge pier debris:
The analysis of floating debris at a roadway should be compared with an analysis with no debris to see the impact in the computed water surface elevation and energy grade elevation at the upstream side of the roadway crossing.


CivilGEO G2 Reviews
4.8/5.0 Rating, Over 230 Reviews

GeoHECRAS is recognized as the top Civil Engineering Design Software with an average of 4.8 out of 5.0 rating from over 230 real user reviews on G2.


We use cookies to give you the best online experience. By agreeing you accept the use of cookies in accordance with our cookie policy.
When you visit any web site, it may store or retrieve information on your browser, mostly in the form of cookies. Control your personal Cookie Services here.


