
Welcome to CivilGEO Knowledge Base
Welcome to CivilGEO Knowledge Base
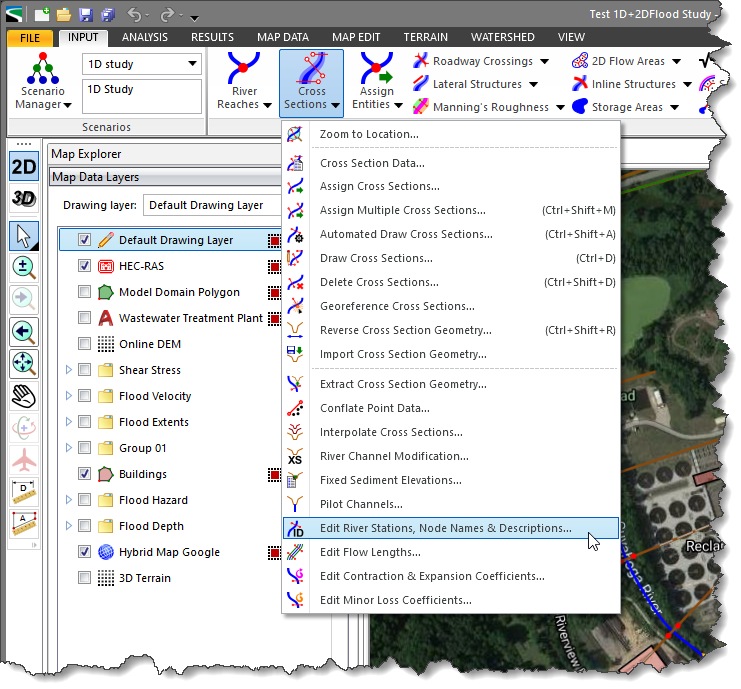
The Edit River Stations, Node Names & Descriptions command allows the user to edit the cross sections river stationing, associated node names, and description for single/multiple reaches along a river and computes new river stationing using a defined flow length.
Follow the steps below to use the Edit River Stations, Node Names & Descriptions command:
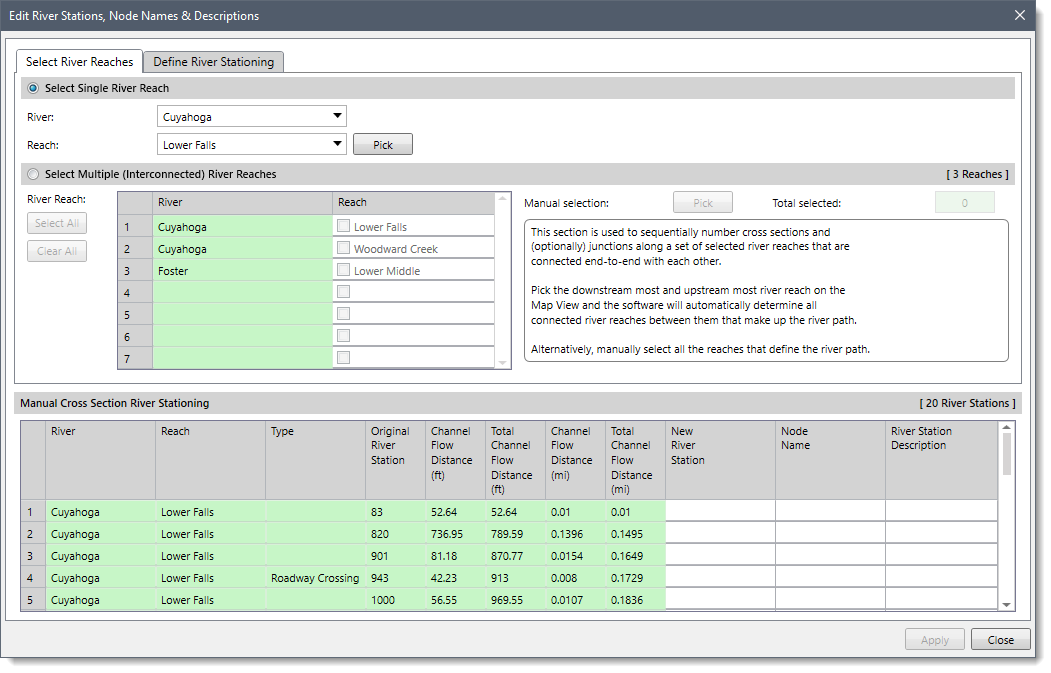
The following sections describe the Edit River Stations, Node Names & Descriptions command and how to interact with the above dialog box.
The Select River Reaches panel is used to select single or multiple reaches along a river that define the river path.
The Select Single River Reach radio button section allows the user to select the river and the reach that make up a river path. Note that this radio button section is selected by default when the dialog box is displayed.
If the model contains a single river and reach, then that particular river and reach will automatically be selected in the River and Reach dropdown combo boxes. If the model contains multiple rivers and reaches, then the user can select the desired river and reach from the River and Reach dropdown combo boxes.
Alternatively, the user can click the [Pick] button to select the river and the reach from the Map View. Clicking on the [Pick] button causes the dialog box to temporarily disappear, prompting the user to select the river reach from the Map View. After selecting a river reach, the dialog box will be redisplayed with the river reach shown as selected. The selected river reach is highlighted on the Map View. To abort the selection process, the user can press the [Esc] key or right-click and select Cancel from the displayed context menu.
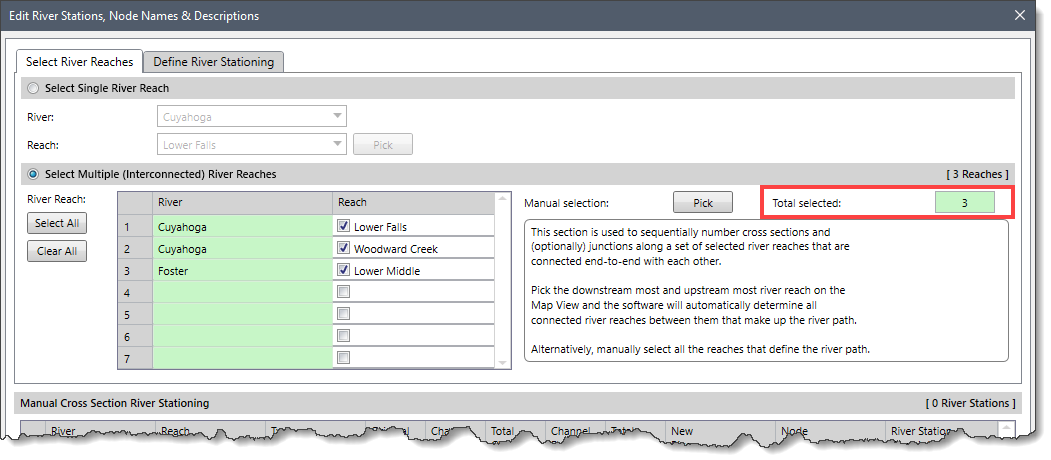
The Select Multiple (Interconnected) River Reaches radio button section is used to sequentially number cross sections and (by option) junctions along a set of selected river reaches that are connected end-to-end with each other. This section allows the user to select multiple reaches defined in the project that make up the river path.
This section has a table that lists all river reaches defined in the project. The user can select the desired river reach by checking the checkboxes available in the Reach column corresponding to each river name available in the River column that defines the river path. By default, all reaches are unchecked.
The user can click the [Select All] button to select all river reaches listed in the table that define the river path.
The user can click the [Clear All] button to cancel all the reaches selected in the table and redo the entire process.
Alternatively, the user can click the [Pick] button to select the most downstream and upstream river reach on the Map View and the software will automatically determine the connected reaches between them that make up the river path. On clicking the [Pick] button, the dialog box will temporarily disappear, prompting the user to select the most downstream and upstream river reach on the Map View. Once finished, the user can press the [Enter] key or right-click and choose Done from the displayed context menu. The dialog box will be redisplayed, and the total number of selected river reaches will be displayed in the Total selected read-only field.
 Notes:
This section contains a table that allows the user to manually edit the cross section river stationing, associated node names, and descriptions along with computing new river stationing using defined flow lengths for the selected river reach.
The first two columns of the table identify the river and the reach. The remaining portion of the table displays significant information, including the type of river station, original river station, channel flow distance in feet and meters, new river stations, node names, and description of the river station.
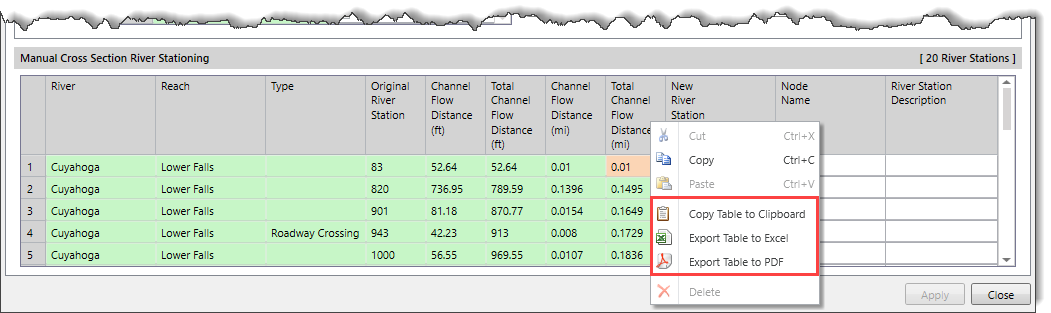
In addition, the data in the cross section river stationing table can be copied to the clipboard or exported as a Microsoft Excel or PDF document by using the Copy Table to Clipboard, Export Table to Excel, or Export Table to PDF commands from the right-click context menu.
The Define River Stationing panel allows the user to number the cross section river stationing based upon river chainage or incrementally.
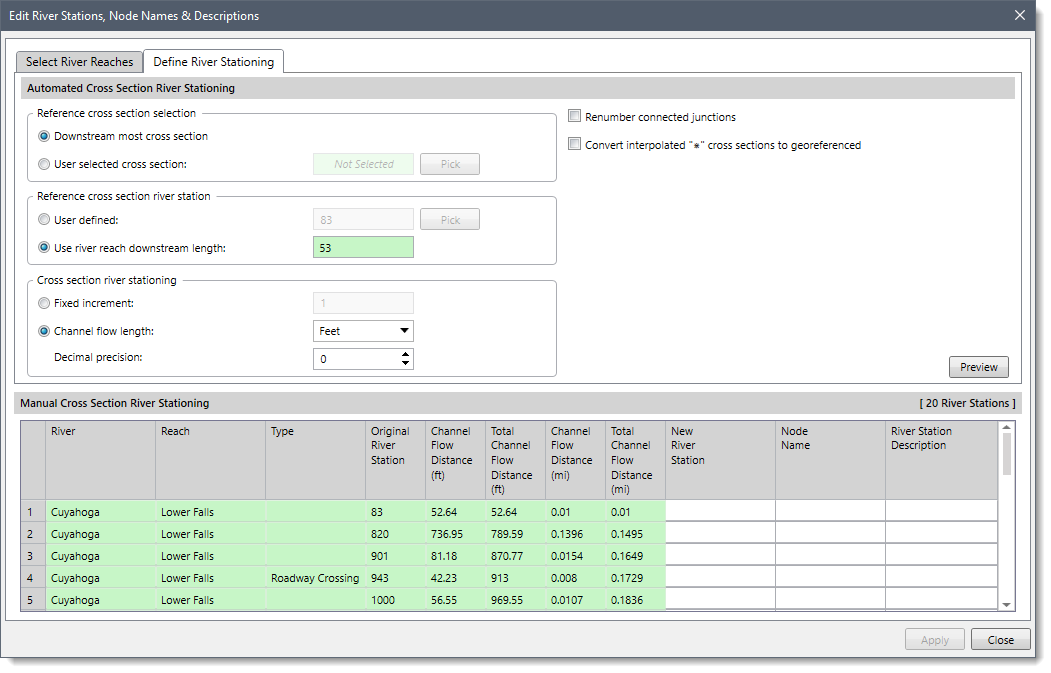
This section allows the user to select the reference cross section that will be used for computing river stationing for all other cross sections. The following options are provided:
This section allows the user to measure downstream reach distance in order to assign it as the most downstream cross section river station. The following options are provided:
This section is used to define how the cross section river stations are to increase in value as they move up the river reach. The following options are provided:
The Renumber connected junctions checkbox option is used to list the junctions in the table. By default, this checkbox is unchecked.
The Converted interpolated ‘*’ cross section to georeferenced checkbox option is used to convert the interpolated cross sections to georeferenced. By default, this checkbox option is unchecked.
Clicking on the [Preview] button causes the software to display the station suggestion to the user in the New River Station column of the Manual Cross Section River Stationing data grid. This allows the user to apply defined cross section river stationing to the selected river reach.
![[Preview] button for previewing new river station](/wp-content/uploads/sites/25/2022/12/Edit-River-Stations-Node-Names-Descriptions-Command-Image-6.png)
When all the option has been properly defined in the Edit River Stations, Node Names & Descriptions dialog box, click the [Apply] button. The software will then assign the user-defined changes to the cross section river stations along a defined flow path. Click the [Close] button to close the dialog box.
Note that when the user clicks the [Preview] button and then navigates to select a different river reach or clicks the [Close] button without applying the changes, the Revise River Stationing confirmational dialog box will be displayed.
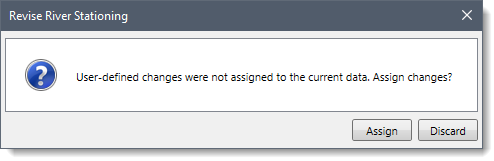
Clicking on the [Assign] button will apply the user-defined changes to the river station.
Clicking on the [Discard] button will discard the user-defined changes and allows the user to redo the process.


CivilGEO G2 Reviews
4.8/5.0 Rating, Over 230 Reviews

GeoHECRAS is recognized as the top Civil Engineering Design Software with an average of 4.8 out of 5.0 rating from over 230 real user reviews on G2.


We use cookies to give you the best online experience. By agreeing you accept the use of cookies in accordance with our cookie policy.
When you visit any web site, it may store or retrieve information on your browser, mostly in the form of cookies. Control your personal Cookie Services here.


