1. Home
  2. Knowledge Base
  3. Exporting Data
  4. Displaying 3D Buildings in Your Project
  1. Home
  2. Knowledge Base
  3. Getting Started
  4. Displaying 3D Buildings in Your Project
  1. Home
  2. Knowledge Base
  3. Map View
  4. Displaying 3D Buildings in Your Project
  1. Home
  2. Knowledge Base
  3. Working with a HEC-HMS Project
  4. Displaying 3D Buildings in Your Project
  1. Home
  2. Knowledge Base
  3. Working with a HEC-RAS Project
  4. Displaying 3D Buildings in Your Project

Displaying 3D Buildings in Your Project

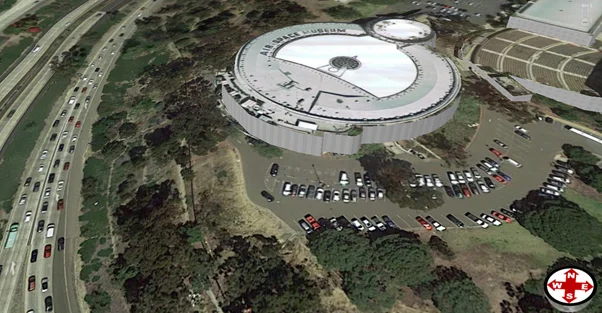
CivilGEO’s software uses OpenStreetMap (OSM) data to create realistic-looking 3D buildings on the Map View. The user can view the 3D buildings as well as download the 3D buildings as polygon shapefile data.

Note: Please note that OSM 3D building data may not be available for all locations.

Viewing 3D Buildings

To view the 3D buildings on the Map View, follow these steps:

  1. From the Map Data ribbon menu, click on the Show 3D Buildings dropdown menu and then select the Show 3D Buildings command.
    Show 3D Buildings command
  2. From the Map View toolbar, switch to 3D view mode by clicking on the 3D command.
    3D View Mode
  3. From the Map View toolbar, select the Rotate View command.
    Rotate View
  4. Click and drag to rotate the Map View into a 3D view. As you zoom into a region, the 3D buildings will be displayed on the Map View.

Downloading 3D Buildings

The software provides an option to download the 3D building data as a GIS shapefile. In that way, the building data can be utilized for other purposes—such as determining flow blockages, etc.

To download 3D buildings as a shapefile, follow these steps:

  1. From the Map Data ribbon menu, click on  Show 3D Buildings dropdown menu and then select 3D Buildings Download command.
    3D Buildings Download command
  2. The 3D Buildings Download dialog box will be displayed.
    3D Buildings Download dialog box
  3. In the 3D Buildings Download dialog box, specify the following:
    • General Specifications
      Specify the layer name and the file directory path for the downloaded polygon shapefile containing the 3D building data.
    • 3D Buildings Data Boundary Limit
      Specify the boundary limits (map area) into which the 3D buildings should be downloaded. Choose an option:

      1. Current screen limits: The software will download the 3D building data for the area that is currently being displayed on the screen.
      2. User-defined limits: Click the [Pick] button. The software will prompt you to manually select a rectangular region on the Map View to download the 3D building data. The Map View will switch to 2D View Mode while selecting this region.
      3. Model extents: The software automatically selects the area enclosed by the model.
  4. Click the [OK] button.

The software will download the 3D building data as a shapefile. Depending upon the region extents selected, the downloading of data may take some time.

Base Map Imagery for Rooftops

Our software also allows use of base map layer imagery for roofs of 3D buildings.

To enable the base map layer imagery for rooftops, follow these steps:

  1. Switch to 3D view mode on the Map View.
  2. Add an elevation layer in your project. To learn how to add an elevation layer in your project, refer to this article in our knowledge base.
  3. Click […] button next to the 3D buildings layer name.
    3D buildings layer name
  4. The GIS Polygon Properties dialog box will be displayed. Notice that the Drape onto terrain radio button under the Assign Elevations section is selected by default.
    GIS Polygon Properties dialog box
  5. Assign elevations to 3D buildings using one of the options listed below:
    • Offset above terrain.
    • Assign fixed elevation.
    • Assign height attribute.
    • Assign elevation attribute.

    Once the preferred option is selected, Extrude walls and Use map layer imagery for roofs checkboxes will appear under the Assign Elevations section.
    Extrude walls and Use map layer imagery for roofs options

  6. The Extrude walls option is used to include sidewalls in 3D buildings whereas Use map layer imagery for roofs option is used to replace roofs of 3D buildings with base map imagery. Select both checkboxes.
    Offset above terrain options checked
  7. Click the [OK] button.
    [OK] button
  8. The roofs for 3D buildings in the project will be replaced by base map imagery.

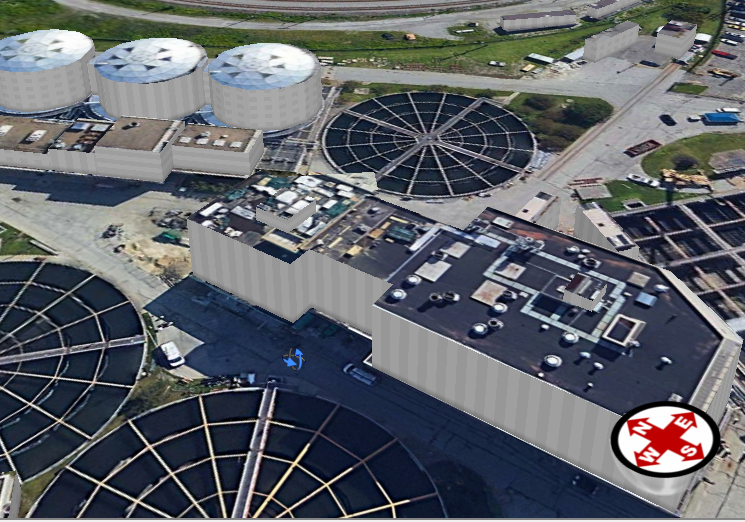
Note: On adding an elevation layer, the roofs of the 3D buildings are automatically replaced by base map imagery when 3D buildings are added using the 3D Buildings Download command.

About the Author Chris Maeder

  • Was this helpful?
  • YesNo

Was this article helpful?

Related Articles