
Welcome to CivilGEO Knowledge Base
Welcome to CivilGEO Knowledge Base
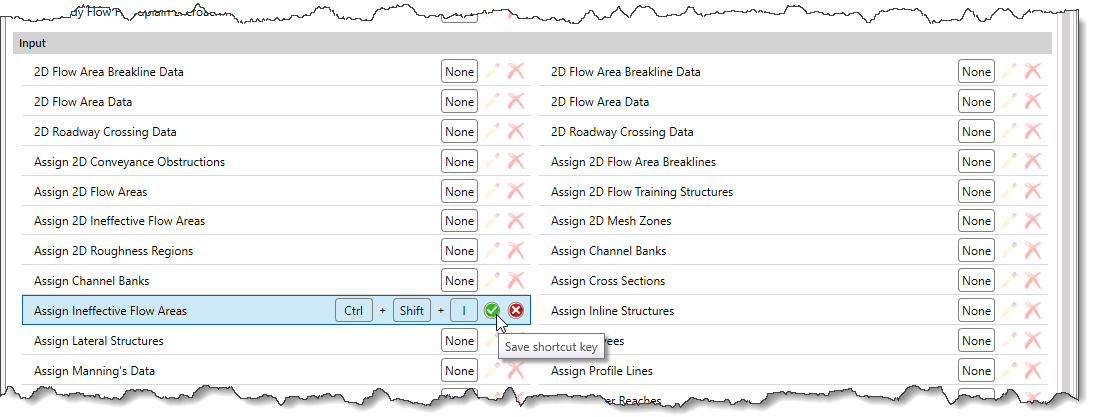
CivilGEO’s software provides a keyboard shortcut library where you can edit or assign your own keyboard shortcuts for any command. For example, if you frequently use the Extract Cross Section Geometry command, you can assign the keyboard shortcut Ctrl+E to start the Extract Cross Section Geometry command.
Our software supports the following keyboard shortcut combinations:
Follow the steps below to customize or view the keyboard shortcuts list:
![[Define Keyboard Shortcuts] Options backstage page button](/wp-content/uploads/sites/25/2023/11/Customizing-Keyboard-Shortcuts-Imge-1.png)
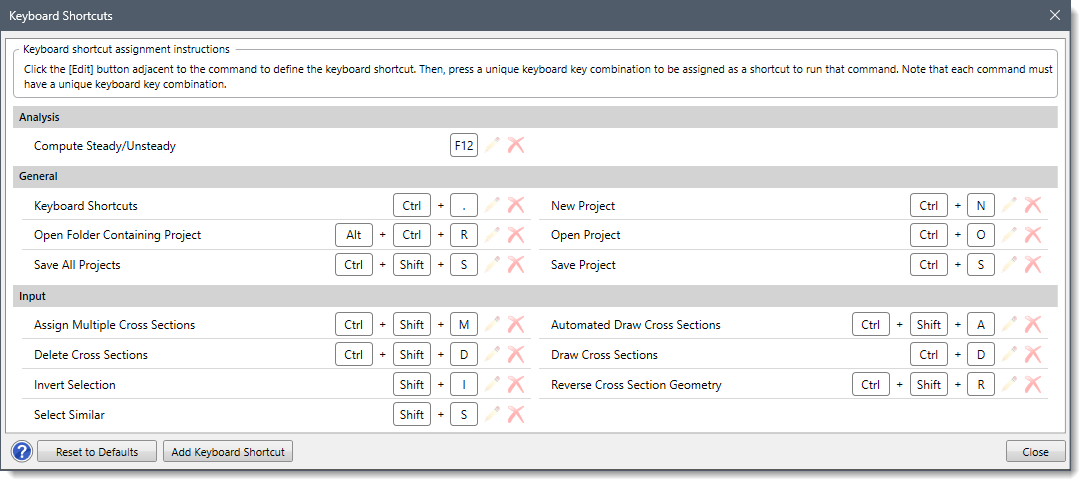
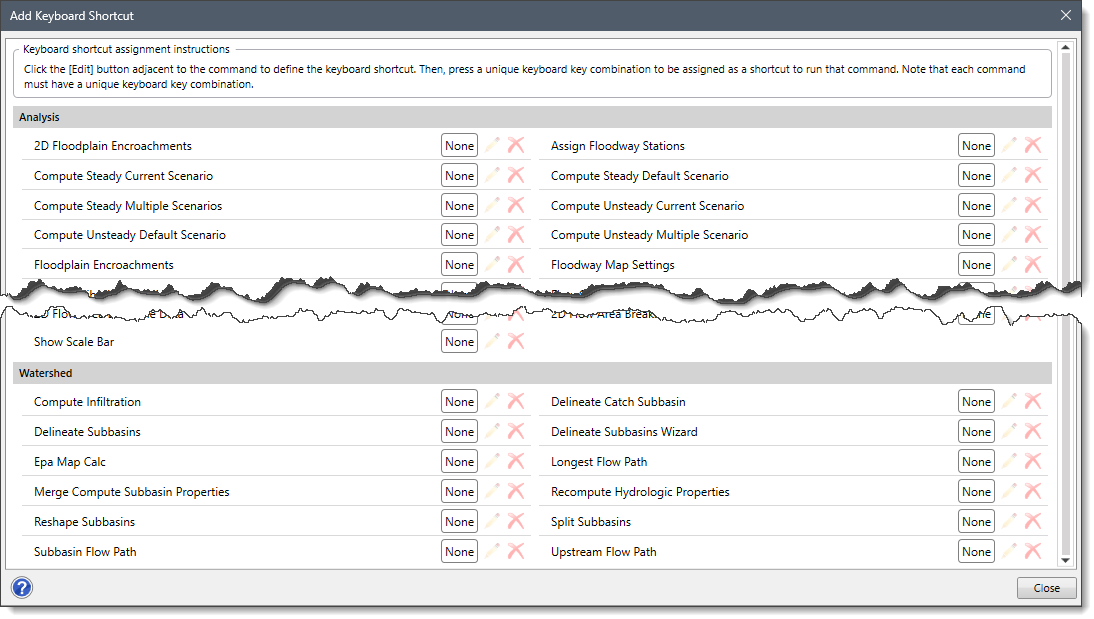
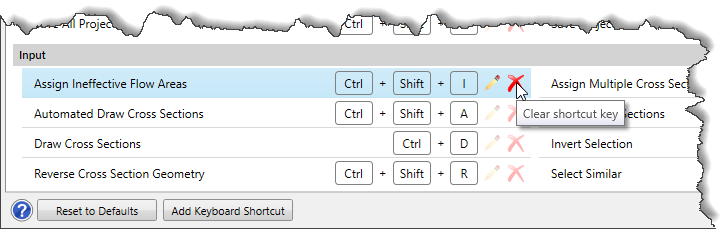
The above dialog box lists all the shortcut key combinations along with their command names. Commands related to a certain ribbon menu section are grouped together and named after the ribbon menu. For example, commands related to the Input ribbon menu will be grouped under the Input section.
Note that each section and its associated commands are arranged alphabetically.
The following sections describe how to create, modify, or remove keyboard shortcuts and interact with the above dialog box.
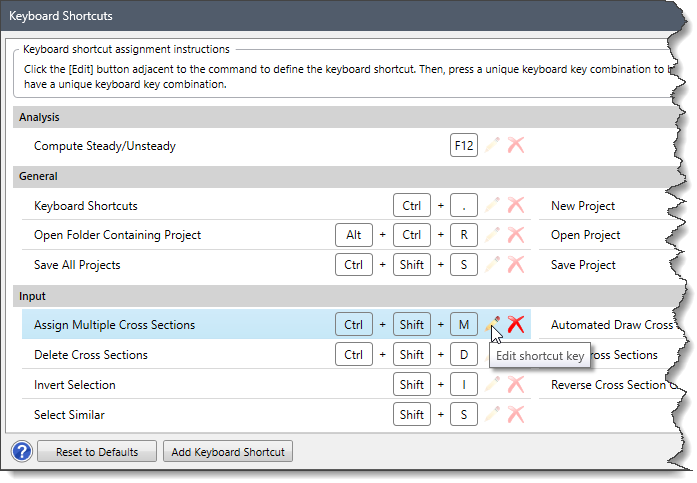
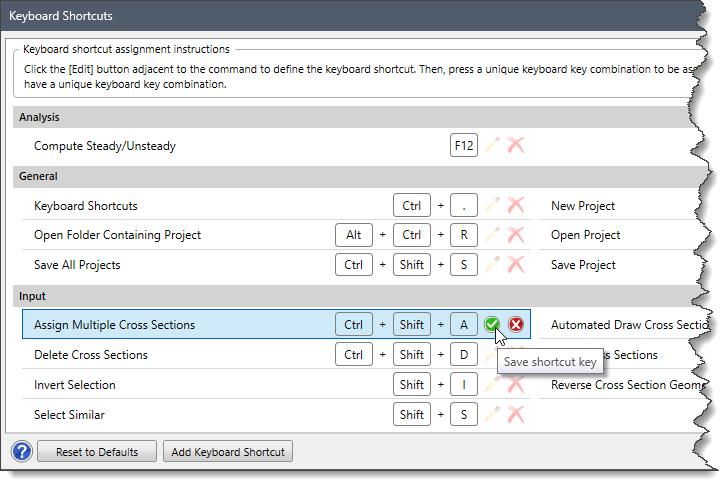
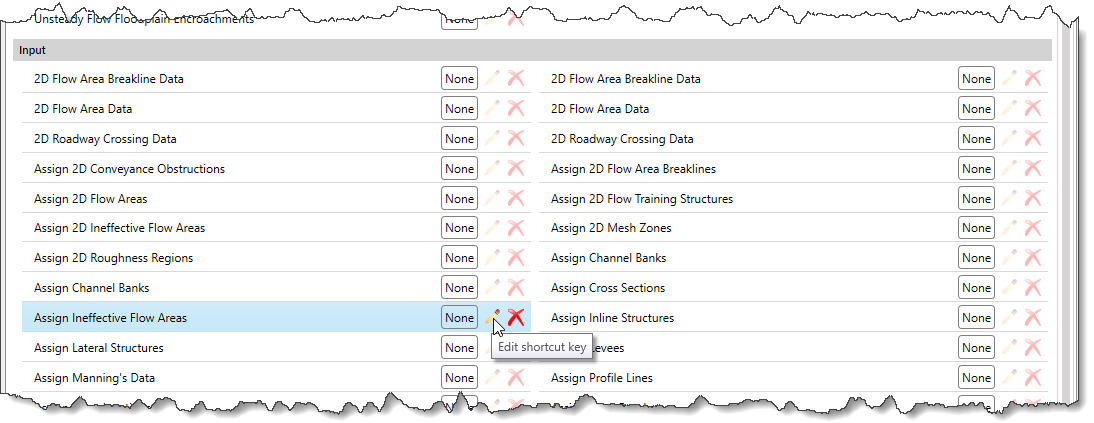
To modify the keyboard shortcut of a command, follow the steps below:
To add new commands to the keyboard shortcuts library, follow the steps below:
![[Add Keyboard Shortcut] button](/wp-content/uploads/sites/25/2023/11/Customizing-Keyboard-Shortcuts-Imge-6.png)
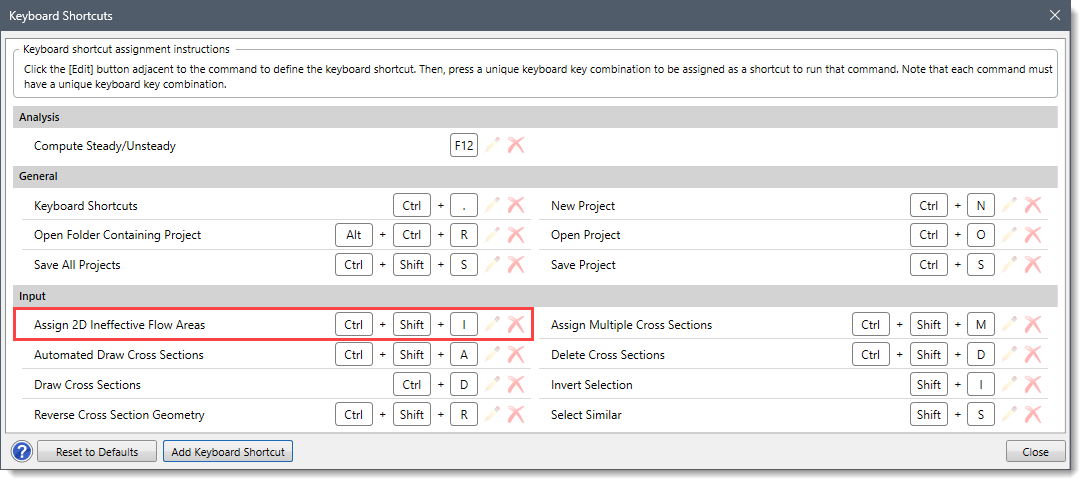
Note that to remove a keyboard shortcut, the user can click the X option adjacent to the assigned shortcut keys as shown below.
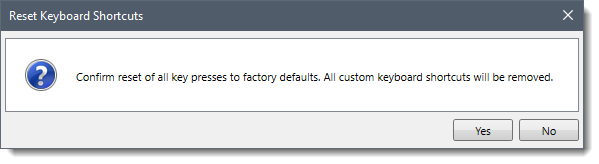
To reset the keyboard shortcuts to default values, follow the steps below:
![[Reset to Defaults] button](/wp-content/uploads/sites/25/2023/11/Customizing-Keyboard-Shortcuts-Imge-12.png)


CivilGEO G2 Reviews
4.8/5.0 Rating, Over 230 Reviews

GeoHECRAS is recognized as the top Civil Engineering Design Software with an average of 4.8 out of 5.0 rating from over 230 real user reviews on G2.


We use cookies to give you the best online experience. By agreeing you accept the use of cookies in accordance with our cookie policy.
When you visit any web site, it may store or retrieve information on your browser, mostly in the form of cookies. Control your personal Cookie Services here.


