
Welcome to CivilGEO Knowledge Base
Welcome to CivilGEO Knowledge Base
Soil data can be used to define infiltration parameters for rainfall runoff modeling. The Create Soils Layer command allows the user to add multiple soil layer data input files to create a single soil coverage layer.
Follow the steps below to use the Create Soils Layer command:

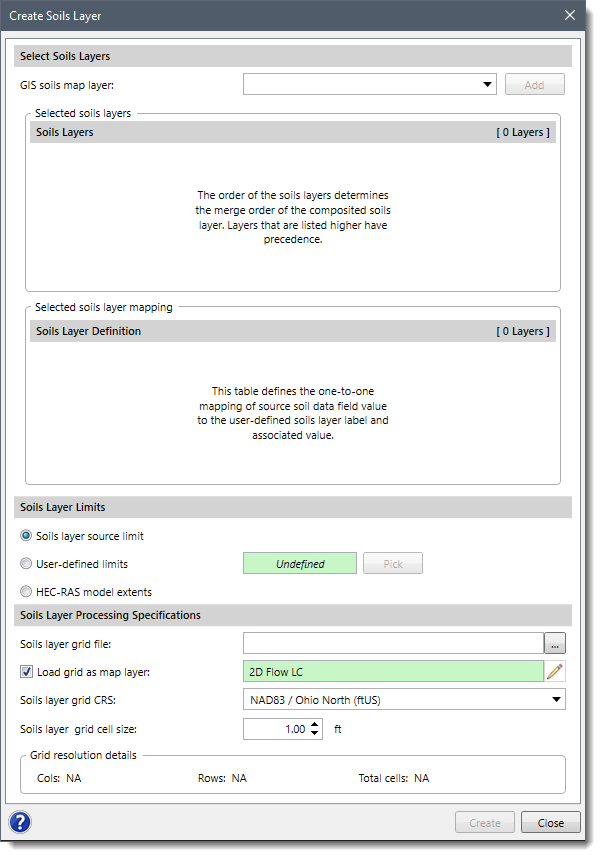
The following sections describe the Create Soils Layer command and how to interact with the above dialog box.
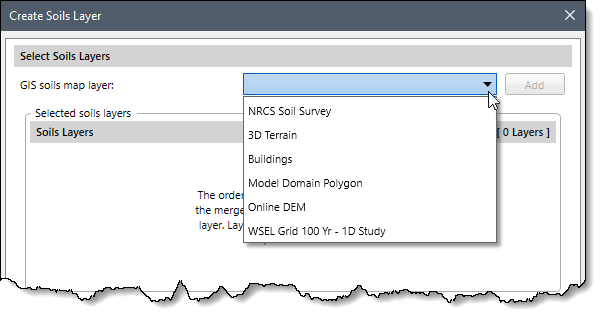
This section allows the user to select an already loaded GIS shapefile map layer containing hydrologic soil data.
To select one or more GIS shapefile map layers, expand the GIS soils map layer dropdown combo box and select the desired GIS shapefile. Click the [Add] button to add more GIS soil layers from the dropdown combo box.
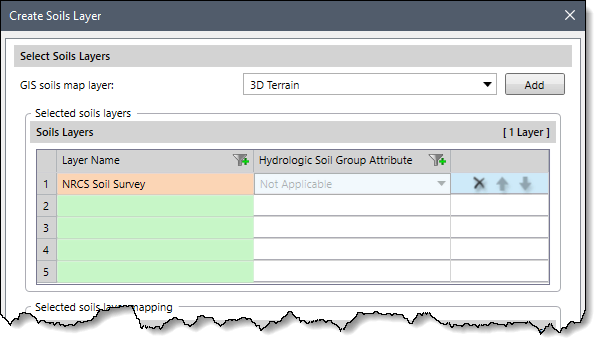
In this section, the added soil map layer(s) will be displayed in the Soils Layers table. The user can select the soil group attribute of the added soil layer shapefile from the Hydrologic Soil Group Attribute field. If more than one GIS soil layer is added, the user can use the up and down arrow options of the Soils Layers table to set the order of the added soil layers.
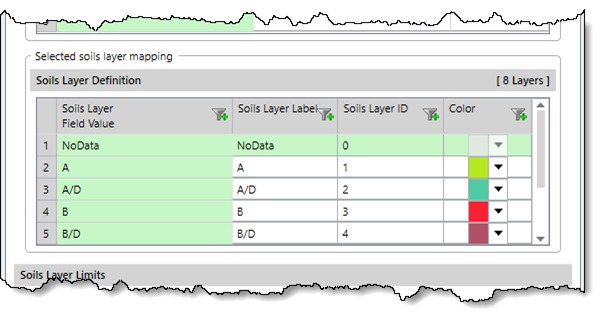
This section consists of the Soils Layer Definition table. In this table, the software automatically defines a one-to-one mapping of soil attributes such as Soils Layer Field Value, Soils Layer Label, and associated Soils Layer ID. The user can also edit the Soils Layer Label and Soils Layer ID attributes from the table.
Note that the green-colored table cells are read-only fields.
This section allows the user to define the extent of the soil layer grid file to be generated.
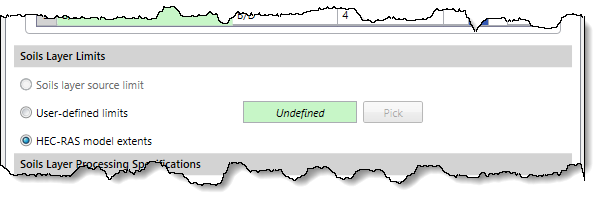
The following options are provided:
This section allows the user to define the processing options for generating the composite soil layer grid.
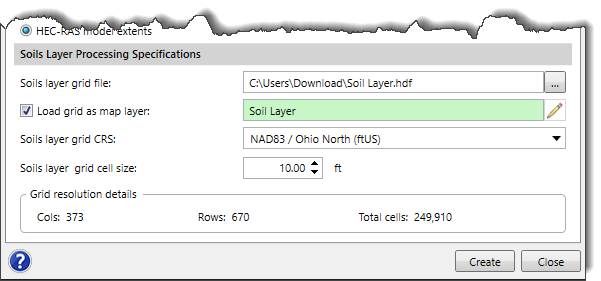
The Soils layer grid file input field is used to define the name and the directory address where the composite soil layer grid file will be saved.
The Load grid as map layer checkbox option causes the software to add the composite soil layer in the Map Data Layers panel. By default, this checkbox option is checked. The software automatically defines the name of the map data layer based on the soil layer grid file name provided by the user. However, the user can edit the map layer name using the edit tool present next to the Load grid as map layer entry field.
The Soils layer grid CRS dropdown combo box allows the user to define the layer’s CRS (Coordinate Reference System). If there is only one CRS in the project, the software automatically selects it.
The Soils layer grid cell size spin control button can be used to define the cell size of the soil layer grid. By default, the software uses a value of 10 ft.
Based on the defined grid cell size and the extent of the soil layer, the Grid resolution details section displays the total number of cells and number of columns and rows that the soil layer grid file will contain.
Once all the options in the Create Soils Layer dialog box are configured, click the [Create] button. The software will then combine the source soil layers to create a single composite soil layer grid file.


CivilGEO G2 Reviews
4.8/5.0 Rating, Over 230 Reviews

GeoHECRAS is recognized as the top Civil Engineering Design Software with an average of 4.8 out of 5.0 rating from over 230 real user reviews on G2.


We use cookies to give you the best online experience. By agreeing you accept the use of cookies in accordance with our cookie policy.
When you visit any web site, it may store or retrieve information on your browser, mostly in the form of cookies. Control your personal Cookie Services here.


