
Welcome to CivilGEO Knowledge Base
Welcome to CivilGEO Knowledge Base
In GeoHECHMS, the user can assign elevations to the junctions, diversions, sources, and sinks elements by using the following commands:
The following sections describe how to assign elevations to the junctions, diversions, sources, and sinks.
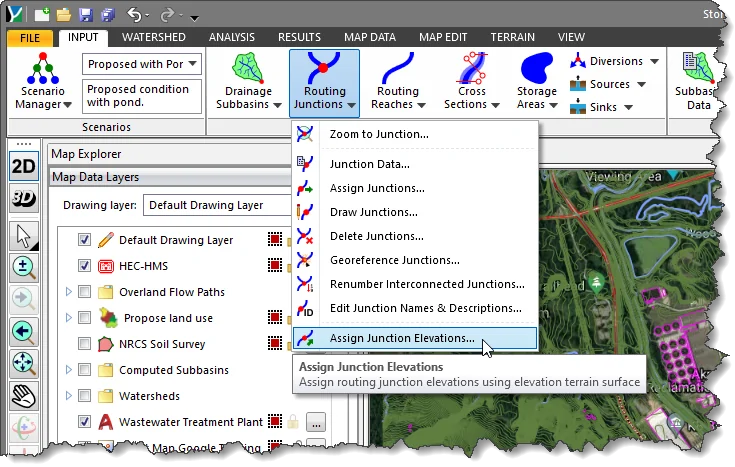
The Assign Junction Elevations command is used to assign invert elevations to the selected junction(s). This command uses the elevation terrain surface to compute the invert elevation of an individual junction(s) with respect to the terrain surface present in the model.
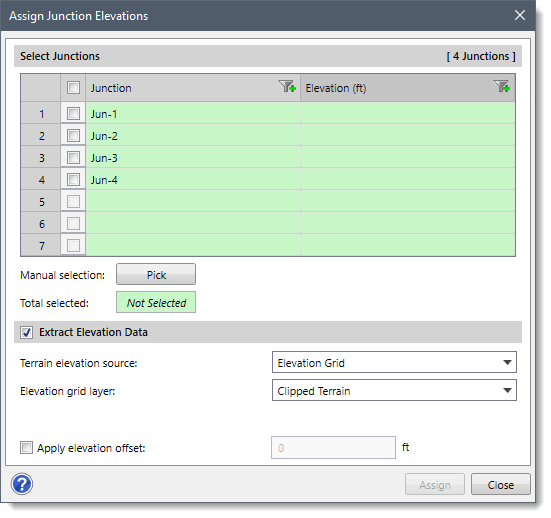
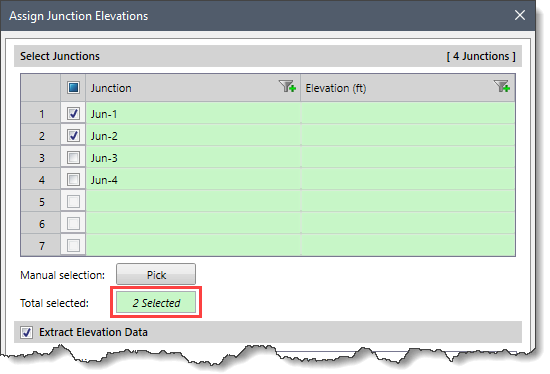
Follow the steps below to use the Assign Junction Elevations command:
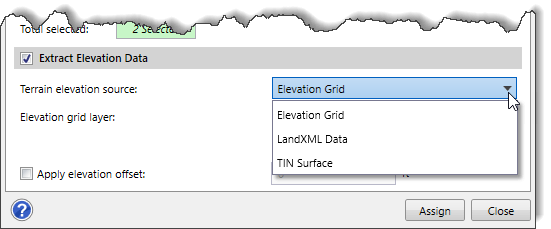 Note that if LandXML Data or TIN Surface is selected as the surface type, different options will be provided to specify additional elevation data information. In addition, if the selected terrain elevation source (e.g., LandXML Data) is not available in the model, the [Assign] button will get disabled (i.e., grayed out) as shown below.
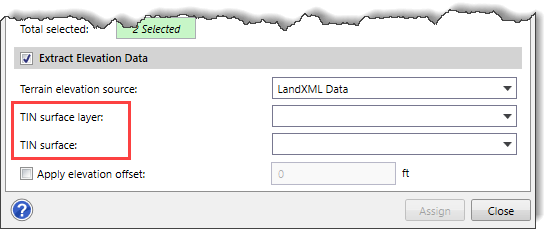

![[Assign] button](/wp-content/uploads/sites/25/2023/03/Assign-Elevations-Imge-7.png)
Similarly, the user can also assign elevations to the selected diversion(s), source(s), and sink(s) using the Assign Diversion Elevations command, Assign Source Elevations command, and Assign Sink Elevations command.
The Assign Diversion Elevations command is used to assign elevations to the selected diversion structure(s). This command uses the elevation terrain surface to compute the elevation of an individual diversion(s) with respect to the terrain surface present in the model.
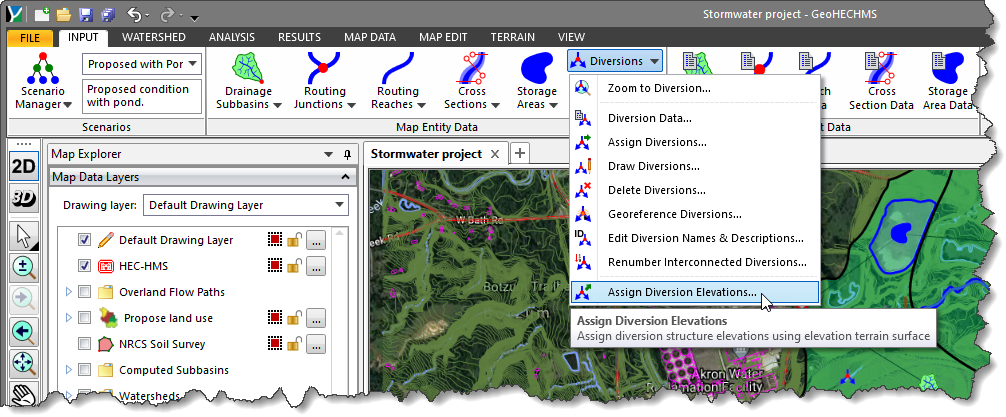
Follow the steps below to use the Assign Diversion Elevations command:
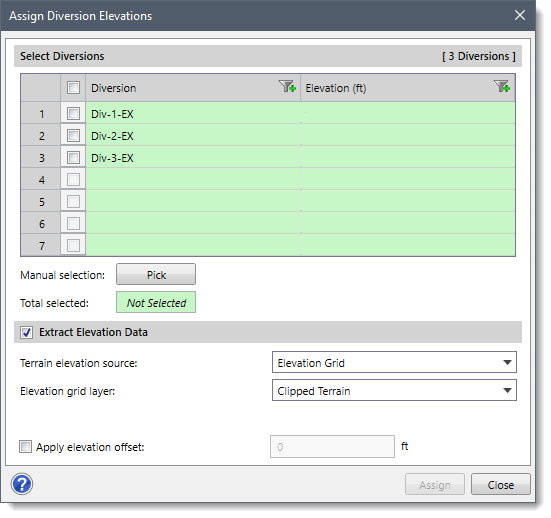
The Select Diversions section lists the available diversion structure(s) in the project. Select the desired diversion structure(s) either by checking the adjacent checkbox entry with each diversion structure or manually from the Map View using the [Pick] button. Once finished, the number of selected diversion structure(s) will be displayed in the Total selected read-only field.
The Extract Elevation Data section allows the user to extract the elevation profile from the selected elevation data source. By default, this section is enabled. If disabled, the options contained within this section will be unavailable (i.e., grayed out).
After defining all the options, click the [Assign] button, and the software will compute and display the elevation for the selected diversion structure(s).
The Assign Source Elevations command is used to assign source elevations to the selected source(s). This command uses the elevation terrain surface to compute the elevation of an individual source(s) with respect to the terrain surface present in the model.
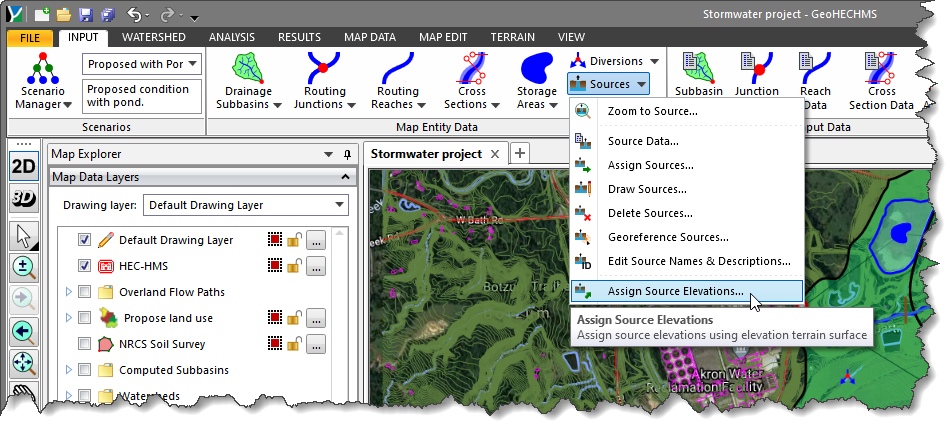
Follow the steps below to use the Assign Source Elevations command:

The Select Sources section lists the available source(s) in the project. Select the desired source(s) either by checking the adjacent checkbox entry with each source or manually from the Map View using the [Pick] button. Once finished, the number of selected diversion(s) will be displayed in the Total selected read-only field.
The Extract Elevation Data section allows the user to extract the elevation profile from the selected elevation data source. By default, this section is enabled. If disabled, the options contained within this section will be unavailable (i.e., grayed out).
After defining all the options, click the [Assign] button, and the software will compute and display the elevation for the selected source(s).
The Assign Sink Elevations command is used to assign sink elevations to the selected sink(s). This command uses the elevation terrain surface to compute the elevation of an individual sink(s) with respect to the terrain surface present in the model.
Follow the steps below to use the Assign Sink Elevations command:
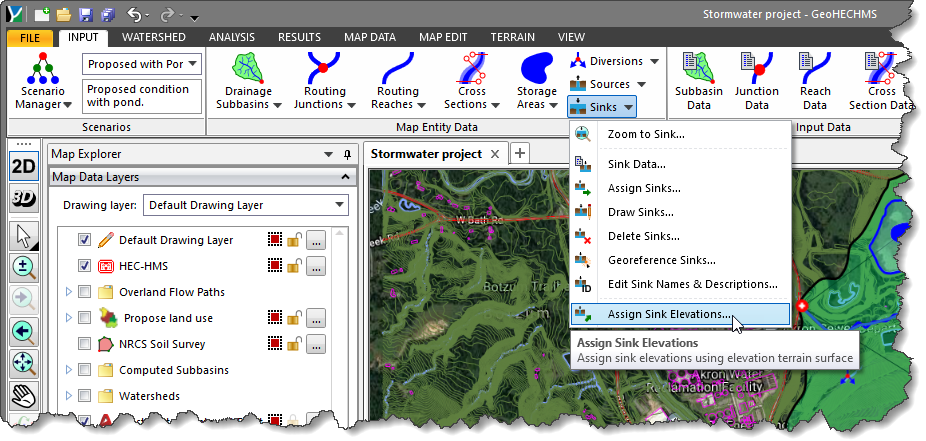
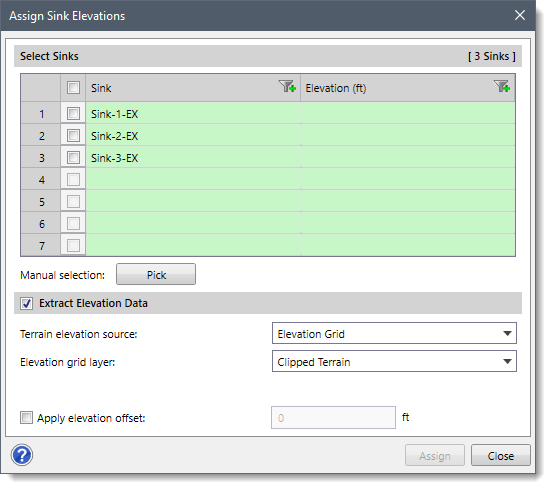
The Select Sinks section lists the available sink(s) in the project. Select the desired sink(s) either by checking the adjacent checkbox entry with each sink or manually from the Map View using the [Pick] button. Once finished, the number of selected sink(s) will be displayed in the Total selected read-only field.
The Extract Elevation Data section allows the user to extract the elevation profile from the selected elevation data source. By default, this section is enabled. If disabled, the options contained within this section will be unavailable (i.e., grayed out).
After defining all the options, click the [Assign] button, and the software will compute and display the elevation for the selected sink(s).


CivilGEO G2 Reviews
4.8/5.0 Rating, Over 230 Reviews

GeoHECRAS is recognized as the top Civil Engineering Design Software with an average of 4.8 out of 5.0 rating from over 230 real user reviews on G2.


We use cookies to give you the best online experience. By agreeing you accept the use of cookies in accordance with our cookie policy.
When you visit any web site, it may store or retrieve information on your browser, mostly in the form of cookies. Control your personal Cookie Services here.


